Tag Archives: leaky gut

Can You Hear Me Now?

Your body knows best.  Are you listening?

Many of us have bodies that are screaming at us; but we aren’t listening. Instead, we grab another Tylenol and hope for different results. Right?

How’s that working for you? Doing the same things and hoping for different result.

Come on, folks!

Case in point is my Great Oatmeal Experiment.
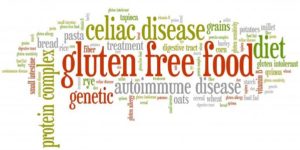
For many years, I have followed the anti-inflammatory style of eating as described in my book, Toolkit for Wellness. The part I was particularly careful about was no gluten-containing grains; no wheat, barley, or rye grains. But other grains such as corn, rice, oats, and others could be problematic because of their lectin and phytate components.

Lectins can mess with the hormone that tells us we are full and satisfied. Phytates can make the minerals we eat bio-unavailable for proper absorption and use by our body.

Each of us has different levels of tolerance.  We won’t know what our tolerance levels are unless we LISTEN.

Listen to what?

Our body talking to us! Do we feel energized? How are those muscles and joints feeling? Headaches again? Unhappy belly? More bloating, gas, constipation, or diarrhea?

Once your body is “cleansed” for a while by removing inflammatory foods, reintroducing potential offenders has to be handled very carefully.

Just like introducing one new food at a time, not unlike that of a baby learning to eat foods, we have to be careful to reintroduce only one new previously eliminated food at a time, to identify something that is going to cause a bad reaction.

I have corn-based food every once in a while. When corn-on-the-cob “comes in” during the summer, I do indulge. Corn tortillas for tacos? Sure.

Still steering away from gluten.

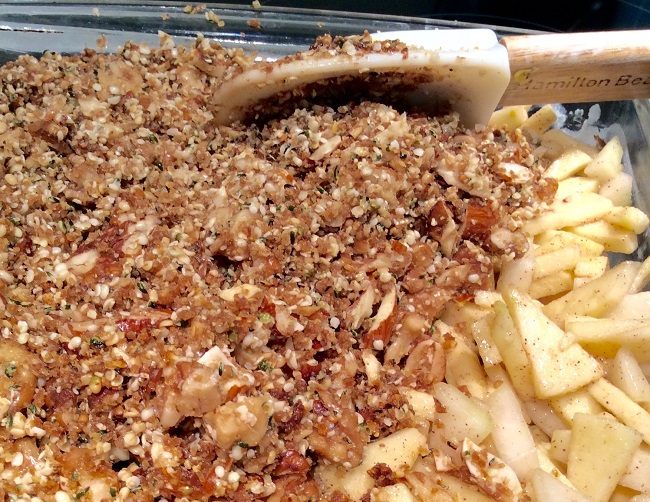
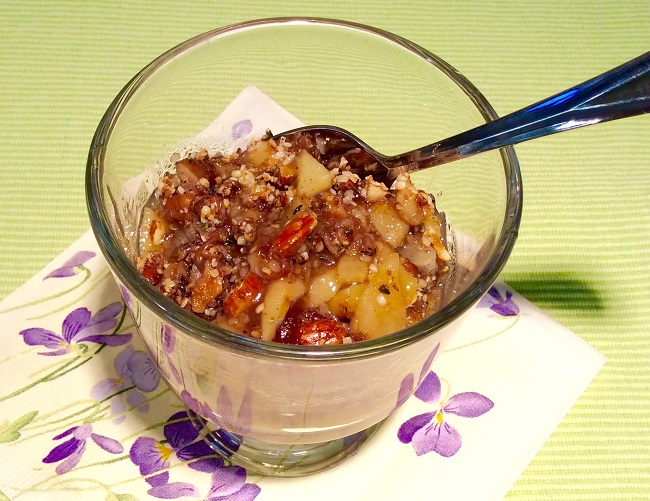
Enter “Gluten Free Oatmeal.”

I needed to shake up my husband’s breakfast menu a bit; provide more fiber – you know – good for you oatmeal?

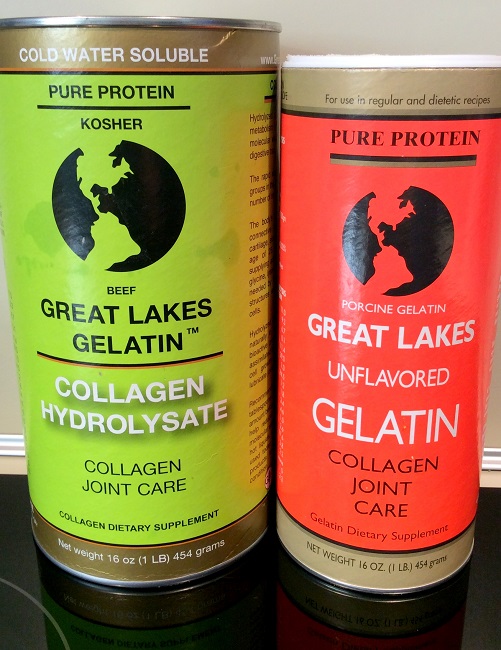
I even posted on Foodtalk4you’s Facebook feed about how I had ramped up oatmeal’s “goodness” factor by adding chia seeds and coconut oil. I created another oatmeal recipe by adding collagen hydrolysate and coconut oil. Ramped-up protein and brain healthy fat! What could be better?

I was pleased as punch in making double recipe “vats” of this so I could easily nuke a bowl of goodness for EACH of us in the morning.

Or so I thought.

There are so many factors affecting how we feel. Sometimes it’s hard to tease out the one offending element.

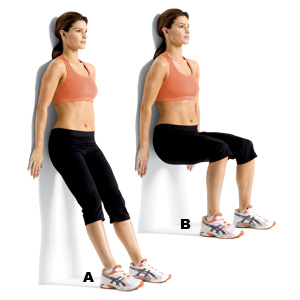
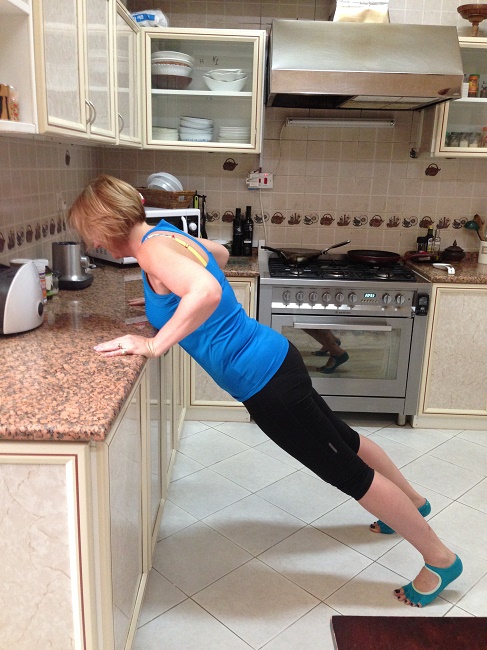
I was still sitting way too much at home while I spent time in my husband’s room (he is confined to a hospital bed at home). On top of that, I am currently writing another book, “Caregiver’s Handbook for Caring for the Bedridden,” which requires more sitting at the computer. Efforts to go to the gym once or twice a week are being met, along with home stretches to break up sitting sessions, and almost daily planks.

But something was WRONG.

Everything from my waist down hurt. Heels first. Then hips. Then legs. Is it possible to get that old so fast? Is this my life forever?

Didn’t seem natural. Certainly, I am living under unusual and stressful circumstances – but, I was falling apart. Grabbing two Ibuprofen, for heaven’s sakes.

We are “Designed for Health”. That’s my mantra. Geez! That’s the name of the classes I teach!

“Can you hear me, now?”

Could it be my “super-healthy-ramped-up-gluten-free-oatmeal?

Only one way to find out.

Stop the oatmeal.

Well, I did.

After just seven days with no more oatmeal, I can get up and start walking with feet and hips that are not screaming.

I listened, and I did something about it.

Yes, I miss my hot, steaming bowl of healthy comfort food, but I LOVE not hurting.

Goodbye oatmeal. Hello happy body!

It’s a choice.

Are you listening? Your body will love you for it.

In health-

Deidre


Watermelon-Mint Summer Salad!

Espousing coping skills, and actually using them, are two different things. As my beloved continues to slumber more than 15 hours a day now, it would be easy for me to just ‘spin in place’ as I watch his winding down. The three rounds of planks that energized me on Tuesday, are just not motivating me today. My yoga mat is not calling to me.

Today’s coping skill is in shifting focus away from me and onto sharing something good with YOU my dear readers!

I have clipped out and saved so many nifty-sounding recipes for salad dressings; and yet have used virtually none of them. If you are like me, then I even hesitate to share a recipe. Rather, I am sharing a concept instead.

Necessity being the mother of invention, an idea came to mind this week that answered several needs:

  • Something to moisturize some dry leftover baked chicken that was destined to be chopped up into a salad.
  • Something that would use at least a part of my over-abundant supply of mint. Note to self: plant less mint and more basil.
  • Something that would ‘smile’ at me from the salad bowl and lift my spirits.
  • Something that would use up this watermelon that I am the only one eating now.

Voila!

Watermelon Mint Salad Dressing

Remember, this is a concept, not a ¼-teaspoon-at-a-time recipe!

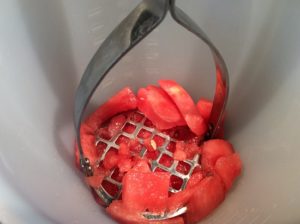
The first step is to smash-up some watermelon.

For my solo serving, I used half of an inch-slice of watermelon taken from one of those mini bowling ball-sized melons. An old fashioned potato masher does the job and leaves some small chunks.

Add some chopped up fresh mint leaves. I generally use the leaves from a 12-inch stem.

Salt

Pepper

Splash of EVOO (Extra Virgin Olive Oil)

Splash of white wine vinegar

That’s it! Stir and pour over your salad!

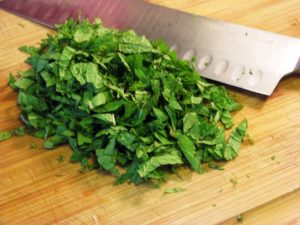
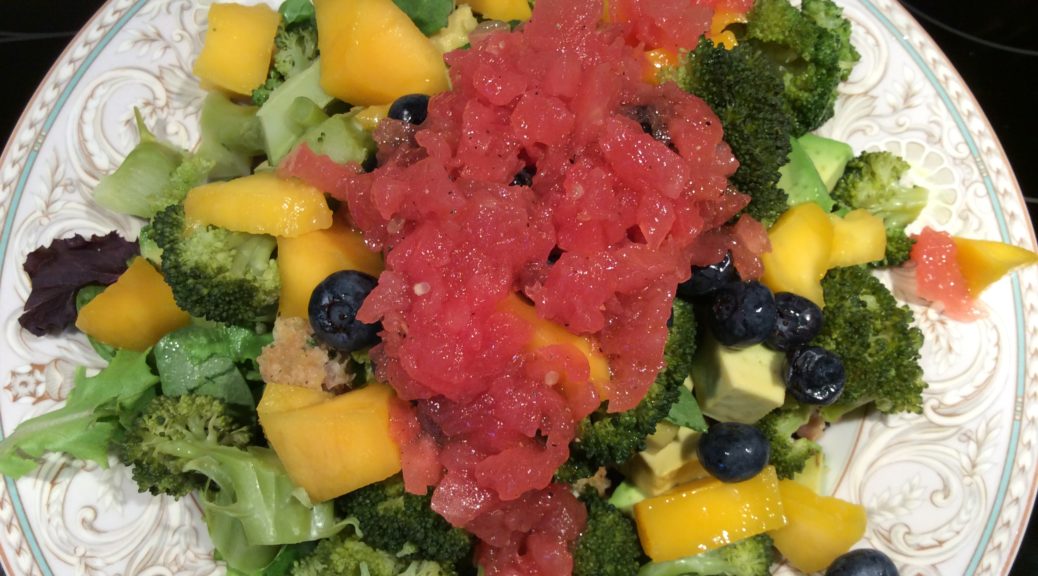
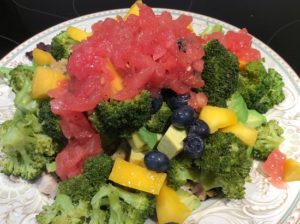
Having made this three times this week, my salad contents have varied with the addition of leftover sautéed okra, avocado, mango, blueberries, steamed broccoli, and of course that chicken.

Salads are a wonderful way to keep soaking up all of that fresh summertime vegetable goodness. Cooking pretty much for one now, I tend to cook more than I need for one meal.

Just convert most leftovers to salads in the summers!

This Watermelon-Mint Summer Salad Recipe concept has revitalized my flagging spirits and has given me fun nutritional meals.

We’ll be needing this added aspect of cooling, as yet another heat wave is in progress!

Thanks for reading-

Deidre


It’s Celiac Awareness Month – Let’s Talk About Your Guts

It’s Celiac Awareness Month.

Have you been asking yourself questions like these:

  • Is this gluten stuff all a hoax?
  • Is it just a “trendy diagnosis” – as our daughter’s pediatrician once offered?
  • What’s at stake if we don’t, at least, investigate the possibilities?
  • Is going gluten-free worth the effort?
  • Do you have to get tested?
  • What if your test is negative for Celiac Disease but you are still symptomatic?

I have, once again, dove into some of the latest news on Celiac Disease, (CD), and all things gluten for this post. Let me tell you, it was hard to tear myself away from the research, as one article linked to another and another.

While one person out of a hundred is diagnosed worldwide with CD, that number is expected to double every fifteen years. Why? Many people are currently undiagnosed, and the causative factors of pro-inflammatory diets are spreading.

Starting my fact-finding internet tour at Celiac.org, I found that, in fact, a Colorado study found a 3% incidence rate of Celiac Disease for youngsters by the age of 15! Yikes!

In case you are not up-to-speed with the term Celiac Disease, let me recap. CD is a genetic autoimmune disorder in which consumption of gluten (found in wheat, barley, and rye grains) results in damage to the small intestine, causing a host of symptoms (See lists below).

So, who should be tested for CD?

It was recommended that anyone suffering from an unexplained, stubborn illness for several months should be tested for CD.

HOWEVER – there are also two more categories of sensitivity:

NCGS– Non-Celiac Gluten Sensitivity- whereby a person is not severely reacting to the gluten found in wheat, barley, and rye grains, but are reacting on some level, which can be problematic.

NCWS- Non-Celiac Wheat Sensitivity- whereby a person is reactive only to wheat.

How do you know if you might be reactive to gluten on any level? Check out this abbreviated list of possible signs and symptoms. I’ve seen lists that link scores and scores of common conditions to some level of gluten sensitivity because the resulting inflammatory response to each person is unique. This could be you:

Signs and Symptoms for Adults:

  • Unexplained iron-deficiency anemia
  • Fatigue
  • Bone and joint pain
  • Arthritic conditions
  • Osteoporosis
  • Liver and biliary tract disorders
  • Depression
  • Anxiety
  • Seizures
  • Migraines
  • Foggy brain
  • Dermatitis herpetiforme (itchy skin rash)
  • Infertility
  • Missed periods
  • Canker sores
  • Signs and Symptoms for Children:
  • Abdominal bloating and pain
  • Chronic diarrhea
  • Vomiting
  • Constipation
  • Pale, foul smelling fatty stools
  • Weight loss
  • Fatigue
  • Irritability and behavioral issues
  • Delayed growth
  • Delayed puberty
  • Dental enamel defects
  • Short stature
  • Failure to thrive
  • Attention Deficit Hyperactivity Disorder

Check? Check? Check?

Let’s talk about infertility, Polycystic Ovarian Syndrome, (PCOS), and gluten. There’s a lot. Google those three terms together and you’ll be busy reading for a long time.

According to Nutritionist and Health Educator Melissa Diane Smith, “85% of her PCOS clients test positive for sensitivity to gluten. When these women remove gluten from their diets, they often see a marked improvement in their PCOS symptoms.”

The May/June edition of the Journal of Reproductive Health in 2011 reported a prevalence of silent CD (undiagnosed CD) in female infertility in Middle East and European studies.

An American study of 188 infertile women showed a 5.9% increase of silent undiagnosed CD. Many who also suffered from IBS (Irritable Bowel Syndrome) were found to have CD.

Dr. David Perlmutter, MD, writes that 5-10% of women 18-44 years of age have PCOS. He tracks links in his patients with PCOS to high blood sugar and diabetes. He cites the role of insulin is intrinsically linked to PCOS.

How do you know if you have PCOS?

Some of the symptoms of PCOS are:

  • Irregular or no periods
  • Heavy periods
  • Acne
  • Increased facial hair
  • Ovarian cysts
  • Metabolic issues related to insulin sensitivity and blood sugar regulation

Have some ideas popped off the page for you?

Are you seeing yourself or someone you know?

Increasingly, we have to be our own patient advocates. Doctors moan when their “internet-trained” patients slam them with all sorts of “internet-acquired diagnoses,” but you can ask to have certain issues looked at … especially if they have not been able to find any help for you.

You can ask for blood tests associated with Celiac Disease, or any level of gluten or wheat sensitivity. If blood tests for CD are positive, a biopsy of the small intestine may be offered to check for damage. You have to be actively consuming gluten for the blood tests to be valid.

Don’t want blood tests? Simply eliminate all forms of gluten for three months. Celiac.org has sample 7-day gluten free meal plans for adults and for kids on their website that will give you a start. My book, Toolkit for Wellness, will show you ways to not only avoid gluten, but other foods as well that create an inflammatory response within our bodies.

Gluten sensitivities are serious things that contribute to very real illness, disease, and general un-wellness. One doesn’t simply “cut back” on gluten. It’s all or none. A single gluten infraction can sometimes take those who are extremely sensitive as long as three months to get over!

This is serious business.

It’s our choice.

In good health –

Deidre


Hmmm! Scones That Love You Back

Chef vs. Baker

Which are you? Pinch of “this,” and a dash of “that”?  Or, “one level cup of sifted flour”? Chef or baker?

It’s just that I’m more of the chef type; but sharing recipes requires more refined explanations of measurements for predictable outcomes. Thus, MANY batches of scones have been prepared, photographed, recorded … and eaten. *burp*

Pardon me!

I know, I know. Tough job but somebody has to do it.

Foodtalk4you has been ever so quiet lately due to my caregiving ministrations, which are always a priority. Thank you for your patience and understanding concerning my unpredictability. My dear husband continues to be under hospice care and my care at home. Still confined to bed, his uncomplaining and appreciative attitude is sprinkled with humor, insight, and love.

The kitchen “laboratory” however, has seen a lot of activity as I tried to optimize my favorite scone recipe to give you consistently wonderful results.

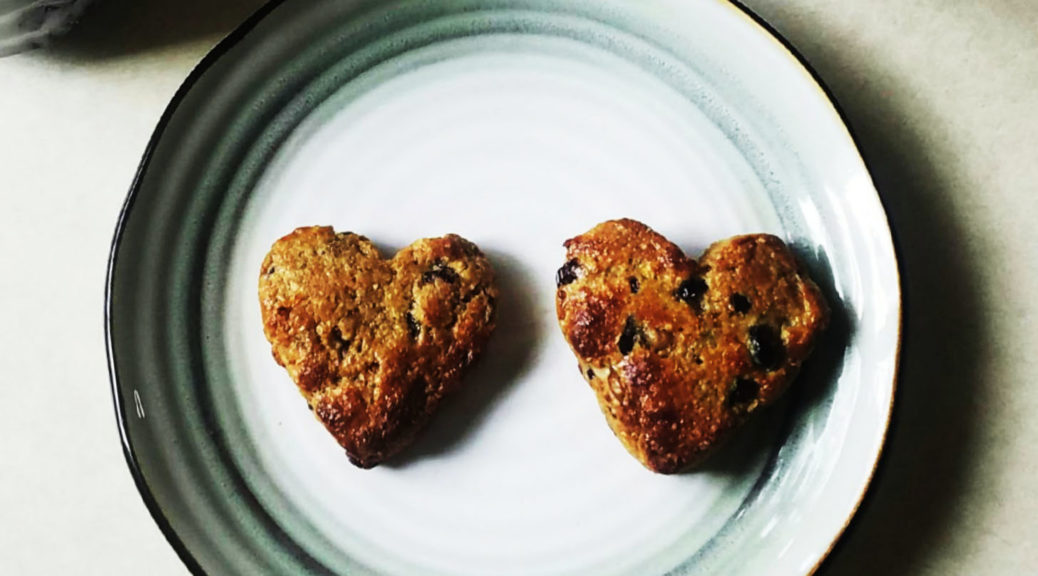
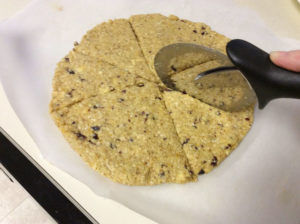
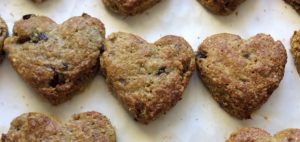
With a Valentine’s Day post in mind, I kept making these little darlings in heart shapes. Needless to say, I missed that deadline; but a heart-shaped scone is so precious any time of year! A good way to say, “I love you!” don’t you think?

You can make the typical scone shape which is achieved by rolling the dough into a circle, slicing into wedges, separating the wedges, and baking.

The heart-shaped scones require a bit more effort using a cookie cutter; and can be problematic if the walnuts are not finely chopped. A secret method? I ended up actually filling the heart shape, pressing the dough down to reach the edges and height of the cookie cutter exactly. Consistent results and portion control.

Long time readers of Foodtalk4you and Toolkit for Wellness know that, just because a recipe is gluten-free, does not make it healthy. I am always trying to pack in extra good-for-you ingredients and to dial back added sugars. This recipe for scones that love you back does that with:

Quinoa Flakes- a rare source of plant-based essential amino acids. Those are the amino acids our body does not make by itself, thus we must get them from our diet. Amino acids are the “building blocks” of proteins. Just 1/3 cup of quinoa flakes contains 4 grams of protein.

Collagen Hydrolysate – unlike gelatin, this powder does not congeal. It is a power house of satisfying, satiating, healing protein that is packed with 20 amino acids! Two rounded tablespoons of collagen hydrolysate yields 11 grams of protein.

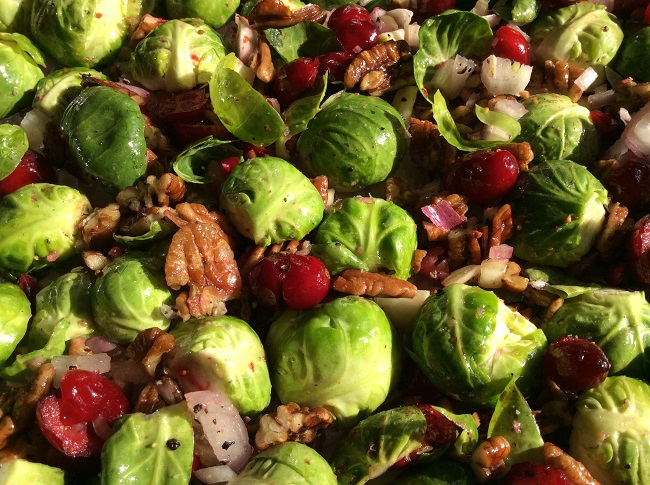
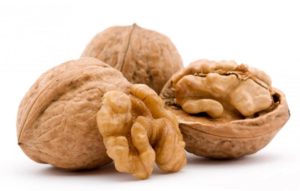
Walnuts- a great source of plant-based Omega-3 fatty acids, antioxidants, and an amino acid l-arginine which is heart healthy. Walnuts have been shown to help with brain function, suppression of tumor growth, weight control through increased satiety, as well as improved blood sugar levels. Experts say that even a quarter of a cup of walnuts a day can positively impact our health.

Regarding all nuts: Please buy raw, organic nuts for maximum 
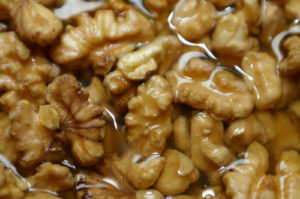
benefit. But wait! You’re not done! Remember to soak your raw walnuts overnight in salted water; rinse and drain; then dehydrate at a low temperature (110-118 degrees) until light and crispy. The results are crunchy and much more digestible. As always, refer to your copy of Toolkit for Wellness for the full scoop on the whys and wherefores of sprouting all of your nuts to ease their digestion.

Another plus to this recipe is it requires a minimal number preparation tools and little clean up. Check out my new cool stirring device.

Instead of using a floured surface to roll out the dough, I just use the same parchment paper sheet used for the baking. Easy-peasy clean up!

So, that’s the back ground material on “Scones that love you back.” Let’s get to the recipe.

SCONES THAT LOVE YOU BACK

Dry Ingredients

  • 1 cup Quinoa Flakes (I use Ancient Harvest brand)
  • 1 cup almond flour
  • ¼ cup collagen hydrolysate (I use Great Lakes brand)
  • 3 Tablespoons coconut sugar
  • 2 teaspoons baking powder
  • 1 teaspoon baking soda
  • 1 teaspoon xanthan gum
  • ½ teaspoon salt
  • Rind of one orange, zested
  • ¼ dried cranberries, chopped
  • ¾ cup walnuts, chopped
  • Have on stand-by: 1 or more Tablespoons of ground flax seed if dough is too wet

Wet Ingredients

  • ¼ cup butter, melted (I use Kerrygold brand – from “happy” grass fed Irish cows)
  • 1/3 cup orange juice with pulp
  • 1 egg, beaten

Glaze

  • 1 egg, beaten

Optional

  • Turbinado Raw Cane Sugar Crystals to sprinkle on top before baking

Method

Put all dry ingredients into a mixing bowl and stir well to combine.

Add wet ingredients, stirring well to combine and create dough. If the dough seems too wet or sticky to a light touch of finger tips, add one tablespoon of ground flax, stirring well. Flax absorbs moisture. Wait a minute to test dough again before adding another tablespoon of it, if needed.
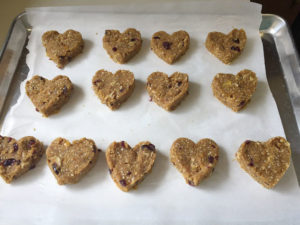
Turn dough out onto a parchment paper covered baking sheet. Form into a smooth ball and press down to a circle with ½ inch thickness.

For traditional scones: cut into 8 wedges using a knife or pizza cutter; separate slices on baking sheet; follow baking instructions.

For heart-shaped scones: use a cookie cutter to press out shapes, reforming scrap dough into another ½ thick layer until all dough is used. OR use my secret method of filling each heart-shaped scone, hand pressing the dough into the shape, and level with the top of the cutter. Separate scones on baking sheet.

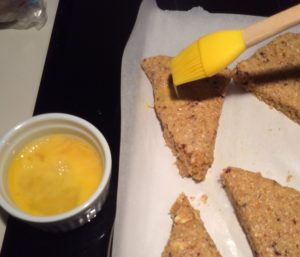
Apply egg wash using a brush.

Sprinkle just a dab of Turbinado crystals on top of each scone, if desired. It looks nice but is not intended to become a sugar-bomb coating.

Bake at 350 degrees for 15-20 minutes. My heart-shaped 2 ½ inch across scones take 18 minutes. Scones should be golden brown when done.

Cool on wire rack.

Enjoy these healthy scones for a delightful start to your day.

Subscribe to our blog by clicking the subscribe button on the left side your screen. We promise that your information will never be shared and I absolutely will NOT bug you with daily requests or ‘hot deals.’ You will simply get one notification by email that links you to a new post when it comes out.

For a printable recipe, CLICK HERE: SCONES-THAT-LOVE-YOU-BACK-PRINTABLE

In health-

Deidre


Power Up and Prepare For Liftoff!!

Each day, it seems, we are in the cockpit of life preparing for a takeoff. What switches are we supposed to flip in order to “power up” our engines? There are so many on our dashboard. Can we realistically try to flip them all every day; or are there a critical few that will give us the lift and acceleration we need for a good takeoff and flight?

After spending hours every week researching, reading, and experimenting with activities that will, “do our bodies good,” one meal, one breath, one movement at a time, I’m left thinking “Ack!” How can I share idea after idea with my readers without over-whelming them, too?

There must be 50 “good” things I should be doing all of the time just to start my day off right.

Wait a minute.

The goal is not to feel like a failed, spineless weakling if we are not doing these things. The idea is to lead a natural, comfortable life that uses nature’s laws to optimize health – and – to accept the responsibility of intention.

Do we intend to “do our body good”?

We want – no, demand – that our bodies keep us going every day; but are we helping our bodies to do that?

Are we a friend or a foe to our body?

I sure want my body at its best 100% of the time so I strive to “power up” each day as best I can to give my mind-body-spirit the “food” it needs to do that.

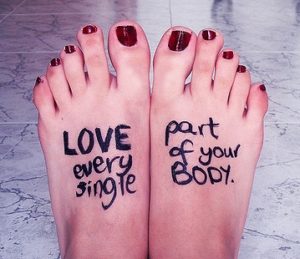
Granted, smooth uninterrupted daily routines probably exist only in fairy tales.

Nearing the 10th month of being a full-time caregiver for my sweet husband who is confined to bed, I know full well how easily “me time” can disappear. Keeping myself on an even keel, though, is vital to being at my best for him – and me. Those who juggle kids, family, and jobs find free morning time at a premium as well. I hear you.

So, what are the essential few things I do to power up? You’ve seen many of these before. I will explain any new ideas in more detail.

POWERING UP

  1. ALWAYS: Super Brain Yoga and Power Poses as explained in the last post HERE. If there is time for only one thing, this is it. In addition to reinforcing inner balance and focus, I am filled with thoughts of gratitude – thanks for being equipped for strength and victory. I am open to receive that strength; and feel confident to move forward, no matter what may come my way.

Gratitude increases levels of that “feel good” hormone serotonin; who couldn’t use more of that each day? Be ‘intentional’  by boosting yours.

  1. ALMOST DAILY: Drinking lemon juice in warm water while 
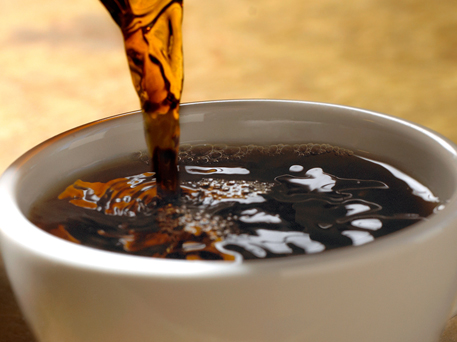
coffee is brewing. Did your grandmother do this? Mine did. She swore by it and lived to be over 100. Today, we know that a simple drink of lemon juice in warm water is a marvelous detoxifier, helps regulate bowels, and actually helps de-acidify the digestive system! Start by using the juice of ½ of a lemon in one cup of warm water. Swish your mouth out to eliminate remaining juice from reacting with tooth enamel.

Once lemon juice is inside your stomach, the digestive process will cause an alkaline environment that will improve reflux. I refuse to resort to over-the-counter or prescription meds for reflux. Lemon juice in warm water absolutely nails this problem for me. If I skip a couple of days, the reflux returns.

  1. ALWAYS when I am home: Power Coffee often with 2 Breakfast Cookies- plain coffee just doesn’t do it for me anymore. Learn about this amazing drink HERE and these guiltless cookies HERE. After this dynamic duo, I am good for hours!
  1. ALMOST DAILY: Oil pulling for at least 5 minutes, preferably up to 20. Now, this is a new topic for Foodtalk4you, but oil pulling is thousands of years old and is considered medicinal for the whole body.

One of the best articles I have read about the benefits and history of oil pulling is found HERE.  In case you do not have the time, let me summarize this article and why I do this almost every day.

  1. Oil pulling is simply swishing coconut, olive, or sesame oil in the mouth for the purpose of cleansing the oral cavity, refreshing breath, and removing toxins.
  1. It’s easy to work into my daily schedule. Oil pulling can be done first thing during the morning shower; or I often do it after breakfast (Power Coffee and Breakfast Cookies!) while I tidy up the kitchen. This is habit stacking at its best! No extra time needed!
  1. Oil pulling is a safe and effective way to detoxify not just the 
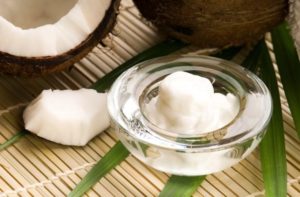
mouth but the entire body because toxins are absorbed into the oil which is spit out. Coconut oil is highly absorbent so its benefits of moisturizing skin, raising healthy blood cholesterol, increasing energy, and killing toxins are easily accessed by oil pulling.
  1. I see and feel a difference right away. Imagine: fresh mouth with NO CHEMICALS!

How to do oil pulling:

  1. Use 1-2 tablespoons of coconut oil. Just scoop it up with a spoon and put into your mouth and chew on it until it is a swish-able liquid. Hint: You may want to start with a smaller amount just to help yourself warm up to the experience.
  1. Swish the oil around your mouth, flushing the fluid around and between teeth. Take your time and do not be so vigorous that you tire your muscles!
  1. Swish for 5-20 minutes; the longer, the better. Remember, the oil is picking up toxins and needs adequate time to really ‘clean house.’
  1. Spit out the oil which has become white (full of yuck) into the trash. Do NOT spit the toxin-laden coconut oil down the drain as it will clog plumbing. Coconut oil is solid at cooler temperatures, remember.
  1. That’s it! Enjoy natural cleanness and fresh breath. A gentle tooth brushing, and you’re good to go!
  1. TWICE A WEEK: Weight training exercises. I am still a proponent of home-based exercises, (See the exercise chapter in my book Toolkit for Wellness), but I just was longing for the targeted benefits of weight training machines. Give me a good thirty-minute circuit workout, and my body just smiles a great big, “Thank you!”

Since joining the local $10-a-month Planet Fitness Gym, I have maintained my twice weekly visits (or more) since January 1st! By not doing the sweat-inducing cardio machines, I can easily dip in to the gym between errands, change back into my street clothes and carry on.

Twice recently, I did do some cardio, and may keep that as my last stop, one extra day a week, but my main focus right now is the no-sweat 30 minute weight training circuit. Now you can work up a sweat, but my weights are high enough that 10 reps will do just fine, thank you!

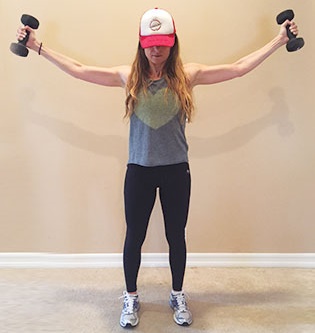
So if you are not getting up an hour early each day for the ‘perfect start,’ then just know there are a few things that you can do in your normal, real-life routine that will definitely perk up your body and your day.

A routine that is not forced.

A natural routine.

Something intentional to “do your mind-spirit-body good!”

In health-

Deidre

Big Game Pizza – “Hut! Hut! Hike!”

New Bern, NC — Even non-sports fans such as moi, (myself), can enjoy a big game, final tournament, or the Olympics, (YES!), every once in a while. What’s a big game without big game food? Can the words, ‘big game food,’ even be uttered by someone trying to, “Do my body good,” at every turn?

If you have the idea converting everything containing flour, (pretzels, pizza, or brownies), over to a gluten-free substitute will somehow magically make you healthy, think again. Going gluten-free can be one of the biggest rabbit holes we can fall in.

Wonder why that weight is not melting away after holding back on gluten? It’s probably because you have a cupboard full of gluten-free equivalents. In other words, you are still eating pretzels, pizza, brownies, pasta, cakes, and cookies. That’s a lot of carbs, folks.

But what about Friday night pizza? What about the Super Bowl? Isn’t there a better way to do pizza besides just getting the local carry-out’s gluten-free version?

YES!

You’re going to laugh when I share with you how I found this.

Shopping at the grocery store always seems to be done in such a rush, you know? I was hastily scanning the gluten-free frozen foods section when I spied what I thought was frozen thin crusts for pizza. A quick read of the very short ingredient list passed the test for no chemicals or high fructose corn syrup. Okay. Grab it. Done. Out of the store.

Upon closer inspection, these were VERY THIN crust objects. Heck. They were tortillas! Geez.

But maybe I was onto something…

Only 24 grams of carbs and no sugar? Eureka! It’s always been the sauce and toppings that called me like sirens from the deep anyway, so here we go!

Prep the baking pan by smearing some olive oil on where the tortillas go and let them thaw.

Pre-cook any desired meats. I sautéed free-range ground beef and turkey, and some ground Italian sausage. My one nod to chemicals was in the few slices of turkey pepperoni.

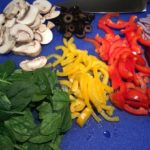
Prep an assortment of vegetables. I used purple onion, red and yellow bell peppers, mushrooms, baby spinach leaves, and olives. Use your imagination- colors and textures abound!

Then assemble. If not using homemade pizza sauce, I always turn to Classico Brand Traditional Pizza Sauce because it has just a few ingredients and no HFCS.

Sauce. Meat – if using. Onions. Mushrooms. Olives. Spinach. Cheese.

Bake in a 400 degree preheated oven for 10-15 minutes or until the cheese bubbles.

Yum!

This pizza may need to be eaten mostly with a fork, but the experience and taste was definitely a pizza experience.

Maybe this paper thin crust pizza will become your go-to big game or Friday night treat. It has for me!

Now, who is playing in the Super Bowl? Ah, yes! Justin Hardy, who graduated from West Craven High School, where I taught!

Falcons Justin Hardy


GO JUSTIN!!

I will be rooting for the Falcons!

Just sayin’.

Deidre


“Super Brain Yoga” is a No Brainer!

Did you say “Super Brain”? Get a Super Brain? Count me in!

But Super Brain Yoga sounds like a whole routine… Maybe there’s a DVD or a book to buy? No. And no.

In fact, what I’m going to share with you for FREE could have cost you as much as $352.07!

Granted, there are less expensive versions, but it all boils down to doing one simple thing. That information might justify $2.07. The rest of it must be $350.00 worth of history.

The effect of doing this one thing, however, may be priceless!

In fact, doing “Super Brain Yoga” melds right into a power pose that I wrote about last year for the online magazine, Excellence; so, for me, the benefits are doubled.

We’ll look at Super Brain Yoga first; then I’ll explain how this can morph into a power pose that will also set you up for a day of balance, positive self-worth, and forward motion.

Super Brain Yoga and Power Pose may just be the trick for your whole family to do together each morning.

If I were still teaching in the classroom, this is how we would start each day! There are TV news articles about teachers doing Super Brain Yoga daily with amazing results for better attention and performance by the students. Can I get an “Amen!”?

As always, we need to turn to a bit of anatomy and physiology first to help understand why this Super Brain Yoga technique has value. Our brain is divided into two hemispheres. The right brain controls the left side of the body, and the left brain controls the right side of the body. There are also acupressure points in the ear lobe that when gently squeezed activate brain pathways.

In everything we do, signals are being ‘pinged’ back and forth between the two hemispheres through special nerve pathways between them. This simple technique helps balance the two hemispheres’ activities (as revealed through before and after MRIs), and strengthens mental focus and clarity.

In a moment, you can see our FIRST EVER video which will demonstrate the simple steps for Super Brain Yoga as follows

    • Stand with feet shoulder width apart facing north if you are a ‘senior’; or facing east for ‘non-seniors.’
    • Keep the tip of your tongue touching the roof of your mouth.
    • Gently squeeze your RIGHT ear lobe using the thumb and index finger of your LEFT hand. The index finger goes on back of the ear lobe and the thumb goes on the front.
    • Gently squeeze your LEFT ear lobe using the thumb and index finger of your RIGHT hand. The index finger goes on the back of the ear lobe and the thumb goes on the front.
    • Gradually bend your knees into a squat position while inhaling.
    • Gradually straighten your knees to come out of the squat while exhaling.
    • Repeat at least 14 more times

That’s it!

Practicing this simple move each day helps to connect and re-energize the nerve pathways between the two brain hemispheres. Don’t worry about doing deep squats, this is more of a brain thing than a physical exercise. Increasing the number of repetitions over time until you are doing this a few minutes, will definitely, “Do your body good!”

What have I noticed doing this each day?

I feel more physically balanced. I am measuring this by the ease in which I stand on one foot while brushing my teeth. As mentioned in the exercise chapter of my book, Toolkit for Wellness, I do a painless “habit-stacking” balance exercise each time I brush my teeth. I divide the 2 minutes of tooth brushing into two 1-minute segments in which I alternate between standing/balancing on one foot, then the other. Since doing Super Brain Yoga, my “wobble-factor” has vanished.


Am I ready to sign up for that genius quiz show? Not yet, but when combined with the Power Poses I will describe next, AND my daily cup of Power Coffee, (see last week’s post), I am most definitely:


  • balanced in mind, body, and spirit
  • ready to meet the day with confidence and resolve, and
  • feel energized yet calm

So, what are Power Poses? Let me explain by introducing you to Amy Cuddy.

Amy Cuddy’s book, Presence, puts science into what I’ve known all along.  While we have long been stoked in the ‘mind-over-matter’ dogma – which is certainly well-documented – and I know can work miracles. Cuddy’s proven approach, however, shows that the body can LEAD the mind.

Her tale of personal transformation is also beautifully told in her *TED talk, which is the 2nd most viewed TED talk and can be found here:  TED

In her book, Cuddy shares studies she and others have conducted, as she gently peels away each application of how we view ourselves, present ourselves, and how others perceive us as a result of our ‘presence.’

As she methodically builds her case for the ‘body over mind’ path to a stronger, more positive personal presence, she shares the famous quote of William James (1842-1910), who was a renowned psychologist at Harvard: “I don’t sing because I am happy. I am happy because I sing.”

The very act of smiling and standing with confidence redirects the body’s chemistry to a positive flow. Why not boost your confidence by holding a power pose for 2 minutes at the start of the day?

The studies Cuddy shares demonstrate that body positions of strength (i.e. Wonder Woman, Superman) – that have a more expansive sitting position with arms away from the body and legs not intertwined – result not only in a mindset of strength, but actually produce positive brain chemistry changes.

The ‘victory stance’ is genetically ingrained. People around the world, across cultures, and even the blind, who have never seen a ‘victory stance’ naturally, assume that pose after great personal accomplishments. Feet apart, chin slightly elevated, hands thrown up in the air outstretched.

It’s universal!

Looking forward to a challenging day? In private, assume your Victory Stance and hold it for two minutes. Claiming that victory – in advance – helps assure a more positive approach on your part and sets up those you are working with or influencing to see you as a person of strength.

Victory Stance pre-event poses do not supplant being prepared for a speech, proposal, or interview. Being well-prepared for life’s challenges is still a must. In fact, as you prepare to put yourself in front of others, precede even your preparations with a Victory Stance each time you practice.

Do note, however, that showing up in front of others looking like Superman may be off putting. This do in private before the presentation.

No speeches to give? We carry our ‘presence’ everywhere we go. It colors how we look at the day, and how the world views and receives us.

Practice unfolding those self-hugging arms, stooped shoulders, and minimalist postures trying to make yourself disappear. Practice in private to be ‘bigger’ to take more space. Hold that chin up, open up your chest, and thrust your arms skyward.

Create a more positive and balanced YOU before you start the day by doing Super Brain Yoga followed by a couple of Victory Power Poses!

Let’s roll the video, Sheree! Watch below as I demonstrate the proper procedure for Super Brain Yoga and for the natural unfolding to two Victory Power Poses:

Wow! That was our FIRST online video for foodtalk4you! Hurray!

A big part of personal satisfaction is stretching and growing beyond our comfort zones.

Online video?  Check!

All of my mornings start this way. Super Brain Yoga, Power Poses, and Power Coffee!

2017 is looking up!

Please leave a comment about how foodtalk4you is helping you or if you have any questions. Share this article with a friend.

Subscribe to this blog so you won’t miss any posts; an email will alert you each time a new one is up. As always, we NEVER share your email address with anyone.


(*)  TED is a nonprofit devoted to “Ideas Worth Spreading.” It was conceived in 1984 as a conference devoted to bringing people together from the three worlds of Technology, Entertainment and Design.

In health,

Deidre


It’s Day One – Beautiful!

How many times have you had to start over? Losing weight? starting-overExercising every day? Writing that book? Learning how to play the guitar? Liberate yourself from the weight of backsliding or inaction by facing forward and declaring, “Today is a beautiful day to be ‘Day One’!”

That’s what I did recently.

Before the focus of our household became defined by my husband’s hospice care, I was already trying to lose those “last five pounds.” I had been actively engrossed in expanding my exercise repertoHospiceire to include pull-ups – sort of semi-pull-ups – real push-ups, and using a heavier kettlebell. Success was within my grasp! Just keep at it a little bit every day.

After the March 21st trip to the ER, everything changed. Survival mode ruled the day. Stress threatened to overwhelm. The coping techniques I wrote about in Toolkit for Wellness became my best friends.

Stress does a number on how our bodies function. Well, I knew that; but, wow! The pull for carbs – even gluten-free ones – is insidious. I felt I deserved the carb-y treats just for surviving the day.

A good day? Carbs to celebrate!

Exercise? Yeah, right.

WalkingGo for a walk? Can’t leave home without a sitter.

Planks? Push-ups? Have to be later, busy with my husband’s needs.

Gradually over the course of almost four months, I became out of shape and fifteen pounds over where I want to be.

But I am keeping my spirits buoyed by wonderful moments with my husband, the encouragement and frequent contacts with family, friends, helpers, and the wise use of free time at home to enjoy looking at the birds and squirrels, and by coloring.

I placed no pressure on myself for any additional requirements except to eat lots of the veggies I loved.girl-exercising

But it was time to take control.

I think you reach a point when you no longer want to be a ‘victim’ or just someone always in a reactionary mode. I want to call the shots.

So do it! Enter “Day One”!

CoffeeBack to exercises done during coffee brewing time. We drink the stuff every day. That time is already allotted. Piggy back habits by exercising during brew time.

I had to start slowly again. Backsliding does that. Who cares? Who’s looking? Only me. Start over. No big deal. That’s how it works – a little bit every day.

My full-body plank had shrunk to 20 seconds. Fine. Day One is 20 wall-squatseconds. Day Two is thirty seconds.

I find there are ample opportunities to do more movements in the kitchen – exercise central for me. Waiting for a pan to heat up? Squats right in front of the stove. Nuking something for a minute? Kitchen counter push-ups. Waiting to stir the veggies sautéing in the pan? Time for arm circles.

The following is a list of exercises I am currently doing during brew time and at other cooking times. These are fully explained in my book, Toolkit for Wellness, staplank-girlrting on page 237:

PLANKS- These are always first because they are the hardest. Full body plank followed by half-plank. My goal is to do a two-minute full body plank.

SQUATS- These are so easily done any time, especially while waiting for a pan to heat up.

STEPS IN PLACE- Starting with very high and slow steps gradually getting faster and shorter, then returning to high steps. This is my favorite for getting pumped up.push up

PUSH-UPS- These right now are done at the kitchen counter but will eventually follow planks.

KETTLEBELL LIFTS and SWINGS- Returning to my lower weight kettlebell, I do single arm lifts, double arm lifts, around-the-world swings, and standard kettlebell swing through.

BALLET POINTS- From a “first position stance,” I point my toe/leg to the front, side, and back, ten times each for both legs

FLY LIKE AN EAGLEarmsPalms up with arms to the side, lower outstretched arms 1/3rd of the way down to your leg and back up 8 times. Repeat 2/3rds of the way down 8 times. Repeat all the way down 8 times. Continue to do arm circles, palms up both forward and back 8 times. Continue with pumping arms back 8 times. Whew!

TODAY is a beautiful day to be “Day One”! What are YOU working on?

Deidre


Classical Gas Blues

Has gastric reflux set up house in you? This goes beyond the 7-Tips-to-Reduce-Belching-or-Burpingoccasional heartburn. This kind of reflux can help you identify the location of your esophagus…when you’d just as soon not know. Then there’s the stealth version, too. No uncomfortable sensations in the gullet, but unexplained hoarseness or inability to sing as smoothly as you usually do.

gastroesophageal_refluxThere are other symptoms as well, including: regurgitation of a bitter tasting and burning fluid into the throat, burping, and recurring hiccups, just to name a few. Reflux or GERD (gastro-esophageal reflux disease), as it is known, can tear up a perfectly good esophagus and ruin singing careers. There is also increased risk for esophageal cancer if left untreated over time.

While the reflux was just a nuisance thing when I bent over, (which is Learn-to-Sing-Nowa lot as a caregiver), then I started having trouble singing…Well, that was too much!

There is definitely a stress factor, as well. Truly, I can have just one negative thought and bring on the reflux. Who says the mind isn’t powerful?

So, one prong of my anti-reflux campaign is stress management. Affirmations. Check. Coloring. Check. More sunshine. Check – when the sun shines. More walking. Check. Talking with friends. Check. But, I was still clinging to what also needed to be addressed.

There, again, our health is our choice.

The turning point forhow-proton-pump-inhibitors-work me came with viewing NBC Nightly News the other night, as they featured a story about the bad side effects of many common drugs given to combat reflux. In addition to the already known side effects of proton pump inhibitors being increased risk of fractures and infection (due to the drug blocking mineral absorption), the folks at Johns Hopkins discovered there is also an increased risk for kidney disease.

A 20-50% increase risk for kidney disease, in fact!

One female patient was profiled having normal kidney function in March but only 30% function by August, while taking a proton pump inhibitor. She was instructed to stop taking the over the counter medication and her kidney function increased.

Yet, drug manufacturers claim that following the recommended dosage on the label is safe. Today we’re hearing that the top medications for treating heartburn/reflux also cdoctor-bannerauses dementia!

The story concluded with a doctor from Johns Hopkins saying reflux can totally be addressed by food. He said eliminating berries, chocolate, caffeine, and alcohol for 28 days will help heal the body. That was it. He was speaking to me. There was my choice for the second prong of my defense attack.

Was I going to choose health? Health without drugs?

Yes.

Caffeine consumption is going down – gradually – a cold turkey approach is not kind to the head. No more chocolate…Hey, Valentine’s Day is over! A choice is a choice. So long berries…See the recipe that follows using baked apples. No more alcohol…well, that SP_WINEisn’t hard, but my half glass of wine will just have to wait another day.

It’s day five as I write this and guess what? No reflux. Even with just half-caffeine coffee! Twenty-eight days total for healing.

Twenty-three more to go! When I get there, moderation will be my middle name.

So, with no more chocolate, what kind of treat can I devise? I return to an updated version of my Baked Fruit with Benefits. This may be the best baked apples I have ever created, and they are chock full of extra goodness (that’s the benefits part).

As a lead-up to the recipe, however, let me summarize a recent post on MarksDailyApple.com that reminded me of somcollagenething I needed to be doing: adding collagen to my diet where ever possible.

Here’s why. The amino acid glycine is the main amino acid in collagen. We make about 3 grams of this a day ourselves (so it’s considered non-essential) BUT we need a minimum of 10 grams a day – more if we are healing from injury or recovering from intense exercise. Thus, it could be categorized as a conditionally essential amino acid– meaning we need to supplement it in our diets.

pastured-cowThe big flap about not eating so much meat, apparently, can be erased by ramping up our intake of collagen – if the animal studies translate to human results. Meat-eating animals’ longevity was increased with the addition of glycine/collagen to their diets. He cited another study in which low levels of glycine predicted diabetes risk.

Glycine/collagen will also: improve quality of sleep, reduce the amount of muscle meat needed to be eaten to maintaisleepn muscle mass, is great for healthy joints, improve appearance and elasticity of skin , assist in healing of wounds, and is a key ingredient in cooking rich sauces.

Aside from eating bony cuts of meat: ribs, oxtails, necks, and the like, which all take extra time to slow cook, and from drinking collagen-rich bone broth, I add bone and body building collagen with the products pictured here.

IMG_1871The collagen hydrolysate on the left is not a thickener, and it can be stirred into liquids of any temperature. That’s the kind I used in the recipe below by mixing this collagen powder into the arrowroot/brown sugar mixture used to dust the apple bits before baking.

The powered gelatin on the right can be added to any hot liquid as a thickener. My no-bake Fruit with Benefits recipe in Toolkit for Wellness uses this to thicken the fruit juices as they cook in the pan. I add this to my home-cooked bone broths, as well. With this, you could make your own jello or fruit rolls ups!

Now to the recipe. You will notice that I crammed in every good thing I could find for this baked apple dish. Fresh fruit, gelatin, minimal sugar, and cinnamon topped with activated nuts, hemp, ground flax seed, minimal sugar, cinnamon, and coconut oil.

Baked Apples/Pears with Benefits

Preheat oven to 350 degrees; grease 8 x 8 inch glass dish with coconut oil

Prepare mixture used to “dust” the cut fruit. Any extra may be stored in air-tight container for next time. Quantities may vary as you may even need to mix up just a bit more if you run out.

Stir together:

¼ cup brown sugar

½ cup arrowroot

¼ cup collagen hydrolysateFullSizeRender(1)

1 tsp. cinnamon/apple pie spice, or to taste

Prepare fruit by peeling, coring, slicing apples and possibly pears.

Today I used:

3 Golden Delicious apples and
1 Anjou pear

Gradually add sliced fruit to bowl and sprinkle with dusting mixture, stirring to coat after each addition.

When all fruit is prepared, transfer into prepared glass dish.apples-in-dish

Topping:
Into large fry pan on medium heat put:

2 Tbs. coconut oil

1 cup chopped activated nuts (I used the last of my walnuts, some pecans, and almonds)

¼ cup brown sugar

1/3 cup ground flax seedsFullSizeRender(2)

1/3 cup hemp seeds

2-3 tsp. cinnamon/apple pie spice

Pinch of salt, if desired

Stir to combine, and continue to stir occasionally as the topping heats and browns – about five minutes. Do not let this burn. When browned and warm, spread on top of apple mixture.

Cover dish with foil and bake foFullSizeRender(4)r 40-45 minutes until bubbly. Serve warm or at room temperature.

This is delish! You can easily change-up the fruits; a handful of blueberries is awesome. A scoop of this is a great way to flavor my nightly chia seeds stirred into hot water, too! Keeps the insides humming!

Here’s to no more reflux and happy faces enjoying a healthy dessert!

Deidre

Food That Says, “I Love You”

Times have changed in some respects; and in others, not at all. I IMG_1791remember reading aloud the Laura Ingalls Wilder series of Little House on the Prairie to our children every night as we all learned of Laura and Almanzo’s adventures. Today, our grandchildren listen to The Adventures of Harry Potter. I don’t know what the children eat at the Hogwarts School, but Almanzo’s favorite repast had to include fried apples ‘n’ onions.

Being more of a city girl transplanted to small town North Carolina, this notion of apples ‘n’ onions did not beckon to my palate or culinary desires. Too bad.

First of all, they aren’t fried- as in deep fried. I don’t deep fry anything. In country jarIMG_1790gon, frying apples implies sauteing and browning until tender and even possibly cooked down to a mush.

But apples ‘n’ onions? Really?

Well, this is the month of love. If you fix apples ‘n’ onions you will LOVE the flavor of this impossibly delicious side dish that happily occupies its spot in the perfect plate fruit/fat component and part of the veggie area. Pair this side with any kind of dark-green lea fy veggie, along with lean chicken or pork protein, and you will have a meal that says, “I love you”!

With just three ingredients, this is a cinch to do, and quantities vary according to what’s on hand.

Apples ‘n’ Onions Recipe

Apples – 3-4 apples

Onion (I used a Vidalia onion) – one medium-sized onion

Coconut oil- 1-2 Tbs. of coconut oil to coat the pan wellIMG_1779

Method:

In order to activate the beneficial anti-inflammatory enzyme, allicin, slice up the onion first so it has 10 minutes to rest before heating.
Peel, slice, and core the apples into desired shape. I use an old-fashioned hand crank apple peeler/slicer/corer and just cut the slices into sI love foodmaller pieces.

Melt 1-2 Tbs. coconut oil into large sauté pan on medium heat and add prepared apple and onion slices. You may want to add a pinch of salt.

Stir occasionally and gently cook until browned and tender. Serve warm.

Recipe number two involves an oft’ forgotten little green nugget that used to be buried under an avalanche of melted Velveeta. Boy, once you stop eating “food-like substances,” as found in dairy “products” such as Velveeta, the very thought of returning to them sends chills down the spine. Ick!

IMG_1853-1
Raw Brussels sprouts and cranberries

So, what to do with that bag of Brussels sprouts? This latest recipe supersedes any I have tried thus far! My book contains a great pan-cooked version of Brussels sprouts that’s really fine and has similar ingredients, but these roasted sprouts are the BEST!

Roasted Brussels Sprouts with Fresh Cranberries and Pecans

1 pound fresh Brussels sprouts, trimmed and cut in half8

1 cup activated pecans*, coarsely chopped

½ cup fresh or frozen cranberries, (not dried and sweetened), coarsely chopped

1 Tbs. olive oil

1 Tbs. finely chopped shallots

3 garlic cloves, finely chopped

IMG_1862-1
Roasting!

1 tsp. Kosher or sea salt

½ tsp. ground pepper

Optional: 2 Tbs. balsamic vinegar to toss in after roasting

Method:

Heat oven to 400 degrees. Using a large baking pan, toss all ingredients together except balsamic vinegar. When all ingredients are mixed and coated with oil, arrange Brussels sprouts so the cut side faces down in baking dish. Roast for 25 minutes or untiToolkitforWellnessBolder(1)l golden brown on the edges.

Optional: Toss with balsamic vinegar when roasting is complete. These smelled so good and tasted so good right out of the oven; I forgot the vinegar and never missed it.

*Activated Pecans: Soak raw pecans in salted water 24 hours; drain; dehydrate 105 degrees in dehydrator 14 hours or bake at lowest oven temperature until crispy. This process is explained in my book, Toolkit for Wellness, and makes the nuts way more digestible and yummy.

So, there youKeep-Calm-Valentines have it! Healthy anti-inflammatory eating at its very best. Some old-school goodness from the past and some modern farm-to-table style of today!

Say, “I love you” with some good eatin’!

Happy Valentine’s Day!

-Deidre