In the southeast of the United States we are still sweating. The sun still streams down on us as we harvest the last of the dwindling tomatoes from the garden. We keep an eye on each wave in the Atlantic for tropical development into a hurricane.
But the air is different. For several weeks – maybe the whole month of August – there’s been a subtle difference in the weight, feel, and smell of the air.
Fall is for connoisseurs of subtlety. Similar changes happen in reverse with the arrival of spring, but fall is like a fine wine, with gentle undertones and aftertastes. If you are more of a red or white wine drinker, spring is probably best appreciated by your senses.
Give me fall!
Dogwood trees are still green but with a gentle blush creeping into their leaves. Flower petals silently float off their perches after a puff of breeze or slight touch; while hummingbirds stay at their feeders longer, grazing on every garden bloom for that last sip of nectar in preparation for their long flights south. Glorious butterflies dancing from flower-to-flower – each one adding its own color show.
Granted, the joy of gradually turning in to the home and hearth will look and feel different this year. We have spent most of 2020 already gathered in. We long to take flight.
The seasons and the school calendar say otherwise.
There’s abundant time to enjoy fall activities outdoors. I am looking forward to a socially distanced lawn concert at a friend’s house this coming weekend. Cooler temps – when they arrive – will mean I can safely have friends over for dining alfresco, playing lawn darts, or corn hole. Maybe, I’ll finally get a gas fire pit so we can extend outdoor social distancing into cooler weather.
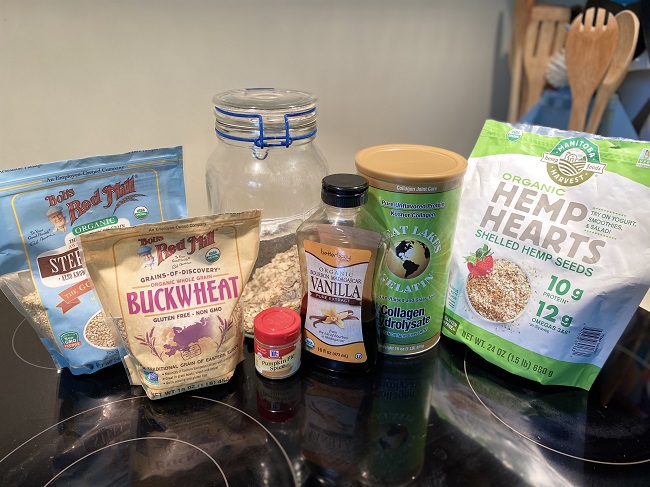
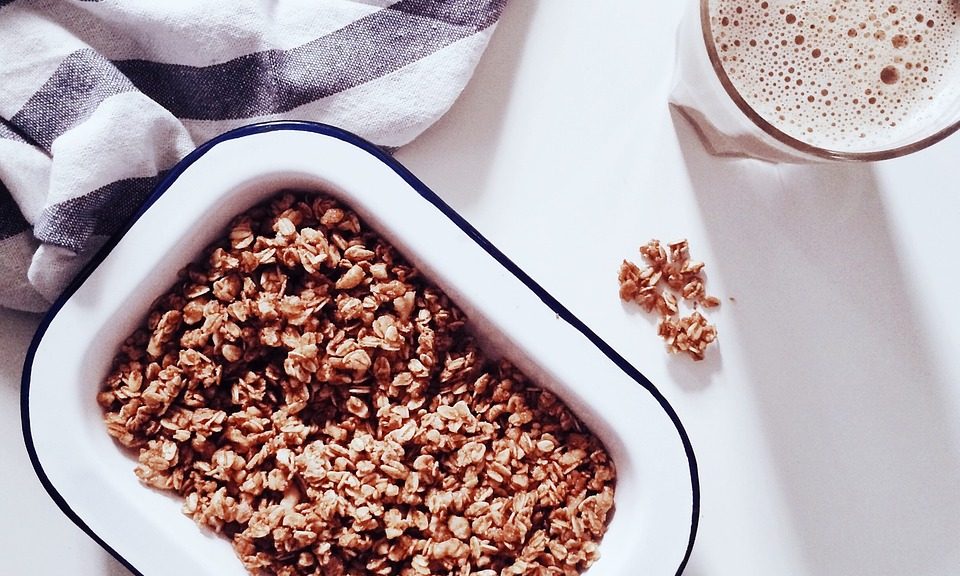
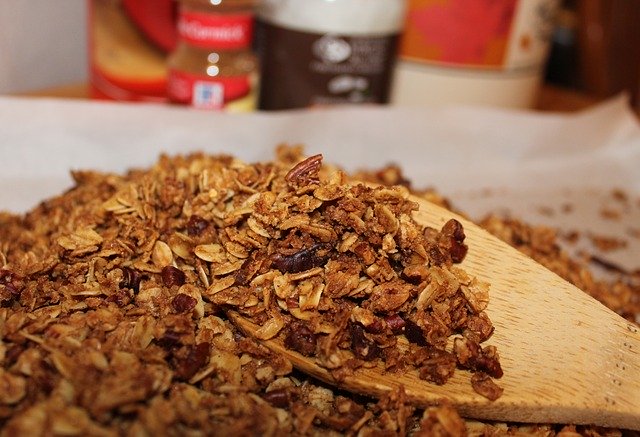
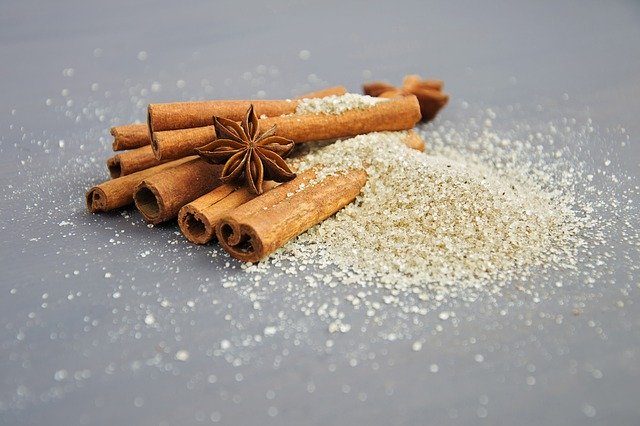
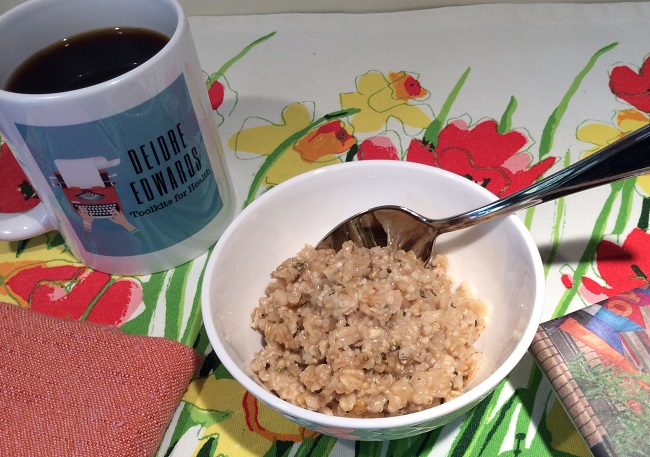
I’ve already added pumpkin spice to my oatmeal/steel-cut oats/buckwheat/hemp/collagen morning cereal. That recipe I shared earlier this year is now new and improved, so here it is:
Super-Powered Oatmeal 3.0
Serves 2-3 (So hearty, you don’t need as much!)
Ingredients
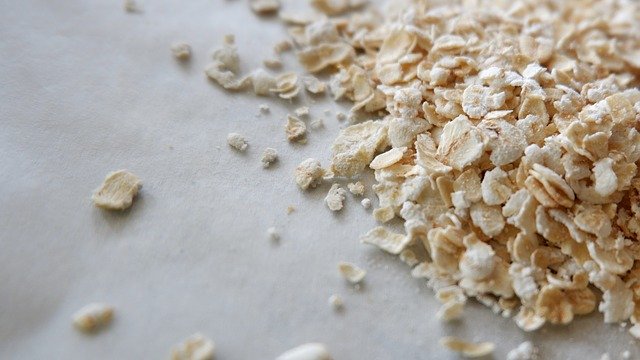
1/3 cup gluten-free oatmeal
1/3 cup gluten-free steel cut oats
1/3 cup gluten-free buckwheat
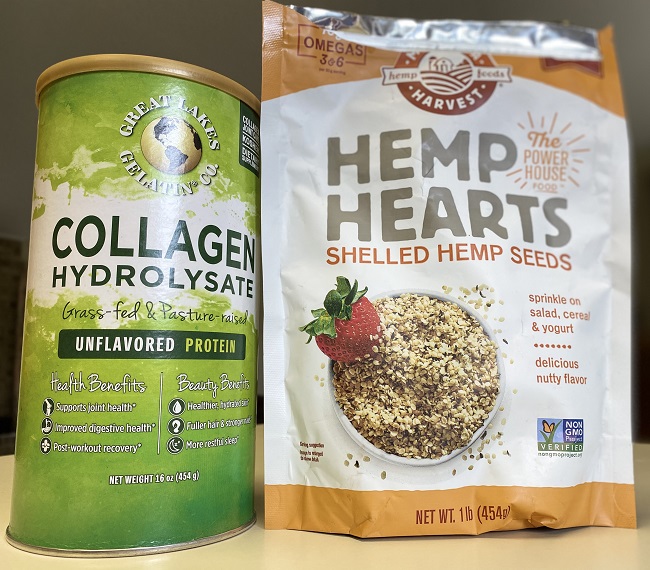
¼ cup hempseed hearts
3 Tbs collagen hydrolysates
Pinch of salt
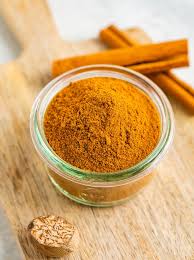
Cinnamon /OR/ Pumpkin Pie Spice
Vanilla
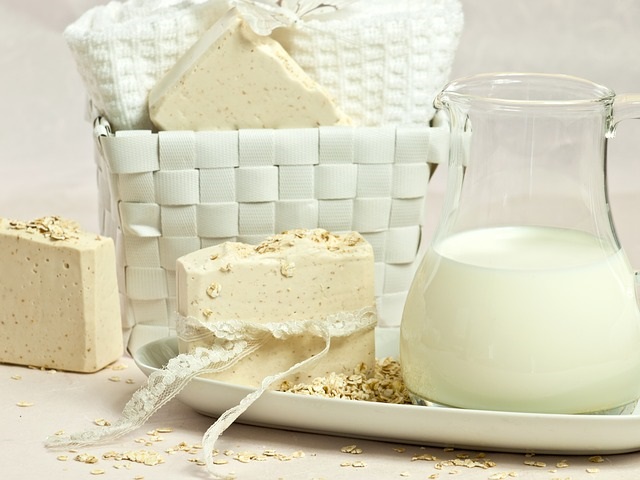
1 ½ – 2 cups almond milk or water
Method
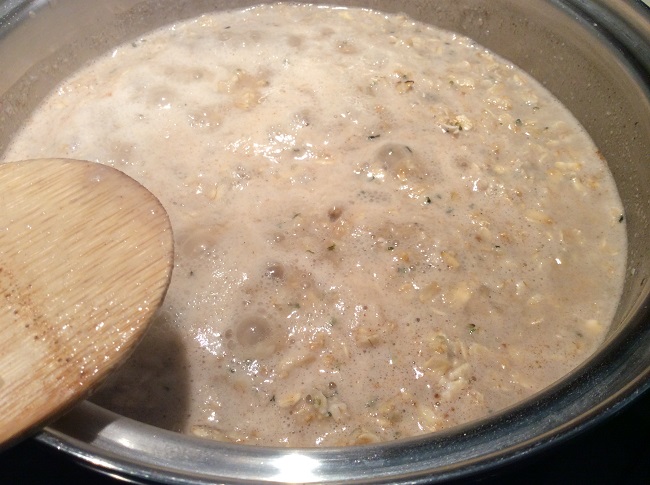
Throw it all in a small pan; cook on medium until bubbly; reduce heat and continue to cook, stirring occasionally.
Purists may want to add the vanilla at the end.
Variations on milk depend upon how creamy you want your cereal, and on how much steel cut oats you use – geez, who really measures this stuff? I put all the oats and buckwheat into a one cup measure and eyeball equality.
If you have not whipped that sweet tooth into shape, a modicum, (small quantity), of brown sugar may be added to the pot – really, with all the vanilla and cinnamon, that’s it.
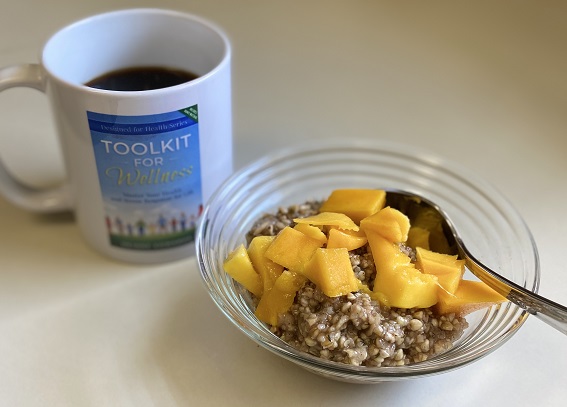
Find a small, cute bowl to add to the experience. You just don’t need a huge serving. Top with a bit of fresh fruit, if desired. I used mango in mine.
Enjoy the process of these shifting seasons. Lean more into the changes and the subtleties therein rather than mourn the loss of an ‘endless summer’ mirage.
In health,
Deidre
Sign up through our subscribe form (on the left-hand side) to always get the latest from foodtalk4you and like us on Facebook!
In the American South, there are moments in midsummer of sublime satisfaction when the tomatoes start to ripen and are plucked off the vine. The moment comes only after impatient sweet anticipation while crafting the perfect ‘mater* sandwich.
To the rest of the English-speaking world, it is a tomato* sandwich.
Humble and pure, two slices of mass-produced factory bread smeared with the region’s favorite mayonnaise, a slice or two of vine-ripened tomato, with some salt and pepper, create summertime heaven on earth for many.
My favorite gluten-free bread does not live up to this image – not even a little bit. Plus, I can hardly remember when I have eaten two slices of bread at once anyway. Just too many carbs.
The mid-night visitation of belly angst from glutenous bread is just not worth it.
What to do?
There are rare times throughout the years – certainly not in 2020 – when eating at a fine restaurant with its own version of predinner slices of sourdough bread, I would indulge just so I could dip my fragrant bread into some of their fine olive oil with pesto.
I suffered no ill effects from such gluten indiscretions. Hmmm. Did the glorious atmosphere of the festive meal simply sweep side-effects away? Or was there a reason here?
Sourdough bread is a fermented food! Duh. If I made the stuff, I might have put two-and-two together.
It is fermented from lactobacillus cultures (great for the gut probiotics); but unfortunately, the cultures do not survive the baking process. However, a helpful byproduct is created: lactic acid.
Turns out, lactic acid lowers the naturally occurring phytates in grain-based bread. I refer you to page 105 of my first book, Toolkit for Wellness, where you will learn, phytates block our ability to absorb minerals from the food we eat.
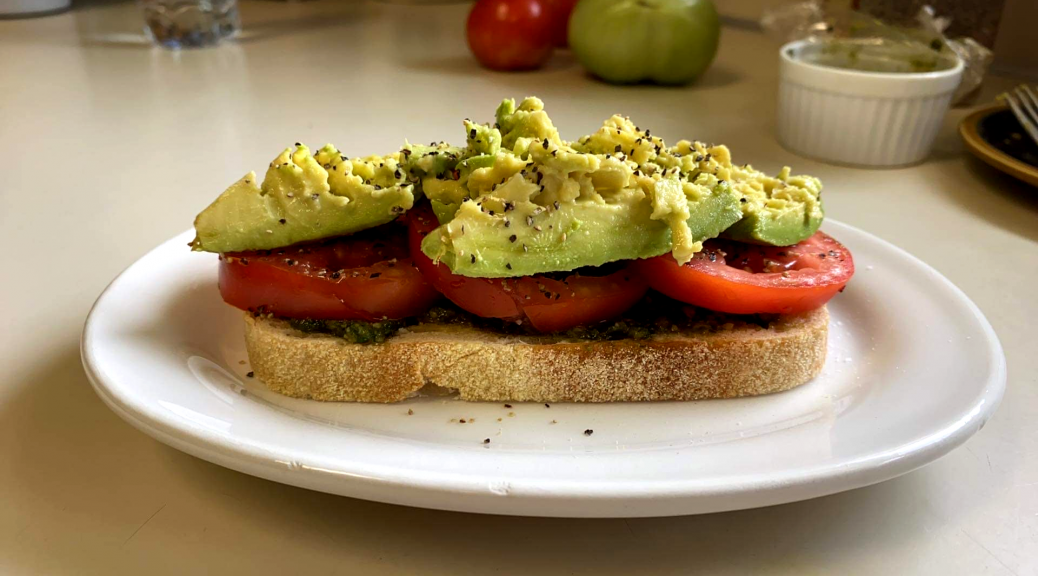
So, for my tomato open-faced sandwich, the occasional bread indiscretion is well-tolerated on sourdough bread.
Let me show you what I did:
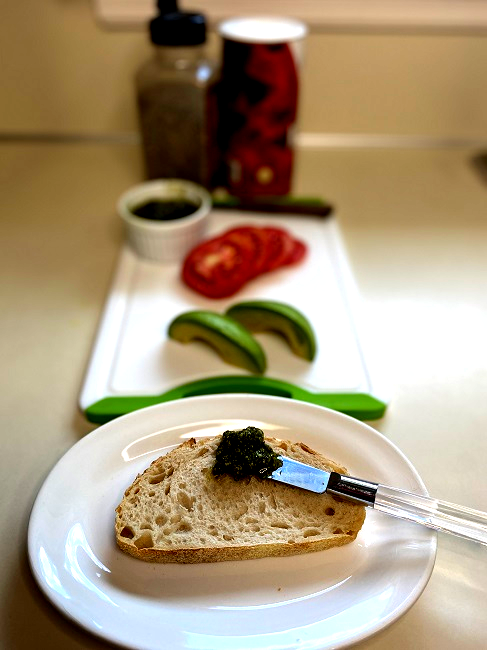
Spread some fresh homemade basil pesto onto a slice of lightly toasted sourdough bread.
Here’s the recipe for the pesto:
Sweet Basil Pesto
Pesto can be a great spread on crackers or bread, or as a great way to zip up the flavor factor in veggies, seafood, or an omelet!
Ingredients
2 cups/500 ml fresh sweet basil leaves, packed
½ cup/125 ml Parmesan, Parmesan-Reggiano, or Romano cheese, grated
½ cup/125 ml extra virgin olive oil
1/3 cup/75 ml walnuts or pine nuts (activate nuts first!)
3 cloves garlic
Salt and fresh ground pepper to taste (I use not quite a ½ tsp/2.5 ml of Kosher Salt and about the same of black pepper)
Method
Using a food processor, pulse the nuts a few times. Add the garlic cloves and pulse some more. Add the basil and pulse until in fine pieces. With the food processor fully on, slowly pour the olive oil through the shoot. Stop to scrape the sides down and add the grated cheese. Pulse until combined. Add salt and pepper and pulse a few more times.
The pesto is ready to use. I store mine in small jars and float additional olive oil on top as a seal.
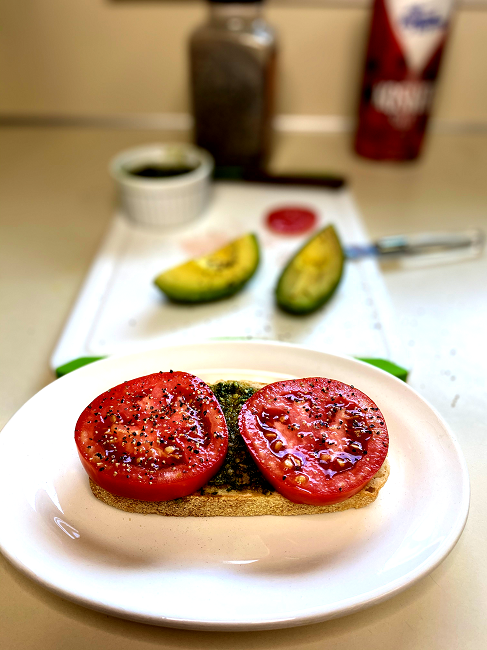
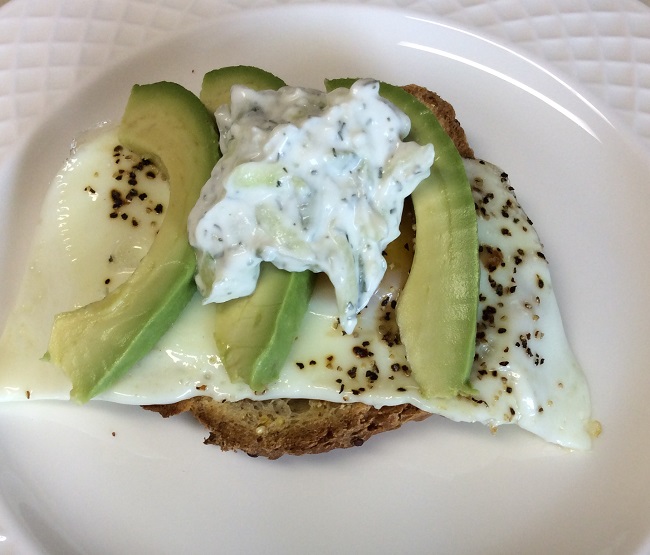
Back to the sandwich: Add slices of fresh-out-of-the-garden tomato with salt and pepper to taste.
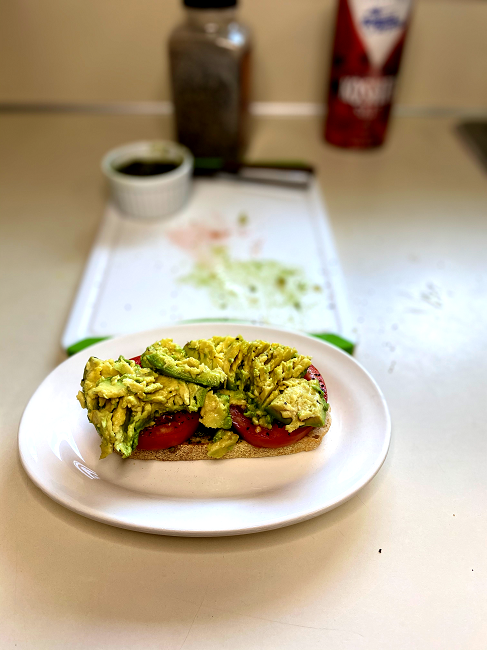
Add slightly mashed avocado on top with salt and pepper to taste. Smashing the avocado first helps it stay in place better.
There you are.
Less bread overall, but great bread that is even good -ish for you.
Pesto for fragrant greenness with
Health-promoting garlic
Olive oil for healthy monounsaturated fat and,
If using walnuts, omega-3s fatty acids as another anti-inflammatory
Fresh tomato – high in heart healthy lycopene as well as vitamin C, K, potassium, and folate
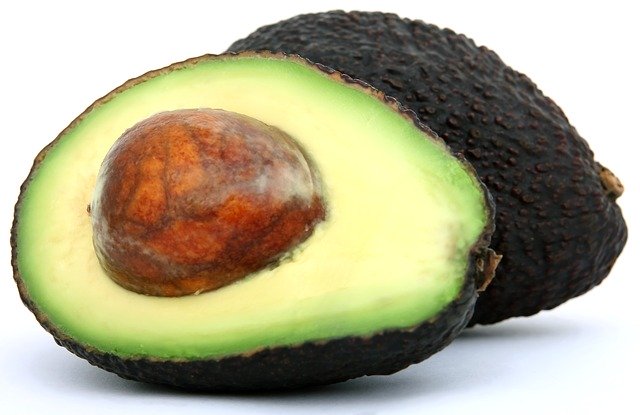
The addition of avocado finishes turning this tomato sandwich into a powerhouse meal. As a transplant from California, this girl loves avocados!
High in vitamins and minerals (remember, the sourdough bread helps our bodies absorb those minerals), avocados are naturally low in sugar and high in fiber. In fact, a great snack is one half of an avocado – keeps you full thanks to the fiber. Avocados do have fat, but it’s monounsaturated fat which is a good fat that helps lower cholesterol – when eaten in moderation.
There you have it! Something delicious and satisfying, with a yummy factor through the roof.
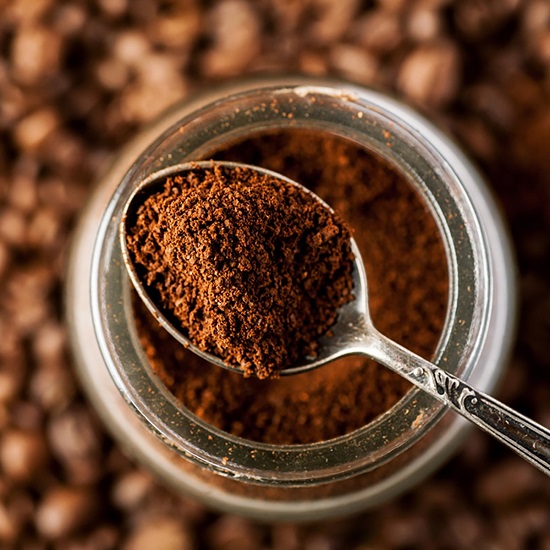
Many of our readers are in countries using metric math. My apologies for having ignored your needs before. An author friend of mine living in Greece was inquiring about measurements for last week’s post about iced coffee.
My coffee scoops are 12 grams each; so, a totally of 24 g coffee is used. The filtered water would be 750 ml.
If you are enjoying foodtalk4you posts, please share with a friend, and remember to like us on Facebook. Please click on the subscribe button so you won’t miss any posts from foodtalk4you.
As people endeavor to write something nice on Facebook – read, not controversial – there are many posts going around giving others a chuckle or a moment of amazement. The “how old were you when you found out …” posts are giving many of us a smile. Very often, the answer is, “just now,” and we scratch our heads wondering how we managed to miss that.
I was ten years old when I found out there was a “p” in raspberry. That revelation totally rocked my boat. Welcome to the wonderous world of silent letters, Deidre.
There was a contestant on a recent baking show challenge who pronounced the “p” in raspberry. He managed to say “raspberry” with its “p” smoothly and naturally.
Gotcha! You just tried it! When I do it, the “p” sounds forced.
Okay, I’m going to throw in here for once. This is Sheree, the editor, by the way. I just make things pretty around here.
I was twelve when I found out Captain Janeway did not really exist; and therefore, I was never going to be a star ship captain, leaving earth to go where no one has gone before. Yes, I was a little naive as a child, I must admit.
I do think, however, Captain Janeway probably did consume lots of iced coffee on her adventures!
Well, how old were you when you found out how to make good iced coffee?
For me, the answer was, “Today!”
The tannins found in iced tea are major culprits for causing my acid reflux issues. Try going through the summertime in the South without iced tea. It’s bad enough I stopped drinking sweet iced tea.
Another favorite for when the temperatures and humidity soar is iced coffee, but there’s an art to creating the perfect glass of iced coffee that had previously eluded me.
#1 rule I discovered long ago was, you can’t take fresh brewed hot coffee, let it cool, and pour over ice.
#2 rule was that it must be cold-brewed
Cold-brewing is a start but throwing ground coffee into a pot of water and sticking it into the refrigerator overnight made a brew that was not smooth.
While taking a lovely and well-socially-distanced vacation to Myrtle Beach, SC, at the end of June, I ate out only twice. Both times were at the Blueberry Grill, sitting outside on their gorgeous patio resplendent with flowers and man-made misted breezes.
Ahhh …
The morning was way too warm for hot coffee, so I tried their iced coffee. When the waitress set my glass down, it looked just like my companion’s iced tea. It was light and clear, just like the iced tea. Well, I was astounded at the smoothness of this iced refreshment!
Since returning home, I have been on a quest to duplicate this wondrous brew; and I’m getting closer and closer to my ideal. If my readers can improve upon this method, I’m all ears, but this is what I have developed.
ICED COFFEE
2 scoops of ground coffee – my scoops are about 2 ½ Tbs
3 cups filtered water
Method
Place ground coffee in container and add water. Period. Wait one hour.
Pour brew through a paper coffee filter into another container.
Add cream if desired. Pour over ice in tall glasses. Enjoy!
Want sugar? Hmmm. Try it without first. This is so smooth you may not need to cover it up with sugar.
That’s how I learned to drink coffee black: start with a goodcup of coffee!
By subscribing to foodtalk4you, you will receive a thank you gift of “25 Easy Tweaks,” and links to each new post in your email.
So many thoughts are being spun about our current predicament. See if these words are not spot on:
“It was the best of times, it was the worst of times, it was the age of wisdom, it was the age of foolishness, it was the season of light, it was the season of darkness, it was the spring of hope, it was the winter of despair, we had everything before us, we were all going direct to heaven, we were all going direct the other way – “
Little did we know, sitting in English Lit class so long ago, this prose penned in 1859 by Charles Dickens as the opening of Tale of Two Cities would apply to us in 2020 in such profound ways.
Just one day of following the news feed will see his words pop off the page as the conferences, sound bites, interviews, statistics, reflections, and insights parade across our screens.
Everyone has become a philosopher of late; I will not try to add to the fray of who says it best. But we would be all amiss if we were not looking at our personal values through a wiser lens.
What is important, lasting, and of value?
Stocks, 401-Ks, and wages may decline or even vanish.
Time is my only commodity.
I do not even know how much of it I have. My portfolio could be fat or completely running out.
Doesn’t really matter. The only time I have is this second. How will I spend it?
How are you spending yours?
Food for thought.
Now, for a different kind of food talk. Since we are all pretty much cooking 3 meals a day lately, there will be several recipe ideas in the coming posts.
Facing fewer trips to the grocery stores prompted my concerns about fresh vegetables. As a card-carrying broccoli fanatic who can consume an entire head of steamed broccoli at one sitting, I was more than a little concerned about how I could stretch my broccoli purchases.
The answer came in the form of broccoli salad. Raw veggies fill us up faster than cooked – and retain their nutrients – not to mention the fiber factor is ramped up.
Before the recipe, let’s look at an optional ingredient to these salads: cold, cooked rice. Why? Well there’s some magic involved…
First remember, moderation in all things.
You are going to learn a cleaver hack can circumvent the carbohydrate load of (starchy) rice – BUT, even if employed, it can be overdone to our detriment.
You may already be taking a probiotic supplement or may be consuming fermented foods alive with healthy bacteria to boost the population of good bacteria in your colon. Great.
Have you heard of pre-biotics?
A pre-biotic is the non-digestible part of food – think fiber and in this case, starch – that goes through the small intestines unchanged only to land in the large intestine/colon where it is fermented and used as food for the bacteria living there.
Well-fed good bacteria equal a happy gut. Happy gut equals happy body.
Seems the starch in hot-off-the-stove rice or potatoes will act like any other carbohydrate: turn into sugar, cause blood sugar spikes coupled with the need for more insulin to process, and will contribute to weight gain.
Enter cold rice or potatoes (potato salad), and the starch goes through the small intestine unabsorbed – no blood sugar spikes – and arrives in the large intestine/colon ready to feed the troops in the fermentation process. Yay.
Do not sit down to a large bowl of potato salad by yourself. Cold pizza probably won’t work either.
Moderation!
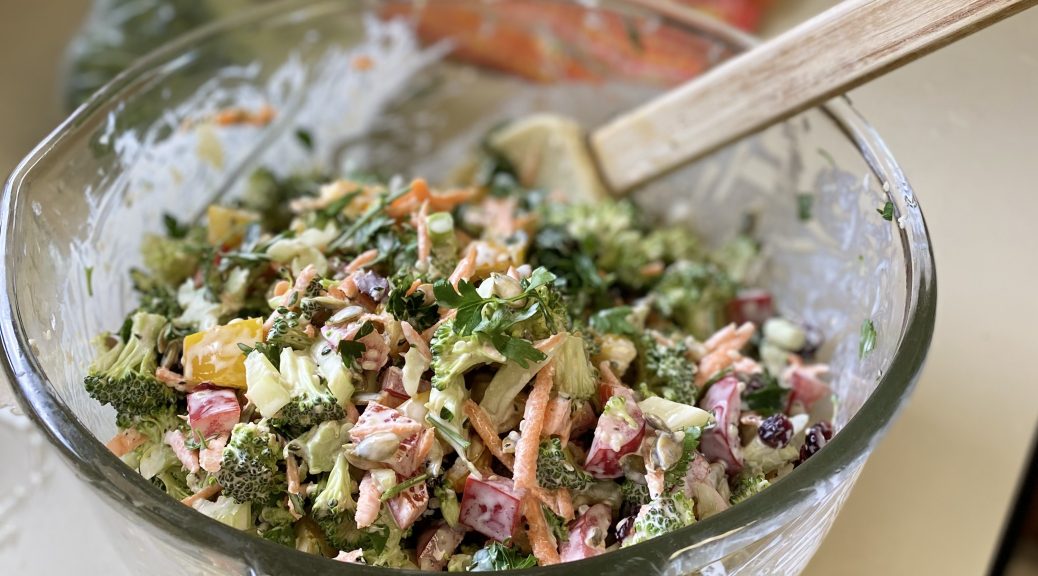
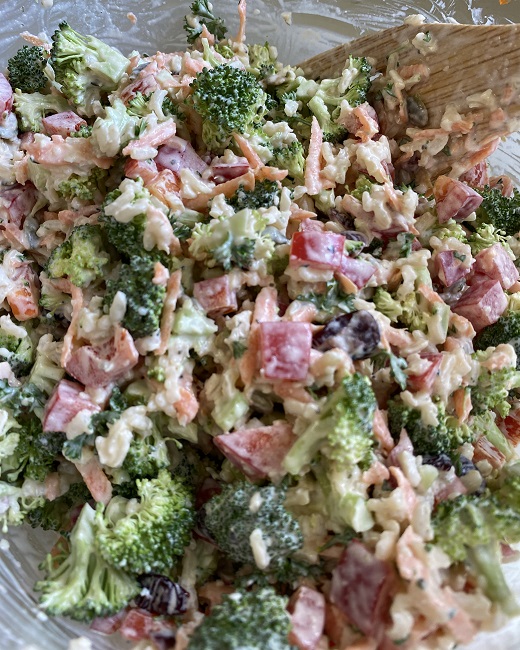
Now – on to the recipe full of goodness that will contribute to a healthy gut, leave you full and satisfied, and will stretch out the broccoli – or Brussels sprouts – to last between less frequent trips to the store.
Broccoli Salad With Options
Ingredients for salad
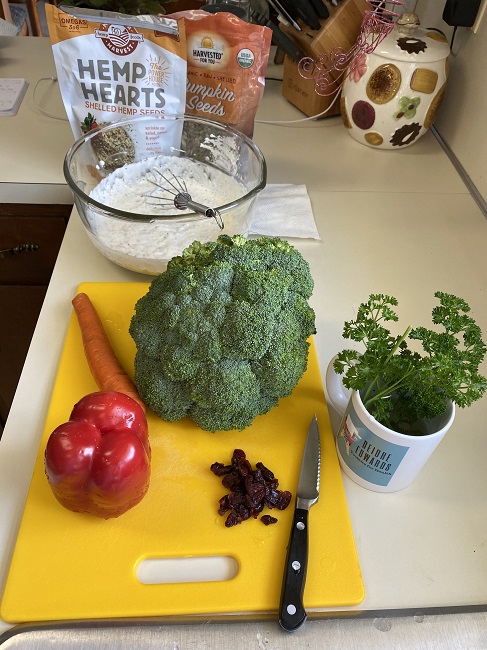
1 small broccoli crown or a combination of broccoli and Brussels sprouts – cut broccoli up into small florets, and cut Brussels sprouts in half, lengthwise, and thinly slice horizontally
1 large carrot, grated
Fresh parsley, chopped
1 Bell pepper – red ones have more Vit. C – diced
Handful of pumpkin seeds
Optional salad ingredients:
Handful of dried cranberries
1 cup cold, cooked rice
Parmesan cheese, grated
2 stalks celery, diced
Ingredients for dressing
Duke’s mayonnaise – quantities vary … sorry. How big is a large dollop? I do not like super-creamy green salads. I use just enough to glue things together. Remember: moderation.
Sour cream – about the same amount as the mayo
Juice from ½ lemon – this I know for sure!
Salt and pepper to taste
¼ cup hemp seeds
Splash of milk of choice to thin the dressing
Method
Using a large mixing bowl, make the dressing first. Throw everything in and stir to incorporate. The amount of dressing you have along with your personal preference of salad wetness will guide how much broccoli and/or sprouts you will use overall.
Prepare the salad ingredients and add to dressing, stirring to combine after each addition.
This probably benefits from some chilling time to meld the flavors, but it is not necessary.
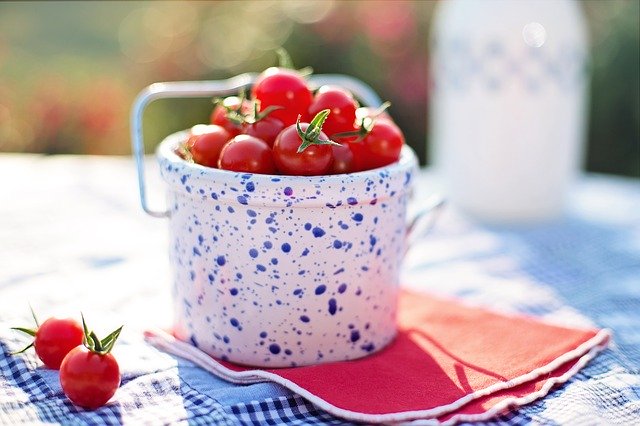
I like serving this with halved cherry tomatoes.
———————————————————-
Done and done. A little goes a long way. My quarantine go-to salad. Ingredients vary. Last week, I had no Bell peppers or carrots, so I added the celery and created an all green version. Parmesan is a nice flavor enhancer as well – add only if you need to ramp up the saltiness.
A big shout out to my dear friend and editor-in-chief, Sheree Alderman, who is making a gradual comeback after a host of life-challenging conditions and surgeries. Love you, girl! We are in this together!
Click on the subscribe button at the bottom or scroll back to the top left of the screen to make sure you do not miss a single post from Foodtalk4you. When you do, you will receive our Thank You gift on things you should be doing to protect your health.
As readers know, my house is gluten free by choice, not absolute necessity. There are times when an indulgence will happen – as in great crusty restaurant bread … mmm … but that’s a rare happening – especially now when we are, basically, staying home for every meal.
Passing on fluffy, yeasty “air rolls” our kids used to smush into gluten-y nuggets at restaurants is not hard at all. Easy-peasy.
But gluten-free oatmeal? Sounds safe. Maybe.
I was all set to extol the virtues of my new “gruel,” which has done an admirable job of sustaining me throughout the mornings recently, when I noticed – yet again – some unhappy hip and knee joints.
What’s this? No more oatmeal?
The jury is still out. Last time I got on an oatmeal jag, the same thing happened.
Was that a fluke? Is this a fluke?
I don’t know folks. The verdict on this one has not been pronounced for me.
But so many people simply love oatmeal and eat it on a regular basis. A friend of mine adores his bowl of steel cut oats with cinnamon, milk, and a hint of stevia each morning. Satisfying and somehow grounding – a great way to start the day.
So … occasionally, I will concoct my oatmeal potion. Taste buds do cartwheels and energy levels stay steady. Regular readers know I would have to ramp up the nutrition and sugarless flavor components using the usual suspects: hemp seed hearts, collagen, vanilla, and cinnamon.
Let’s whip up a batch of Super-Powered Oatmeal!
Super-Powered Oatmeal
Serves 2-3 (So hearty, you don’t need as much!)
Ingredients
½ cup gluten-free oatmeal
½ cup gluten-free steel cut oats
¼ cup hemp seed hearts
3 Tbs collagen hydrolysate
Pinch of salt
Cinnamon
Vanilla
1 ½ – 2 cups almond milk
Method
Throw it all in a small pan; cook on medium until bubbly; reduce heat and continue to cook, stirring occasionally. Purists may want to add the vanilla at the end.
Variations on milk depend upon how creamy you want your cereal and on how much steel cut oats you use.
Geez, who really measures this stuff? I usually put all the oats into a one cup measure and eyeball equality. This is in the morning while sipping my first cup of coffee, after all.
If you have not whipped that sweet tooth into shape, a modicum of sugar may be added to the pot – really, with all the vanilla and cinnamon – maybe a teaspoon could be used – that’s it.
Find a cute small bowl to add to the experience. You just don’t need a huge serving. Why?
Okay, kids. Back to home school. Quiz time.
What’s in hemp seeds?
Right! Omega 3 fatty acids! Quoting from pages 74-75 in my first book, Toolkit for Wellness:
Number two on everyone’s list is Omega 3 – the long chain fatty acid of EPA, eicosapentaenoic acid, and DHA, docosahexaenoic acid, which are found in wild fish and grass-fed meat.
A summary of its benefits include:
Decreasing cancer rates
Decreasing auto-immune responses
Increasing insulin sensitivity
Decreasing insulin resistance
Decreasing nerve degeneration processes
Promotes healing of the gut
Hemp hearts also have a whopping 10 grams of protein to every 3 tablespoons.
Next question: Why collagen?
Three tablespoons of unflavored collagen hydrolysate have over 16 grams of protein and all the essential fatty acids – remember science class: building blocks of protein – that you need to power up your body. That’s why Ms. Deidre adds collagen to so many things to ramp up the nutritional profile.
Well, Ms. Deidre, why are you always using cinnamon?
Good question! Don’t you remember on page 161 of your Toolkit for Wellness textbook, cinnamon not only helps mimic sweetness, but it also is loaded with antioxidants, calms inflammation, helps reduce insulin resistance, and helps with blood sugar levels?
When combined with vanilla extract, a non-sugary sweet factor can be achieved that will not scramble blood sugar levels or brains.
That’s a win-win for all home-schooling families. No squirrely kids! Yay!
In health-
Deidre
We welcome all new subscribers and hope that you are enjoying your new subscriber gift, “25 Easy Tweaks for Better Health.”
Claim your new subscriber gift by scrolling to the bottom of your phone screen and clicking on the SUBSCRIBE button. If you are using a computer, the SUBSCRIBE button is on the left side near the top of the screen.
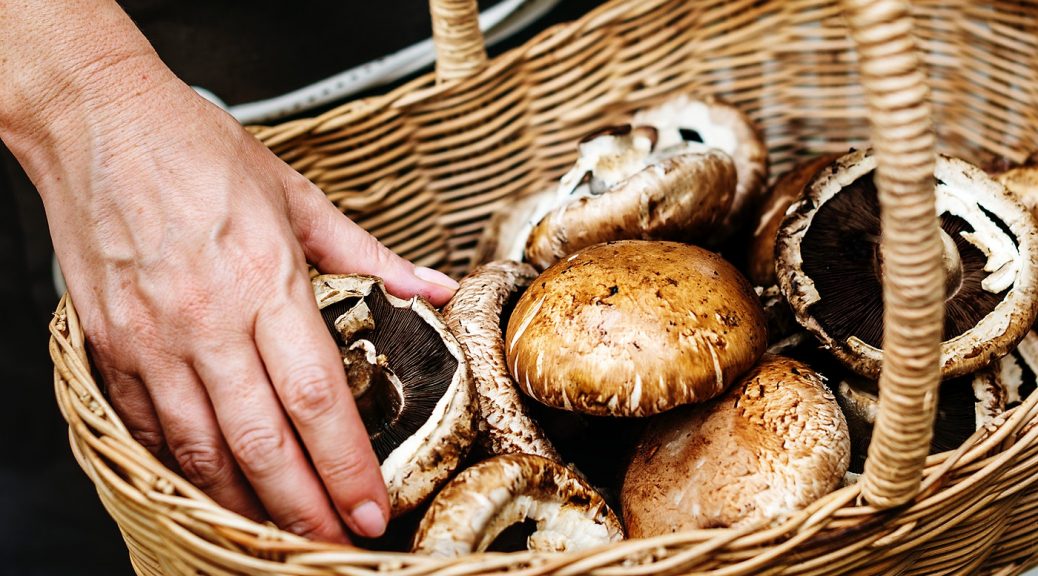
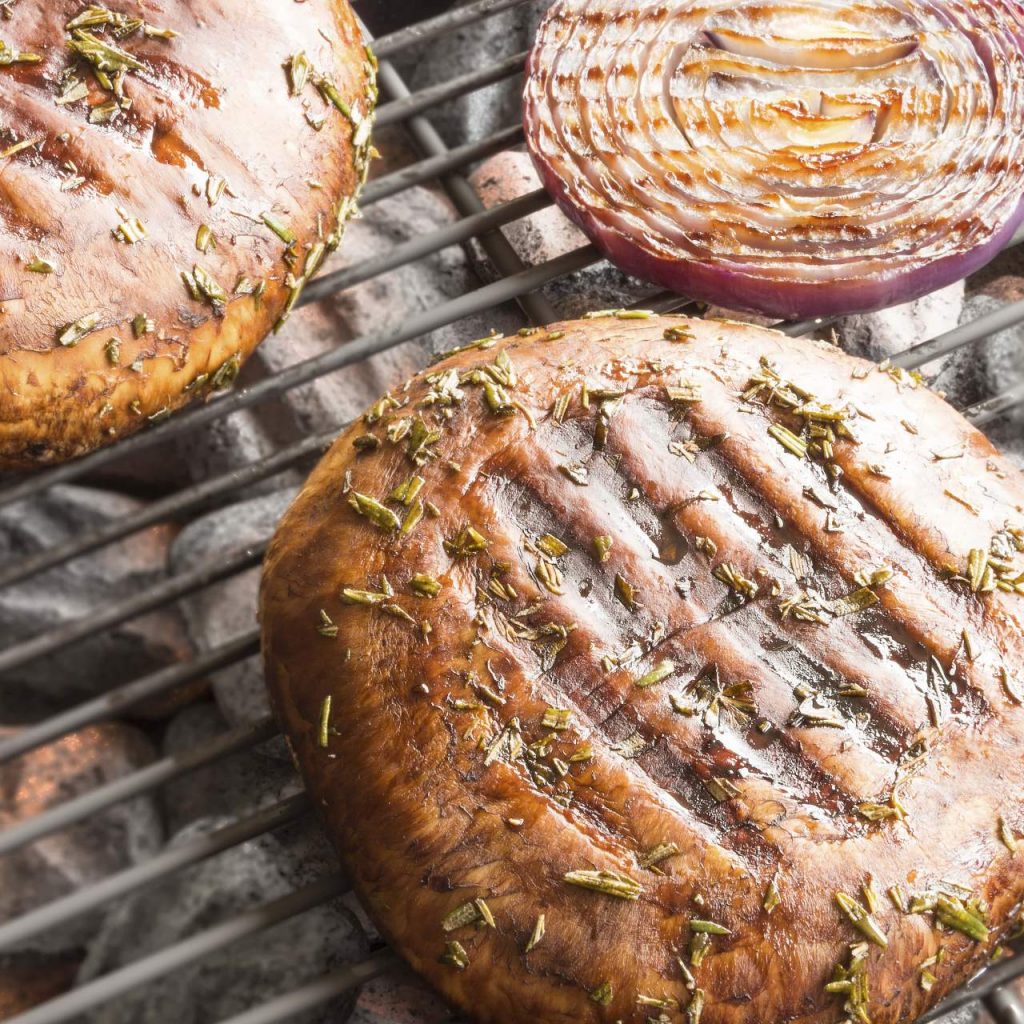
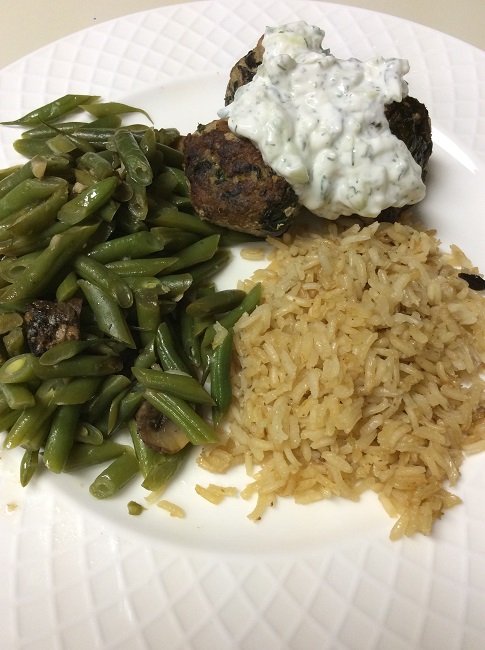
As a follow-up to the Tzatziki Sauce recipe HERE, I want to share a recipe that just happened to come my way. When “bun-less burgers” are featured, there’s usually a portobello mushroom on either side of the burger.
Looks good in pictures, but when I tried it, I ended
up with super juicy buns that were not at all what I had in mind. Mushroom
juice dripping everywhere and fingertips breaking up the “bun.” Even as a lover of mushrooms, the experience
grossed me out.
So, when Greek Turkey Burgers with Portobello Buns popped
up in my in-box, the only thing that caught my attention was “Greek.” Sure
enough, I was not disappointed. Another place to enjoy Tzatziki Sauce!
The original recipe may be found here: EATING WELL
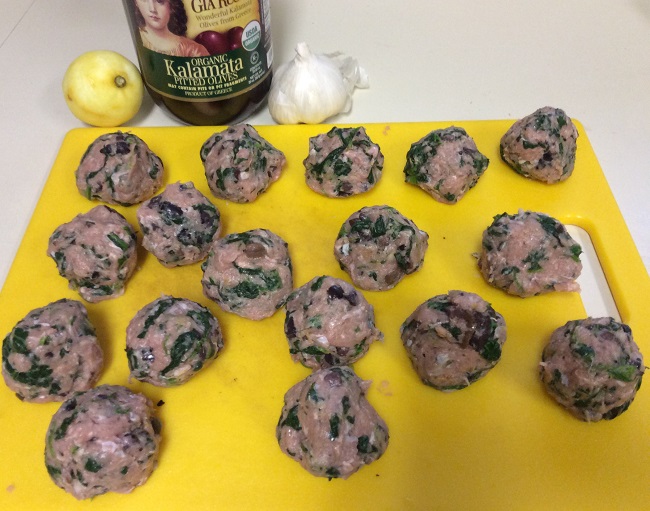
I chose to transform these burgers
into meatballs which better support my serving size needs. Turkey is an
agreeable alternative to the normal beef and is the perfect compliment to the
other Greek-themed ingredients.
Without further ado, here’s my new
favorite meatball recipe:
Greek Turkey Meatballs
Ingredients
1 pound lean ground turkey
1 cup frozen spinach, thawed and
squeezed dry
1/3 cup Kalamata olives, chopped
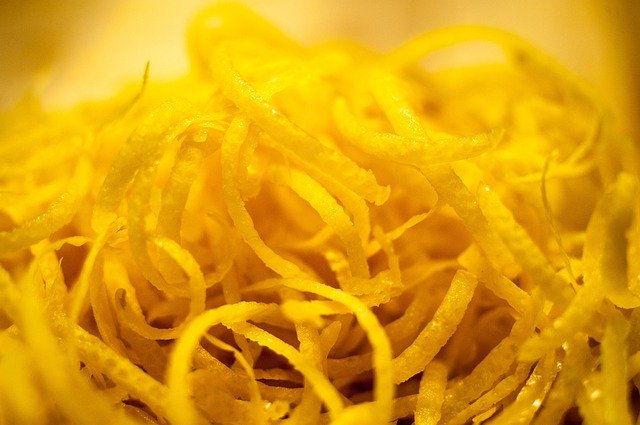
1 ½ tsp lemon zest
1-2 cloves garlic, minced
½ tsp dried oregano
Salt and pepper to taste
½ cup chicken broth or water
Tzatziki Sauce for serving
Method
Combine all ingredients in a large
glass bowl using gloved hands to mix well. With a large cookie dough scoop, press
the meat mixture into the scoop using the side of the bowl. Release meatball into
your other hand to round out the flat side; place onto a plate and repeat until
all meatballs are formed.
Use avocado oil to coat a large
skillet on medium-high heat and brown the meatballs on all sides. Brown
meatballs in batches, if necessary, to prevent over-crowding during the cooking
process. Return all browned meatballs to the pan, lower the heat, add broth or
water, cover, and simmer until cooked through.
Tzatziki Sauce
Serve with Tzatziki Sauce. These go
well with rice and a side salad.
This recipe checks so many boxes for
flavorful, nutritious ingredients. Hope you enjoy it.
In health-
Deidre
We welcome all new subscribers and hope that you are enjoying your new subscriber gift, “25 Easy Tweaks for Better Health.”
Claim your new subscriber gift by scrolling
to the bottom of your phone screen and clicking on the SUBSCRIBE button. If you
are using a computer, the SUBSCRIBE button is on the left side near the top of
the screen.
If the “t “in front of the “z” bothers your tongue, go for “zaaahhht.”
Say “zaht” a few times. Easy.
Then practice the “zeeekeee.”
Put the two parts together and repeat several times.
As you practice putting the first part – which ends
with that troublesome “t” – with the second part, you’ll get the hang of the
“tz” combination.
Add the opening “t” and you’ll be walking through the house proclaiming: “Tzatziki!”
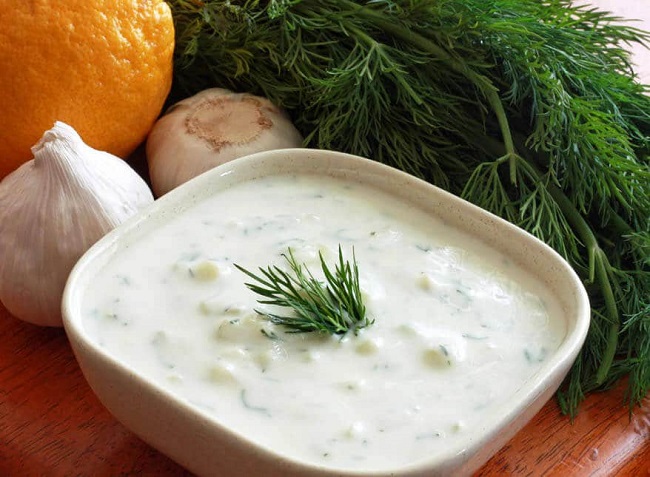
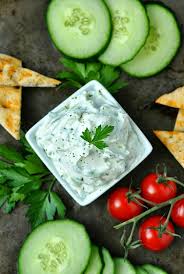
Your kids may question your sanity, but they won’t
question how delicious and versatile this sauce is. With three main ingredients
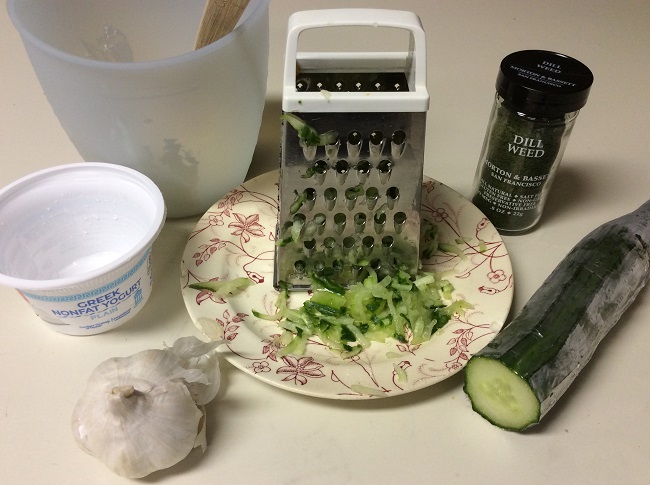
– cucumber, garlic, and Greek yogurt – it’s a cinch to make.
The basic recipe can easily be halved or doubled, can
be tweaked for, more or less, garlic taste, and can be made with mint or dill
to add a wonderful top note of flavor interest.
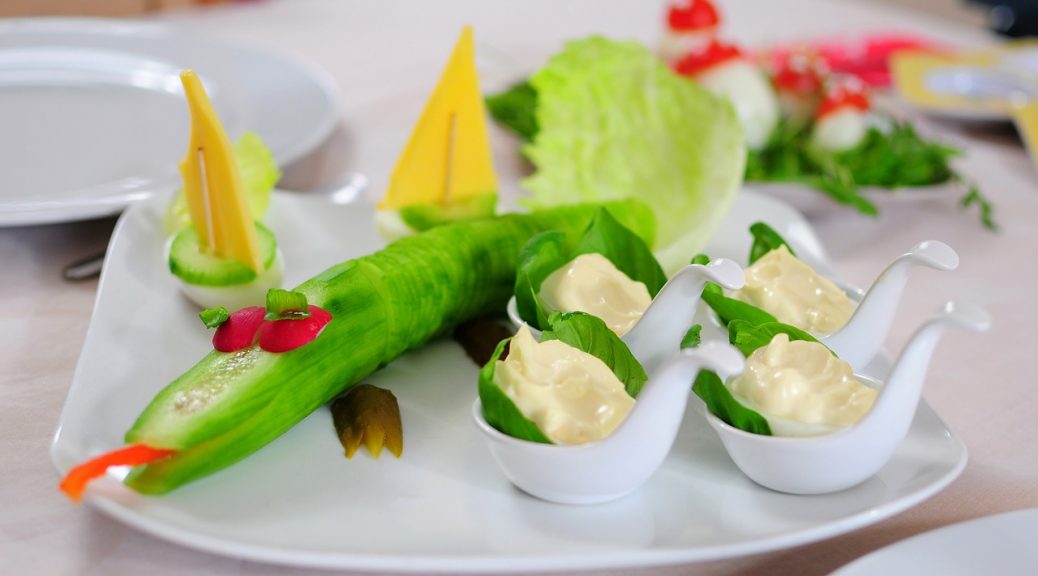
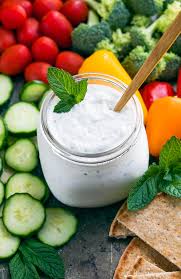
But where do you use Tzatziki Sauce?
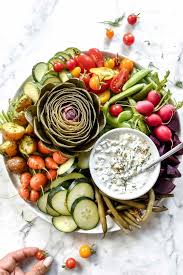
As a dip with pita, chips, or veggies. As a mouth
coolant to spicy dishes – add a dollop on top of the food or at the side of the
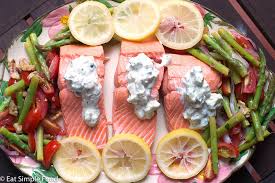
dish to dip forkfuls into. As a flavor companion to salmon, lamb, pork, beef,
chicken. That’s just about everything.
I especially appreciate the adaptability of recipe
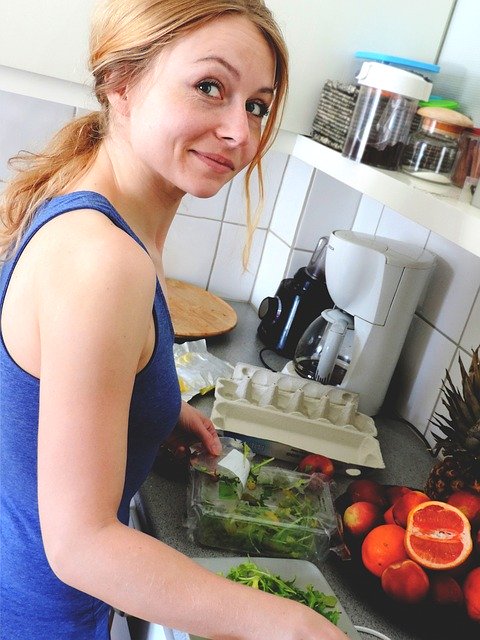
size. When buying an English cucumber, I’m often not dutiful enough to eat it
every night and some gets wasted after a while.
Cooking for one has its drawbacks.
But, using half the cucumber for a few salads, and the
other half to make just over a cupful of Tzatziki sauce, and I’m happy.
You will find you can adapt this to your personal and
family palate preferences by tweaking quantities and flavor additions.
Without further delay, I present Tzatziki Sauce 101.
TZATZIKI SAUCE
Basic ingredients
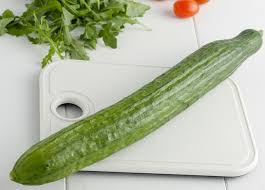
1 English cucumber – at least partially peeled and
grated or very finely chopped – put grated/chopped cucumber in a sieve to drain
and squeeze with towel or paper towels to remove excess fluids
2 cloves garlic, minced
2 cups Greek yogurt – if you desire an even thicker
sauce, let the yogurt strain through a sieve or cheese cloth over a bowl
overnight in the refrigerator before using.
Finishing touch ingredients that may vary
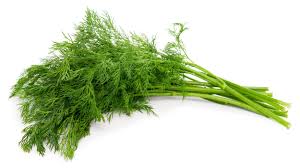
Dill weed to taste – fresh or dried
Fresh mint, chopped
Pepper to taste – white pepper would be optimal
1 Tbs Extra Virgin Olive Oil
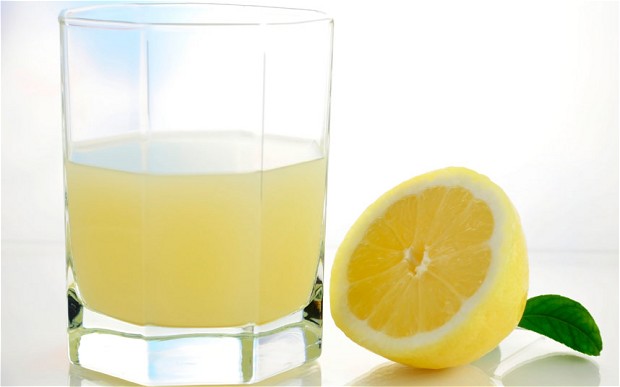
1 tsp white vinegar or lemon juice
A note on ingredients: When I’ve been around those who
made this at home, myself included, no olive oil or lemon juice have been used
– just vinegar. I’ve only used a liberal amount of dried dill – but after
looking at many recipes, the mint leaves may be an interesting addition – depending
upon the purpose.
Method
Nothing much to do except stir together the squeezed
out grated/very finely chopped cucumber, minced garlic, and yogurt. Add the
vinegar, pepper and dill weed; stir to combine.
Cover and refrigerate at least one hour before using
to allow flavors to meld.
Some recipes call for using a food processor; that
would eliminate the fine texture of the sauce, but may make it more dippable.
Whatever you do, you will end up settling on a texture
level, garlicky level, and dill level that suits your tastes and needs.
Three main ingredients with countless uses. What could
be better?
Remember to sign up to receive the latest addition of
Foodtalk4you each week at the top left of this page.
A little extra tired, maybe, from over-obligating
myself, I was awakened around 4 am for the usual trip to the bathroom.
No big deal.
But something was off. Once in the bathroom, my hands
started to tingle as if I had been hyperventilating. Hmmm. Better breathe into
my cupped hands. But I was not hyperventilating.
The tingling spreads all over my body, and – was that
sweat on my brow?
Okay. This is not going down well. I was starting not
feel good. No. I was beginning to feel very bad.
Was this going to turn into diarrhea, or did I need to
throw up? Any self-care plan would require movement on my part, and that
somehow did not seem an option. My body had become weighed down by some
invisible, mighty source of gravitational pull.
Was I going to pass out? I leaned my body away from the cast iron tub, just in case.
Summoning an energy I wasn’t aware I had at the moment,
I pulled my long hair back into a ponytail away from my sopping wet scalp. My
trembling body was, within a few moments, drenched in sweat.
Shake hands with the flu.
I am so thankful I had gotten my annual flu shot in
September. Because of that protection, I did not become a statistic. The third
death from the flu in North Carolina was reported that very week.
Fortunately for me, I was able to exit the bathroom
without anything else happening, and I safely tucked my ailing carcass back
into bed as I listened to strange gurgles rise from my tummy. Next morning, I
felt a little beat up and just took things easy.
Flu is not an inconvenience. Flu knocks you down
suddenly – and it can kill!
It’s not too late to get protected from the flu.
‘Nuff said.
On to the holidays.!
Being an avoider of intense sweets and gluten is
problematic this time of year. During a recent group trip to Williamsburg with my
church, I threw caution to the wind during the catered dinners.
I know, I know. I literally wrote the book on this – Toolkit for Wellness – but since I was gluten-free by choice and not by condition, I thought I could ‘cheat’ a bit if I did not get a bad belly.
No bad belly. Yay.
Oh, wait. A few days later, my joints were talking to
me like I was suddenly a very old lady. What?
Well. The resulting inflammation, for me, came through
the musculoskeletal system.
So, it was time to get right with my body, and it did
not take long for the aches and pains to go away. Lesson learned … again. Everything
is a choice.
But those of us not wanting sticky-sweet and gluten-y
desserts do not have to be relegated to the veggie tray for celebration food. There
are options.
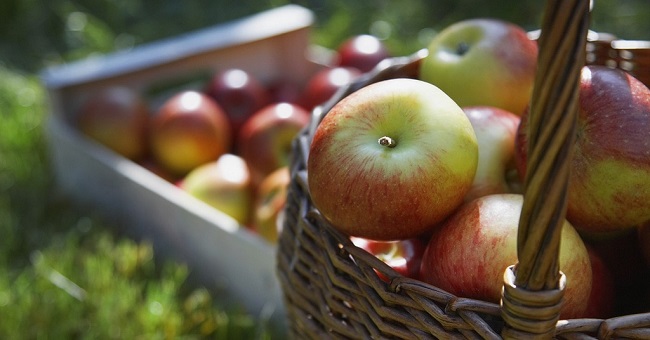
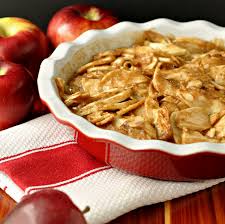
How about a crustless apple pie with streusel topping?
Satisfies without going over the top. Check this recipe out that I created
on-the-fly last week:
CRUST-LESS APPLE PIE WITH STREUSEL TOPPING
Instructions
Pre-heat oven to 350 degrees
Into a large bowl place:
4 large apples, peeled, quartered, cored, and sliced
horizontally. My apples were not baking ones, per se: Honey Crisp, Gala, and
maybe another new flavor also just labeled Crisp.
4 Tbs. arrowroot powder
Brown sugar- sorry about lack of measurements, I just shook
some over the apples; probably ¾ cup or less
Apple pie spice to taste
Stir and toss the apples around to evenly coat with
dry ingredients.
Add some leftover cranberry sauce – maybe 1/2 to 2/3
cup – (Recipe for cranberry sauce to follow)
Mix apples and the cranberry sauce well and pour into
a greased baking dish – mine was 12 x 8 inches.
In a medium sauté pan on medium heat place:
About one cup chopped nuts – I used walnuts and pecans
½ stick butter
About one cup gluten-free oatmeal, and
¼ – ½ cup brown sugar.
Stir to combine and to brown slowly. When warm and
brown, distribute over the top of the apple mixture. Bake at 350 degree about
40 minutes or until evenly browned. I put foil over the top for the last ten
minutes so the edges would not burn.
Serve warm or cold with a dollop of Plain Greek Yogurt.
It’s great reheated.
In case you have missed previous postings of my
cranberry sauce, here’s what I do that is well received every time I prepare
it.
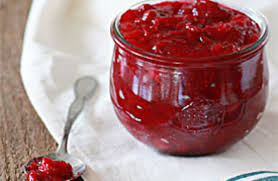
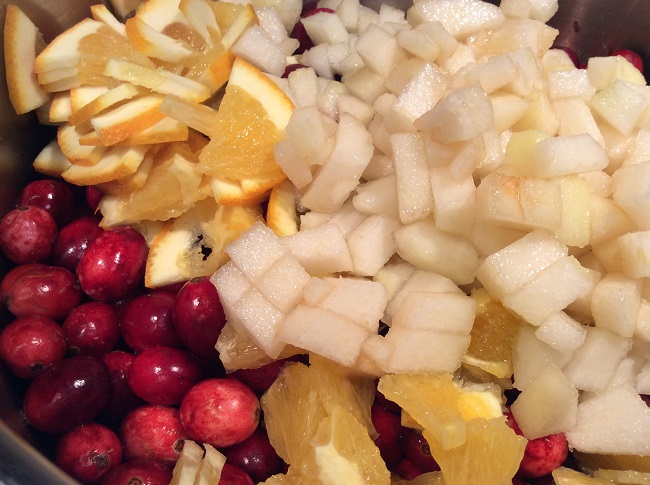
CRANBERRY SAUCE PLUS
Instructions
Into a soup pot place:
2 small bags of cranberries
One navel orange, rind at each end discarded. Quarter
orange and thinly slice
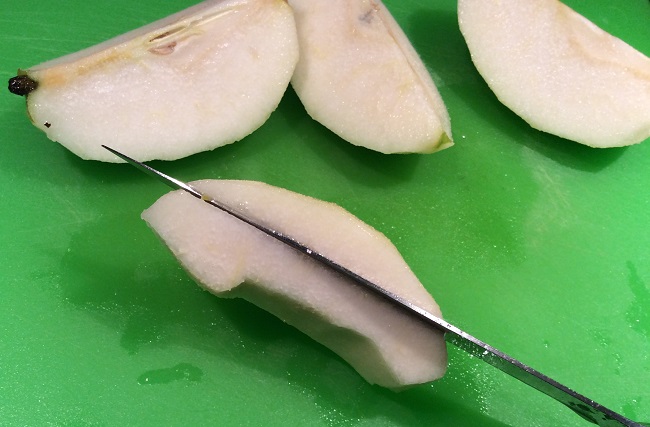
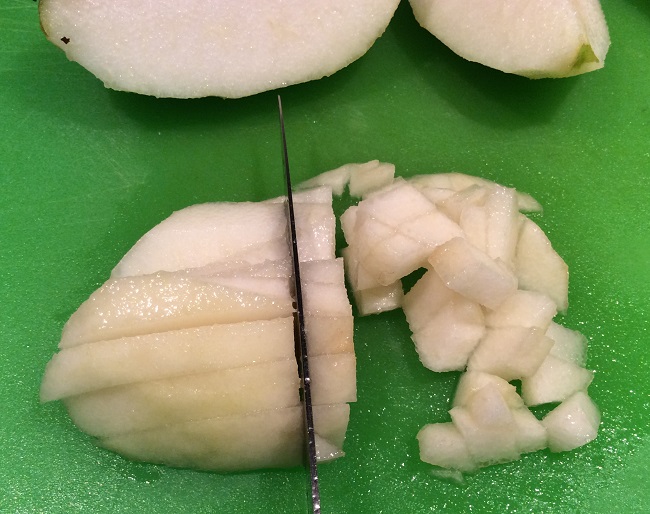
2 fresh pears – peeled, quartered, cored, and diced
1 cinnamon stick
1 cup sugar
1 cup water
Start cooking on medium heat. Then in a small saucepan place:
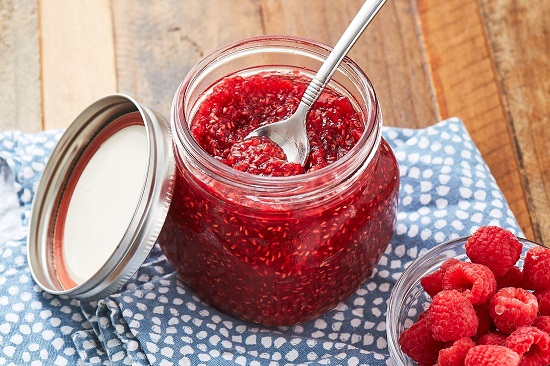
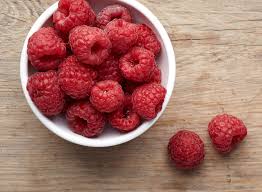
One container of fresh raspberries, rinsed
1-2 Tbs. water
1 Tbs. sugar
Gently cook berries on medium heat while stirring.
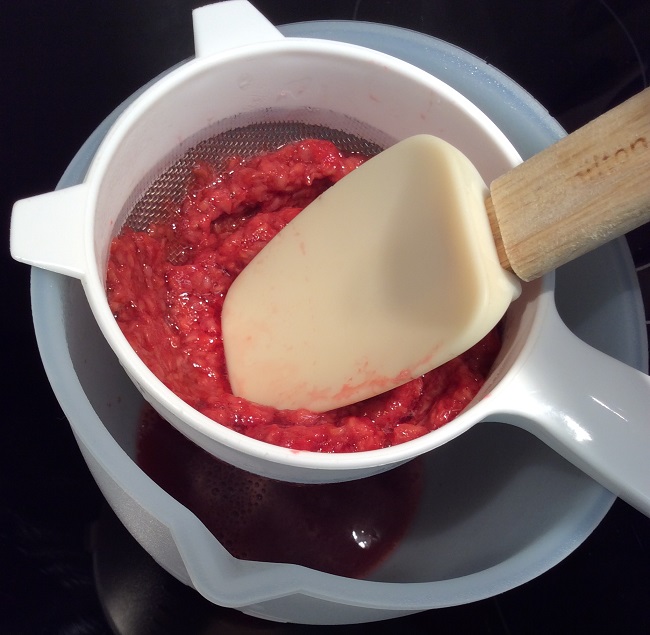
This does not take but a few minutes. When berries start breaking down, place a
large mesh strainer over the cooking cranberries, and pour raspberries and
juices into strainer, draining into cooking cranberries.
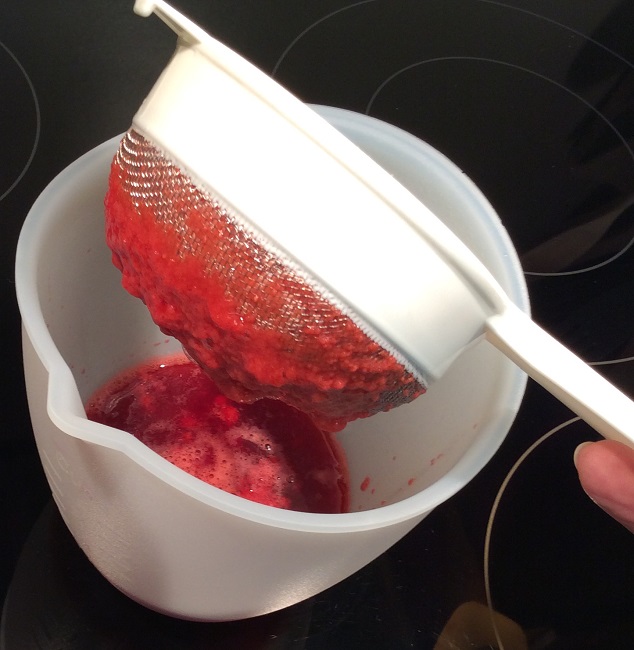
Using a flexible bowl scraper, mash the berries
through the strainer. Scrape the berry essence off the back of the strainer and
put into the cranberries. This takes a bit of mashing, scraping, mashing,
scraping. You will have a mass of seeds and just a little bit of berries left
in the strainer which you will discard.
The effort to create the raspberry essence is worth
it. The essence adds that certain something to the sauce … all without pesky
raspberry seeds.
Stir the cranberry sauce mixture occasionally, helping
to pop cranberries on the side of the pot. Gradually reduce heat as the sauce
thickens and bubbles more intently. When berries are all popped and things look
‘just right,’ your work is done.
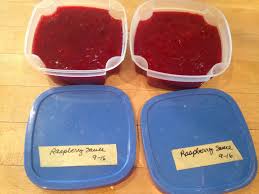
Transfer to serving bowls and/or storage containers to
cool. This sauce keeps quite well and can serve as a not-so-sweet spread on
toast or in a turkey sandwich.
The edgy tartness of the cranberries is countered by
the gentle blunting of the pear and raspberry flavors. The orange slices with
rind seem to candy in the juices. Folks who are not partial to cranberry sauce
really like this one.
So, you better watch out – get those flu shots, and enjoy some excellent Cranberry Sauce and Crust-less Apple Pie!
Book sales for Toolkit for Caregivers is trending as gifts for family, friends, and neighbors who are facing caregiving or are in a time of caregiving. There could be no more thoughtful gift to give such a person. They don’t need a plate of cookies – they need help.
A recent customer had tears in her eyes as she described her gratitude for her Toolkit for Caregivers gift. Her husband’s Alzheimer’s Disease is worsening and reading her book and implementing the suggestions – especially for the business side and for self-care – has meant the world to her.
How many people are you serving at dinner – or
breakfast? As an empty nester, I used to think cooking for just two called for
making substantial quantity adjustments. Geez. Try cooking for one.
I can well understand why single people grab
prepackaged one-serving meals.
So far, I have resisted the temptation. If keeping a
happy belly is high on your list as it is mine, prefab food fails on so many
levels. In addition to the endless list of additives and other unidentifiable
ingredients, most packaged food is also awash in gluten.
I am left trying to prepare smaller quantities and/or
eat the same thing once or twice a day – perhaps disguised as something else – until
the leftovers are gone.
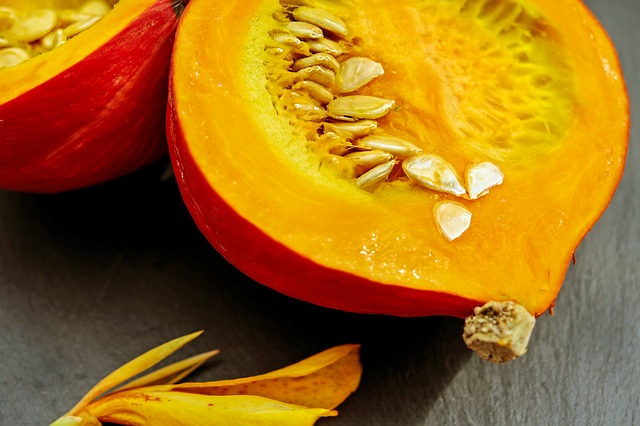
So, when pumpkin was calling me like a siren from the
deep, I knew I needed something versatile.
Something I could dress up – or down – according to my
need.
Not a pie – not a cake – not a pudding …
Something that would be nourishing and possibly sport additional protein. Hmmm …
Inspired by the Food Channel cook off chefs who grab a little of this and that, I set to work.
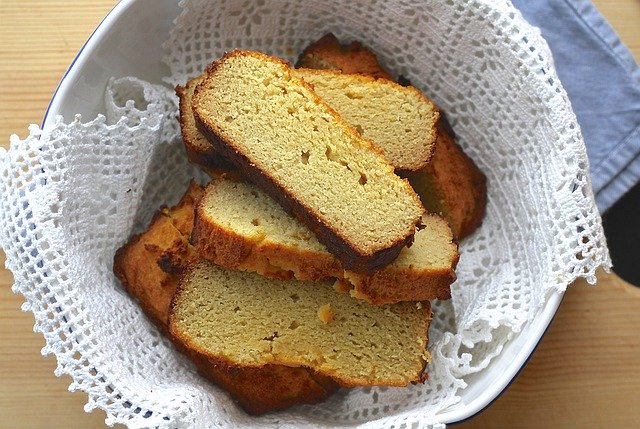
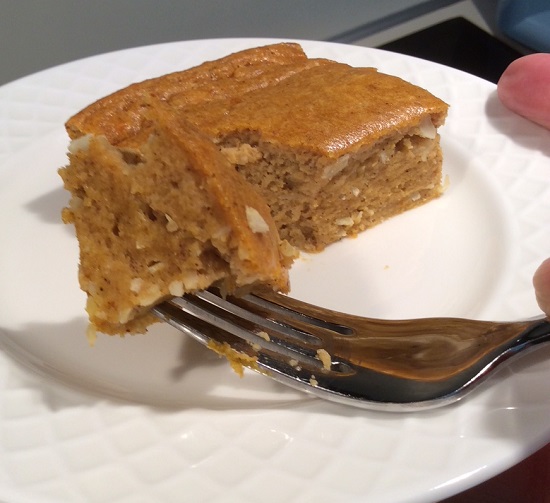
The result was – not a pie, not a cake, not a pudding …
It was perfect and served as breakfast more than once. When it wasn’t
breakfast, I decorated a square of it with a dollop of pudding and called it
dessert.
I was going to remake this using more accurate measurements,
but have not had the time as preparations for the local Holiday Gift Show have been
all consuming. My booth will be beautiful and will feature bookmark Christmas
tree ornaments!
So, here it is: my no-name pumpkin thing concept
recipe.
Pumpkin Bake That Looks Like Breakfast – Unless It’s Dessert
Ingredients
6 eggs
½ cup of Half and Half … Or three good splashes or so
Vanilla
Cinnamon
Pumpkin Pie Spice
Salt
3 Tbs. melted butter – I measured this … shock!
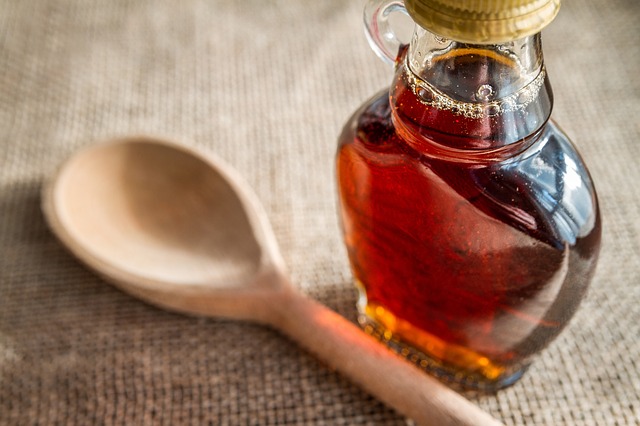
Maple syrup/brown sugar – Quantity is a little tricky, here. I’d say 1/4 to 1/3 cup of brown sugar and a splash of maple syrup. This is not meant to be sweet, but to maintain a delicate balance between sweet and not dominating the pumpkin flavor.
½ – ¾ cup Almond flour
3 Tbs Collagen hydrolysate
½ can Pumpkin
½ cup unsweetened coconut flakes
Method
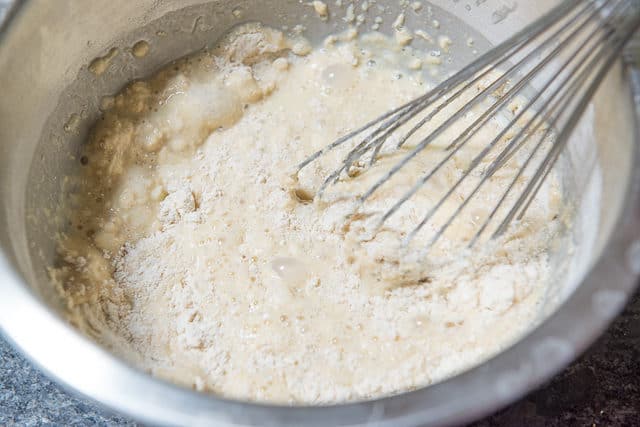
Grab a large mixing bowl and an immersion blender.
Add all the ingredients, blending to combine well.
Bake 350 degrees in a greased square pan for 40 minutes/until a knife comes out clean when tested in the center.This pumpkin bake checked all the boxes for versatility, flavor, protein richness through the eggs and collagen, and provided much needed pumpkin factor without a lot of sugar.
I could see making this for a crowd by using the full can of pumpkin, ramping up the other ingredients, and using an oblong baking dish. If you are fortunate enough to have family in for Thanksgiving, you could nibble on this all day while cooking the holiday dinner.
How’s your gratitude journal doing? You don’t have to
have a journal dedicated to gratitude. Keep it simple. Jot a thought or two
down each day on your calendar. My daily planner has an abundance of room in
addition to the space for appointments and goals.
How about starting today? From now until Thanksgiving
– a couple things each day that fill our hearts with gratitude – right there on
your calendar or planner.
Today: I loved my short walk to the lake and the feel
of fall sunshine on my face. I am so grateful for eyes to see the leaves of my
dogwood trees turn this amazing shade of red.
How about you?
In health and gratitude-
Deidre
Don’t miss even one FoodTalk4You.com newsletter! Look for the sign up to the left of this page above.
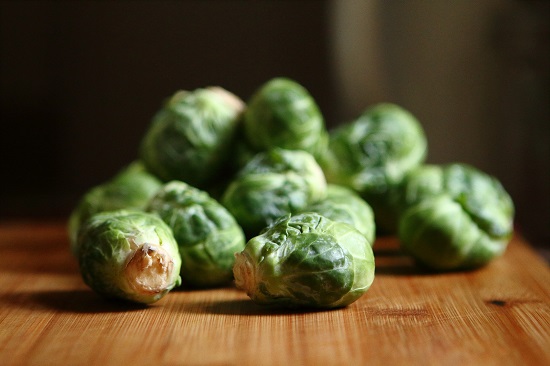
Did you grow up with your mom disguising Brussels sprouts
under an ocean of Velveeta cheese sauce? Haven’t had Brussels sprout since
then, right?
Well, those darling orbs of cruciferous goodness are making
a comeback. Stylish restaurants are spotlighting their unique versions – sans Velveeta
cheese sauce – and are delighting their patrons.
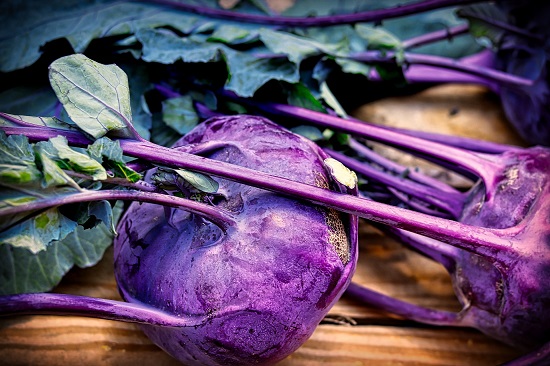
kOHLRABI
Before sharing recipes, let’s get acquainted with this
intriguing mini cabbage.
Some of the best summations I have found for these cruciferous
vegetables calls them “Super Veggies,” as well as other equally positive descriptions.
This ancient family of vegetables, which can be found all over the world,
include:
Since even before 4000 BC, these foods from the Brassicaceae
family have been used, not only as food, but also for their curative properties.
Some of the benefits
of cruciferous vegetables:
Contain cancer-fighting compounds
Reduce inflammation
Regulate blood sugar
Promote weight loss
Enhance heart health
Promote Estrogen balance
The benefit that stands
out for me is the reduction of inflammation. As I often remind readers,
inflammation is the cornerstone for all disease. Curb inflammation and you’ll
go a long way in preventing disease processes.
The blood sugar
regulation and weight loss benefits are largely due to the high-fiber content
of cruciferous vegetables. Also, all these vegetables have high values in
vitamin C and K, as well as many necessary minerals. It’s not as common to find
these types of beneficial fatty acids outside of fish, meats, and nuts. Anytime
we can consume them, it’s a good thing.
The only downside to using
them in your diet is there can be an issue with flatulence. That’s medical
jargon for gas. We are advised to eat
only one or two servings of these vegetables a day if gas is an issue.
Having said that,
Brussels sprouts don’t bother me so much at all; whereas, cabbage is another
story. Individual differences abound.
Enough of the science of
Brussels sprouts and other cruciferous vegetables, let’s get on with the story.
You know how, when you
are on vacation and are in different towns, states, or countries, you generally
want to eat at local establishments? Forget chain restaurants; those you can
get at home, right?
One exception for me is
Bonefish Grill. We do not have one anywhere near my town; so, when I vacation
to Myrtle Beach, South Carolina, at least one trip to Bonefish Grill is going
to happen. That was the case recently.
My friend ordered a side
of their highly touted Brussels sprouts to go with her oysters. Her taste buds
were doing a happy dance after the first bite. Already a lover of Myrtle Beach’s
T-Bonz Restaurant Flash-Fried Brussels sprouts, I was intrigued.
Fortunately for me, there were two sprouts left over from my
friend’s dinner, so I did the only right thing possible – I ate them.
Oh, my…
We plied our waiter for as much recipe information as
possible; but I’m sure he was sworn to secrecy. We could correctly identify the
lemon element, and he very vaguely described some kind of sauce they served to
bind everything. I could tell there were other ingredients though. They were on
the tip of my taste buds …
Well, while I’m still Googling knock-off recipes for Bonefish
Grill Brussels sprouts, I did manage to cobble together a decent concoction
worthy of sharing – so here it is:
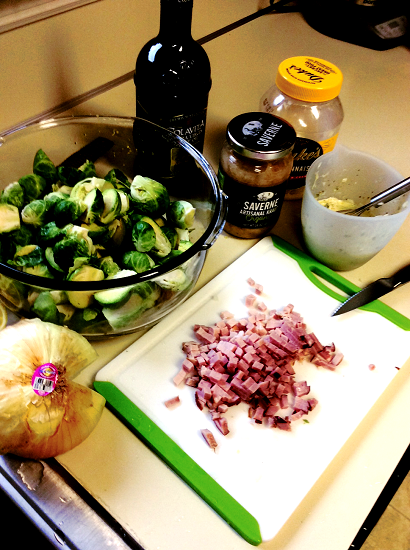
Brussels Sprouts A La Bonefish Grill 1.0
Preheat oven to 400 degrees.
Lightly oil baking dish – I used a 12-inch cast iron pan
20 Brussels sprouts- smaller ones are best, washed, trimmed,
and cut in half
½ cup cubed ham
1/3 cup mayo
3 Tbs. finely diced onion – I used Vidalia, but an online
recipe used the whites of three green onions
½ cup sauerkraut, drained
½ cup olive oil
1 Tbs. lemon juice
Zest of one small lemon
1 clove garlic, minced
2 tsp. dried basil
Fresh ground black pepper to taste
Parmesan/Asiago cheese to thinly shave on top of the
prepared and dressed Brussels sprouts in the baking dish.
Prepare Brussels sprouts and place in large bowl with half
of the olive oil. Toss to coat evenly.
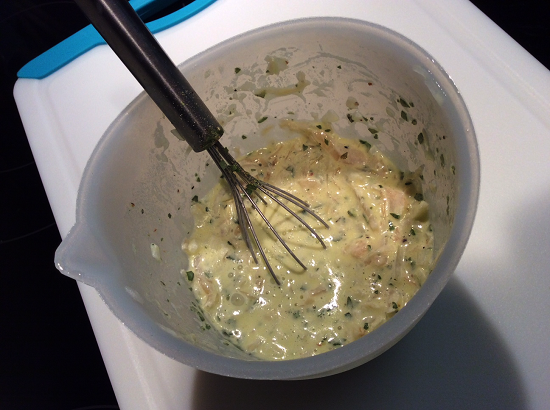
In a small bowl, combine the remaining ingredients stirring
often.
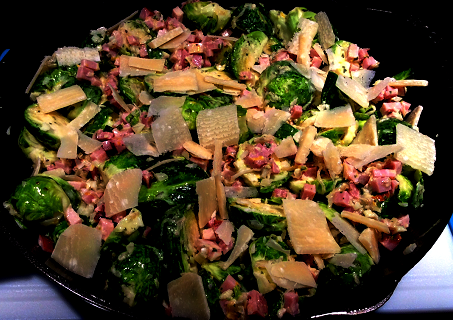
Pour sauce over Brussels sprouts, toss to coat evenly.
Transfer to baking dish.
Sprinkle shaved Parmesan/Asiago cheese over the top.
Bake about 30 minutes or until browned on top.
Enjoy.
This could be a one course meal.
Is this just like Bonefish’s famed side dish? Well no, it’s
tantalizingly close.
Are you tweaking your recipes to a healthier bent for the
coming holidays? Let me know what you are doing to make taste bud magic with
less sugar and healthier ingredients in the comments section below.