Tag Archives: gluten sensitivities

“And the Beet Goes On…. “

We all were reluctant to bring our Designed Health Series to an end. After setting the ground work for a new way of thinking about our entire approach to what is the best for us to eat and why, we were smack in the middle of reconstructing our menu content and sharing recipes when time ran out! But our link remains here until we meet again for follow-up sessions.

Nope - The other moose
NOPE! THE OTHER MOOSE…..

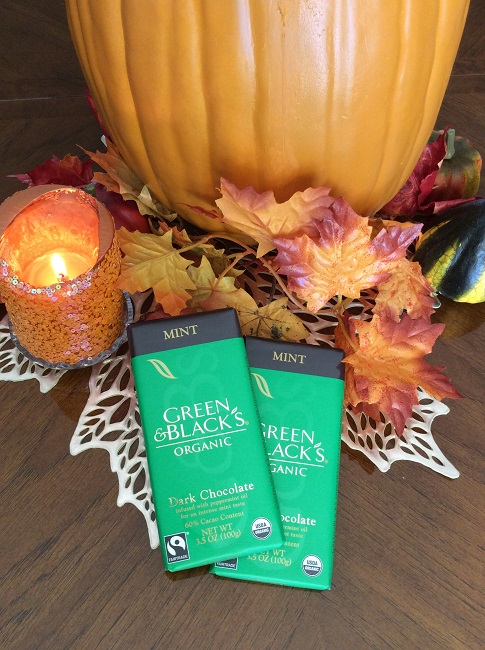
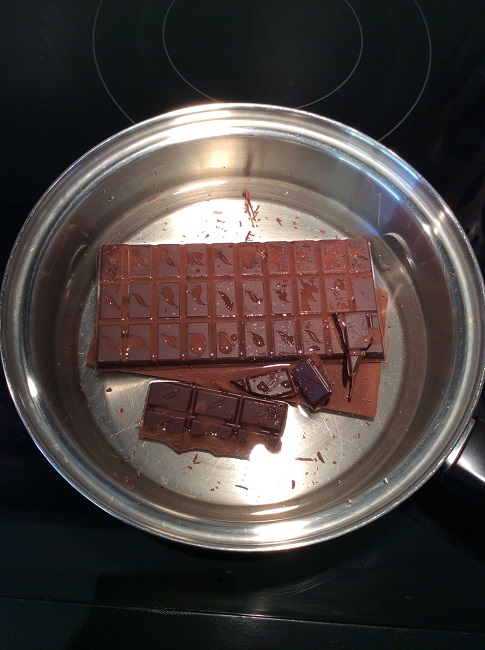
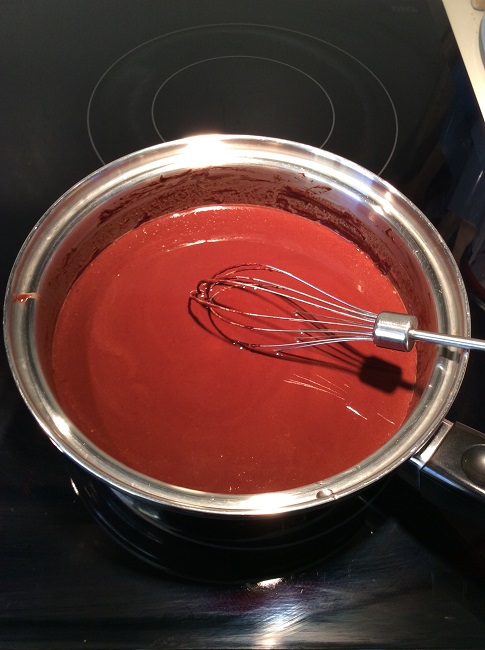
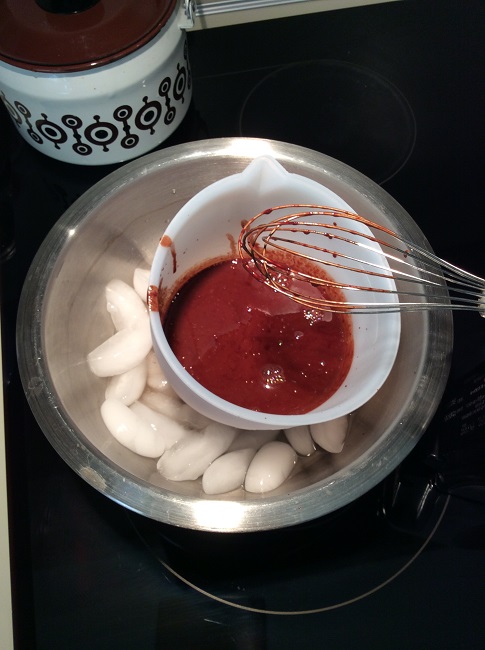
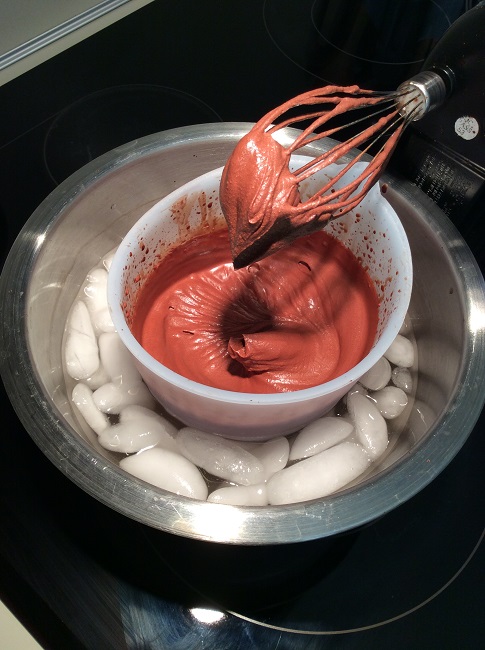
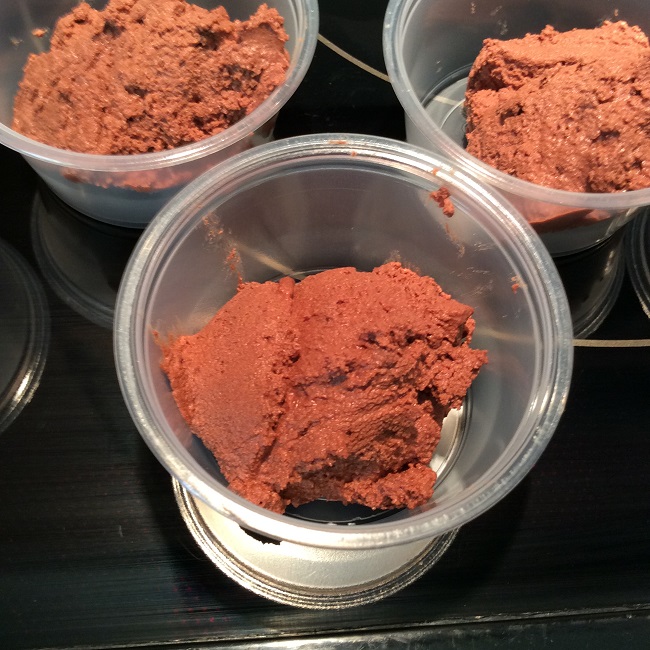
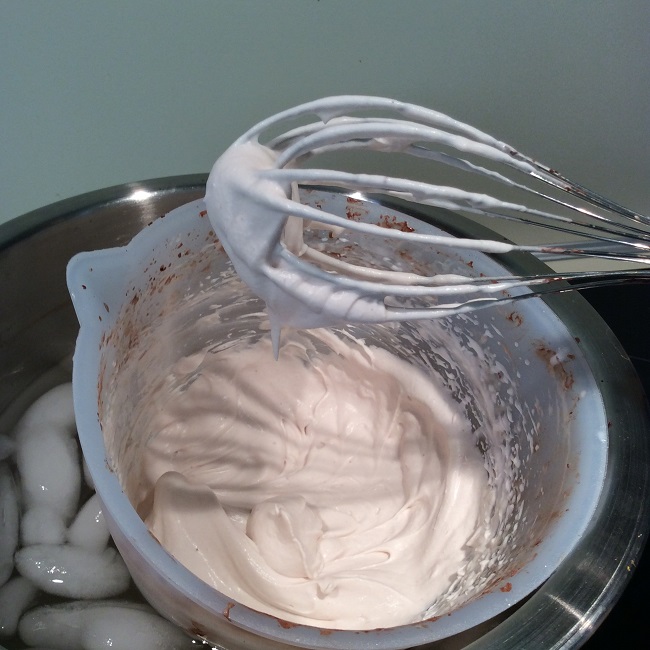
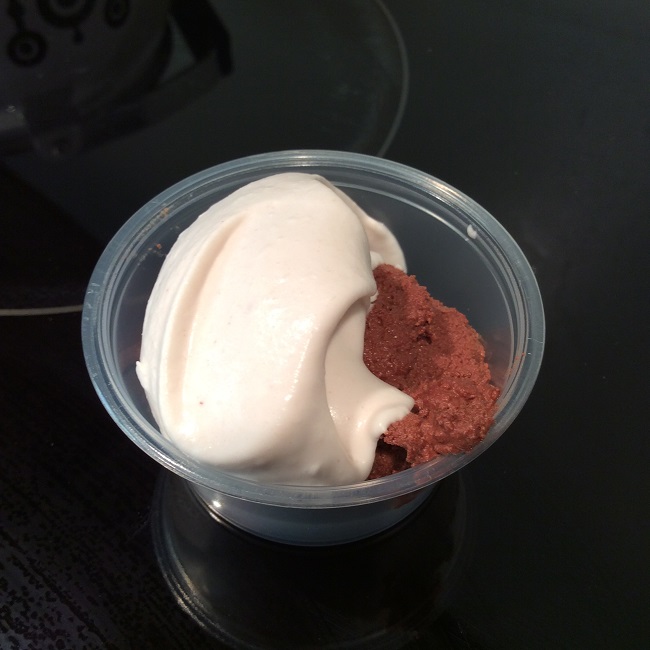
Have you made any “Magic Mousse” yet? There is nothing to it! It really is: just melt the chocolate while stirring in the water and dash of salt, then beat the melted mixture in a bowl placed in an ice bath for several minutes with a whisk attachment to your mixer and “Voila!” mousse appears! Check the Halloween post for details. You can do it! Use regular whipped cream if you have to, but the Coconut Cream is so yummy and dairy free!

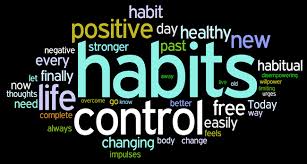
Our early sessions had to do with our mind-set. Everything starts with that ole’ central computer! All of what we do, really, is a habit, so we deconstructed what habits were and how they worked in order to understand how to “tweak” them in a more favorable direction for improFood-Talk-4-u-Joggingved health. Understanding that a habit “trigger” could be just walking out to get the newspaper each morning, which could easily be switched to jogging out and back to the mail box. Not a big deal but a little something in the right direction. With this cooler fall weather, it’s a cinch to jog out and back to the mailbox. Then, maybe, once the daily quick jog is second nature, longer walks or jogs could be added; maybe just around the house before returning inside to read the paper. Most of us are using the initial swish of water first thing each morning to be our trigger to drink 1-2 glasses of water. It’s a habit now, with no real thinking involved.

Something I am working on is finding the motivation to start a load laundry-ladyof laundry. True confession: I tend to let things pile up in that regard until I am faced with marathon loads. So, I am starting a load of laundry now as I make my path to the kitchen to start the coffee. No decision making. No conversation with myself on if I want to start a load. Just, “what am I washing today?” So far, this has been very successful for me to incorporate into my daily pattern. We agreed that the goal is not the “Goal” but the process of minute gradual improvements that are consistent.

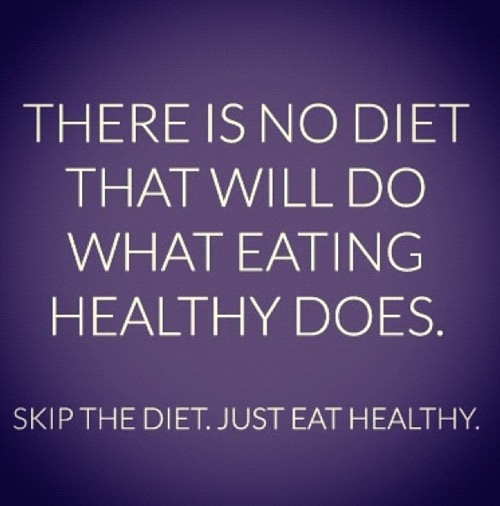
We began following Jonathan Bailor’s explanation of the Calorie Myth concept wherein counting calories is pretty pointless if that process is in exchange for looking at the quality and content of our food. Clearly, 300 calories of candy bar will have a different effect on the body than 300 calories of leafy green veggies or 300 calories of protein. He cited studies and individual cases where simply reducing the number of calories consumed each day—and possibly exercising more—was actually a recipe for failure at long-term weight loss and control. Disaster, really.

We studied what major nutrients are derived from food and how they interact with our body. Starchy carbohydrates and sugary foods not only cause great swings in blood sugar, but can actually feed the craving for more starches and sugars through the stimulation of the opiate receptors in our brains. Thus, starchy and sugary foods are not satisfying in the long term.eaT

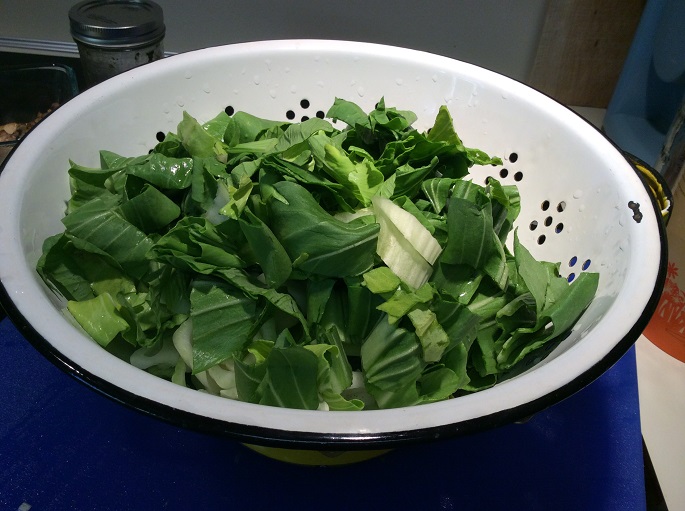
What is satisfying? What can we eat to “hold” us for hours? Proteins, whole food fats from avocado, coconut, olives, nuts/seeds, and non-starchy vegetables. Class participants shared how a veggie-filled omelet held them past their usual lunch hour! No toast, no bagel—just protein and veggies cooked in a pan with “good” fat—“happy butter” from grass fed cows, coconut oil, or olive oil.

We looked at what constitutes an anti-inflammatory diet. With virtually all diseases having roots in the inflammatory process, not contributing to inflammation through our food choices seems natural, basic, and what we were designed to do. Sugar is inflammatory. Grains are inflammatory. Grains—that includes wheat, barley, and rye to eliminate the gluten, and the other grains as well such as corn, soy, rice, and the legumes to eliminate the phytates which block absorption of minerals such as calcium, iron, magnesium, and others.

While not everyone has the natural response to gluten which should be a total “no-go,” some of us have evolved to tolerate some level of the “poison” in our bodies. Which are you? How do you know for sure? There certainly are blood tests which are delineated on the Celiac.org website, but try going totally gluten-free for 30-60 days. Not only will you lose weight because of not eating starches at every meal, but you will likely discover a more pain-free body. Those achy joints won’t be crying out for more pain meds. You belly will be happier. Less bloating; less gas. Then, at the end of 30-60 days, see how going back to gluten works for you………….

One of my sweetest moments recently was when a Designed for Health class participant pulled me aside to show off her remarkably slimmer body; her decidedly slimmer face; and best of all, her ability to once again wear a ring! Getting off gluten and onto an anti-inflammatory diet clearly took away the inflammation in her previously swollen finger joints. She was joyous to don that precious family heirloom on her finger as a testament to how much better she was feeling!

One night in class, we changed the old IN-SANE food pyramid to create a SANE plateful of food: Food-Talk-4-U-Chart-R

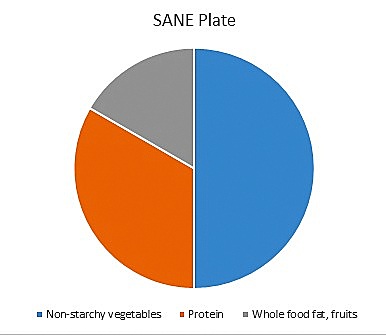
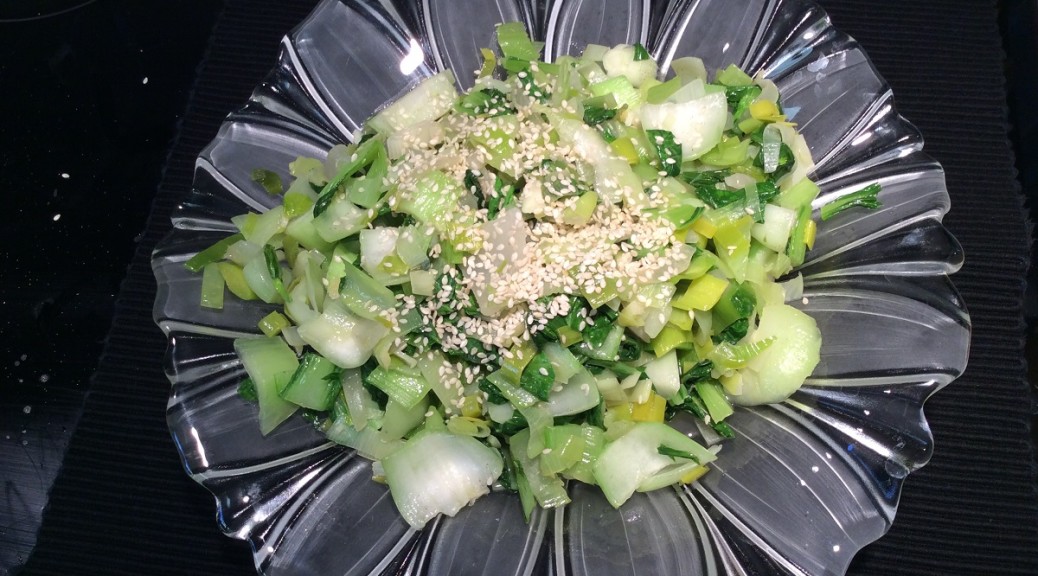
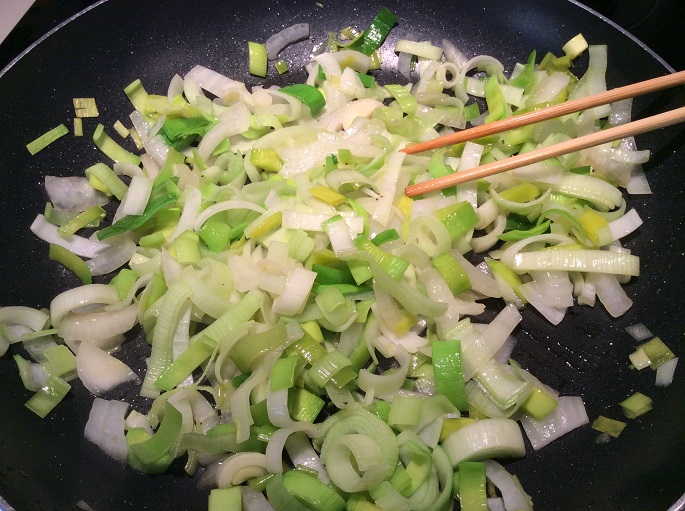
We then started sharing how we were doing this. Recipes started flying around the room! Norman has much success grilling not only his meats but his vegetables—all coated with olive oil—even beets! Ellen described her carrot/beet/parsnip fritters. Someone else offered her recipe for chocolate pudding: ¼ cup cocoa, 1 avocado, 3 Medjool dates, ¼ cup coconut/almond milk all whipped up in a blender or food processor.

Food-Talk-4-U-Colander-R
Raw ingredients

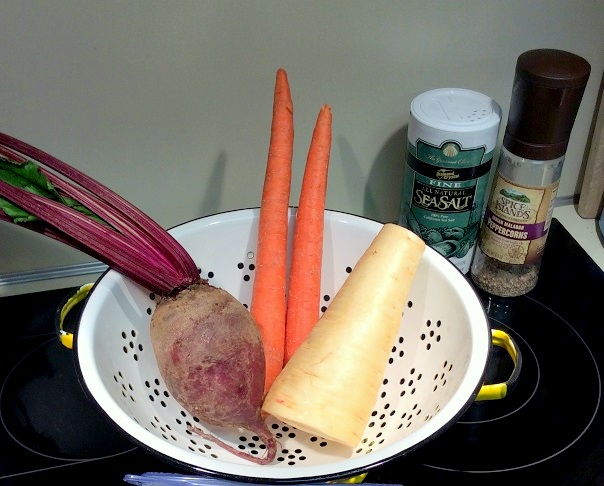
Speaking of beets….with much fear and trepidation, I bought my first EVER fresh, raw beets to use in fixing Ellen’s fritters. My childhood exposure to canned, diced beets used to stretch left-over stew into something called “Red Flannel Hash” had left me permanently traumatized! It would be hard to appreciate what it took for me to “man up” right there in the green goods isle at Harris Teeter to look at, touch, and put three fresh beets with long stems and admittedly beautiful leaves into my basket! But with Ellen and Norman’s words ringing in my ears, I did it!

We were leaving the class the last night and Ellen was trying to remember all of the ingredients to her fritters, and I added some onion as well, so here’s our recipe”:

Carrot, Beet, Parsnip Fritters

Put ingredients in mixing bowl

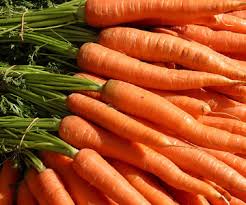
2 carrots- peeled and grated

1 parsnip- peeled and grated

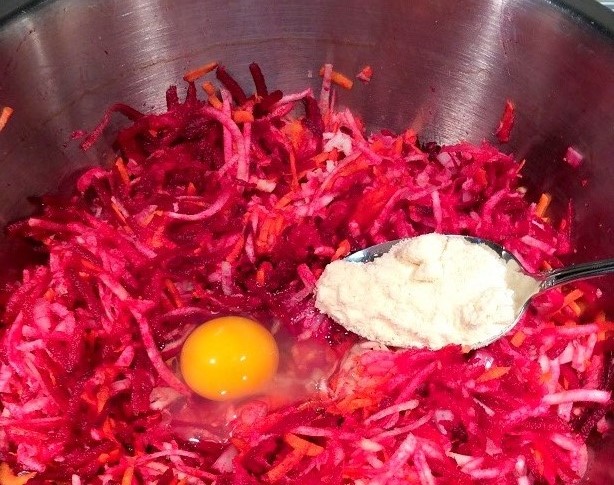
1 beet- peeled and grated

¼ of a large onion- grated

1-2 eggs

1-2 large cooking/serving spoons of coconut flour

Salt and Pepper to taste

Method

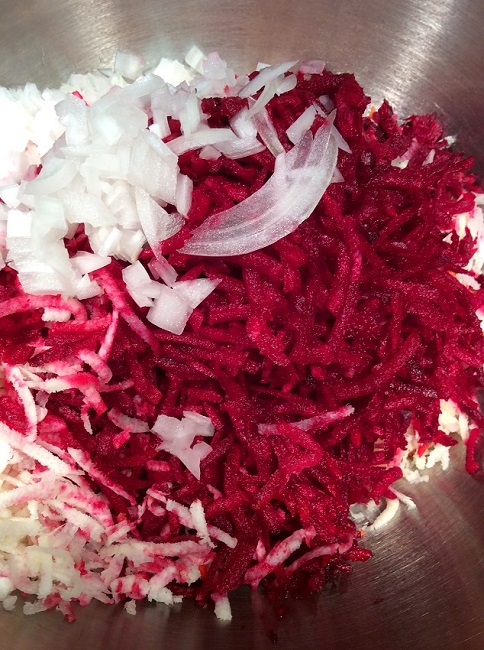
Place all of the grated vegetables into a bowl.

Toss/mix veggies

Mixing up veggies
Mixing up veggies

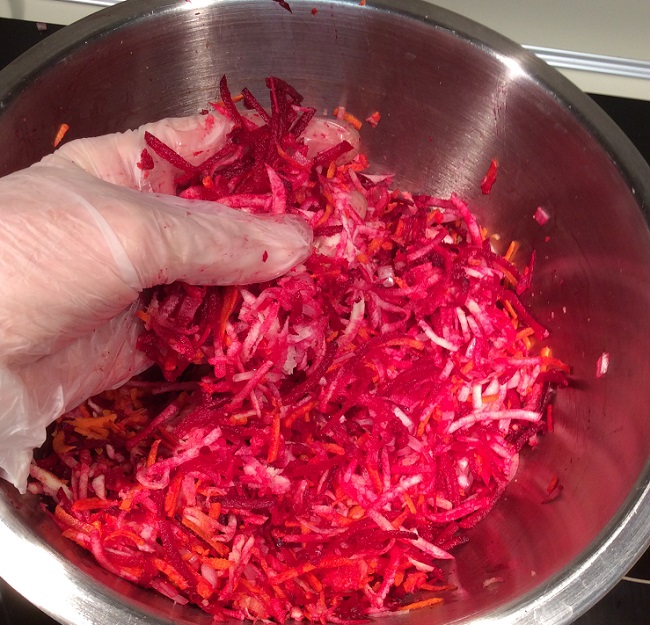
Add first egg and first large spoonful of coconut flour along with salt and pepper. Combine to incorporate all ingredients. If your mixture looks and feels like it needs more “glue” to stick together into patties, then add the additional egg and coconut flour. I did because the beet and parsnip seemed to be large.

Food-Talk-4-U-egg-flour-R
Adding in the egg and flour

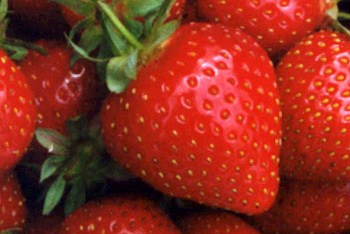
Here’s the tricky part. I formed the patties by hand, squeezing a little extra as Ellen advised, but they still seemed a bit loose. Next time, I will be tempted to use a hamburger press. Just be aware that there will be beautiful red juice dripping out when squeezing and forming these patties, so have a juice catcher handy or squeeze over the sink. Amazing though. As beautiful and rosy red as the beet juice is, it never stained my counter tops! I’ve had strawberries stain my counter and I was prepared to have quite a time cleaning up, but there were no problems! Beets! My new friends!

Saute
Saute

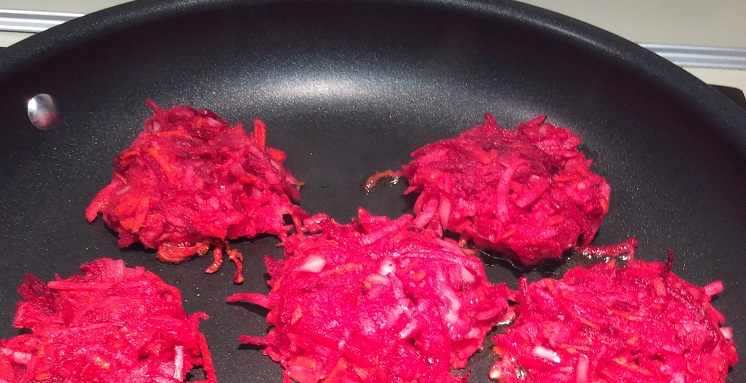
Anyway, form the patties and place in a hot skillet with olive oil and fry a few minutes on each side.

In the meantime, slice up the beet tops and sauté in olive oil and season with a bit of crushed red pepper and sea salt.

Beet tops cooking
Beet tops cooking

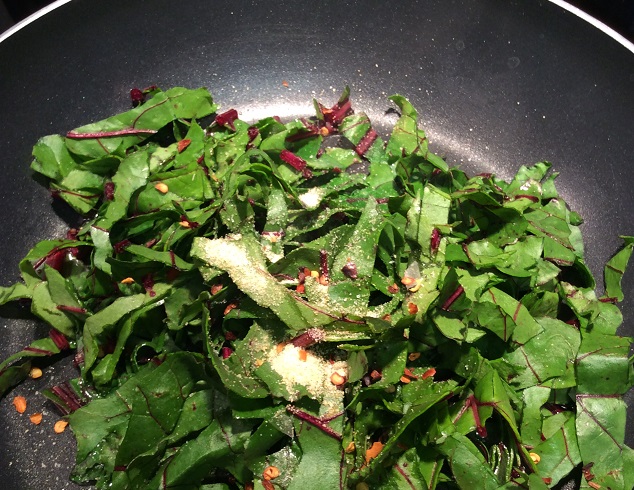
When everything is done, you will have a beautiful serving plate full of color and nutrition! I was absolutely amazed at the mild yet wonderful flavor of the beet tops! And the fritters were such a treat.

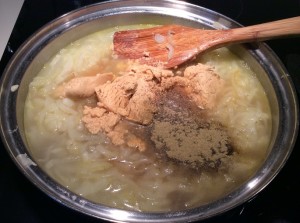
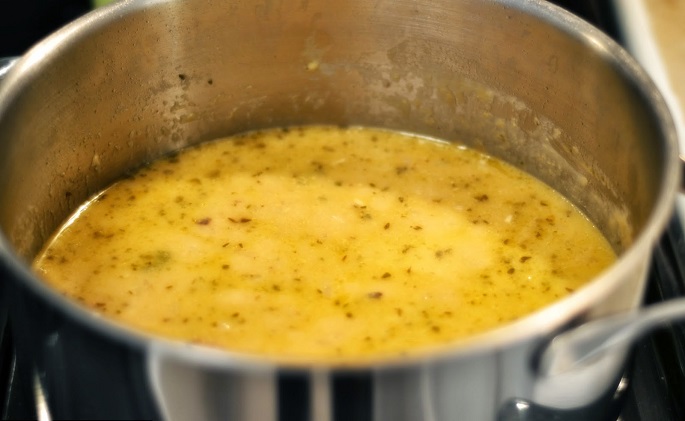
This recipe ended up making a lot of fritters! I enjoyed them as-is as leftovers, but one thing I really loved was adding some of the fritters (or the crumbly parts that didn’t want to stick together enough) to my chicken soup. Turns out I was working on gradually eating a fresh “vat” of rich chicken bone broth soup that I have posted on before. By adding the beet fritters, not only did I add even more nutrition to my soup, but I instantly turned it into Borscht (Russian for beet soup)! What color! What flavor!

Finished product!
Finished product!

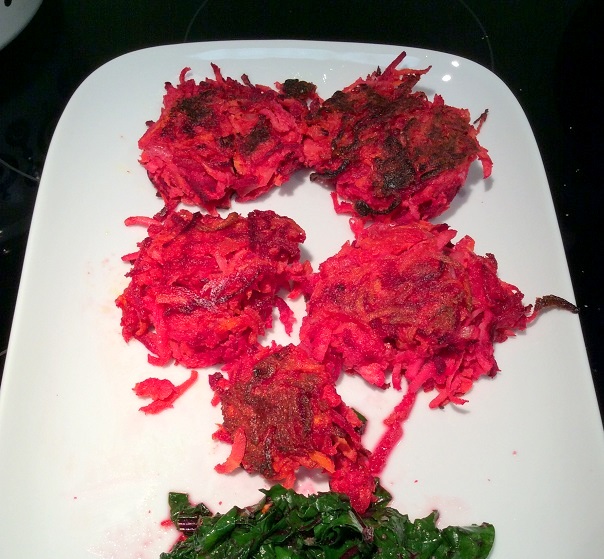
Beets are not just red. They are more like a deep raspberry red. What a great color! Now I have a new, powerhouse vegetable to love!

Until next time when I’ll share a great resource for kid-friendly recipes that are “Designed for Health” and two versions of gluten-free waffles. Just in time for a chilly morning!

Deidre

Can you say “Abracadabra”?

At the conclusion of the seventh and last session of my Designed for Health series, I was able to share with the participants a little magic secret: Two (or three) Ingredient Chocolate Mousse!

No, not this kind of moose!

With the Halloween season upon us, it’s only fitting to add some magic to the scene. Knowing that chocolate is a very allowable whole food fat source, this is a tasty, satisfying, and potentially elegant way to enjoy all of the goodness that chocolate can impart. The best part, this is so rich that one recipe will go a long way—I seriously wanted to use demitasse spoons to serve this, but I didn’t have any.

Anyway, there are a few versions of this floating around cyberspace, but this one does it for me and proved to be a real crowd-pleaser. Follow me as we journey through the land of Magic Mousse!

Recipe for Magic Mousse

4 oz. dark chocolate

3 oz. water **

Pinch of salt

Recipe for Magic Whipped Topping

Coconut cream from one can full fat coconut milk

Vanilla or almond extract

½ tsp. sugar- optional

Method

While higher concentrations of cocoa are desirable– because a big hit of sweetness is not the goal of eating chocolate that is good for you as opposed food-talk-4-u-green-blacks-chocolate-Rto sugary concoctions disguised as chocolate that are not good for you—I settled on a bar that’s 60% cocoa and is also flavored with mint. This is a good level of cocoa especially for palate’s not accustomed to higher concentrations.

I actually doubled the recipe for the mousse, so these chocolate pictures reflect double ingredients. Place the chocolate and water in a sauce pan and slowly melt, stirring with a whisk. Being someone who does not waste a drop of chocolate, I used the whisk

Melting chocolate
Melting chocolate

attachment from the electric beater I will use in a few moments.

**Note: the fluid amount of 3 ounces could be a combination of 2 oz. water and 1 oz. of spirits! I have used brandy in the past, and the results are superb!

food-talk-4-u-melted-chocolate-R
Melted chocolate

Once the chocolate is melted and the fluid incorporated, remove from the heat. Transfer the melted chocolate mixture into a small bowl and place that bowl in an ice bath (ice cubes and water).

food-talk-4-u-2-ice-bath-R
Chocolate in ice water

I am blessed to own these flexible silicone bowls (thank you Pampered Chef!) and the flexibility really comes in handy here. I pinch the bowl top together during the first few minutes of whipping to avoid chocolate spray going everywhere! What you do here is beat, beat, beat….

This double recipe took me every bit of 12 minutes! I remember the single recipe taking over five minutes. But this is where the MAGIC is! You think nothing is ever going to happen. You check. Nope. You check again. Nope. Then you think you noticed a slight change in the texture…was it real? Then, BLAM! It’s mousse! It can actually be easy to over-beat this and get something much firmer than mouse– which would require re-heating and re-beating. My mousse has turned out a little on the firmer side, but it is still nice!

food-talk-4-u-turns-to-moose-RSo now, you dish this Magic Mousse into the desired serving dishes. I was taking this batch to class, so I used 2 ounce condiment containers with snap lids, but at home I would use 2 ounce soufflé cups. For extra fanciness, one could use a pastry bag and prettily pipe the mousse into the cups!

food-talk-4-u-4-cups-with-moose-R
Moose

For the Magic Whipped Topping, chill the can of full fat coconut milk for 2 hours in the fridge or 30 minutes in the freezer so when you open the can, you are greeted with beautiful, white coconut cream.

Unwhipped-coconut-cream-in-can-R

Carefully spoon the coconut cream into (the same) small bowl—again, I just do not want to waste a drop of the chocolate, so if there is left-over chocolate on the whip or in the bowl—fine by me! Save the rest of the coconut milk for a smoothie, a gravy, or cook in some rice for added lusciousness.

Whipped cream in ice bath

With the coconut cream bowl in the ice bath, whip, whip, whip… when things start looking like whipped cream, add the vanilla or almond extract and dab of sugar, if desired, and keep beating away until it looks like this:

Whipped cream
Whipped cream

Then put a dollop of the whipped cream on the mouse, and voila!

food-talk-4-u-final-product-R


You have yourself an amazing creation that looks and tastes like you spent hours in the kitchen— but that can be our little secret!

Seriously, this is rich! I prefer to savor this using a tiny spoon we used to feed our babies, so I am definitely in the market for demitasse spoons now!

My next blog will be a summary of what was covered during our Designed for Health Series and will also include some recipes the class participants shared as they are eating foods that are naturally healthful.

Happy Halloween and enjoy some MAGIC!

Deidre


The Cycle of Stuff

29 April Pretty platesI never thought I would really get weighed down by stuff. I am not a collector. Collecting figurines or a pretty series of don’t-eat-on-me plates just never appealed; maybe because, at heart, I detest dusting. I have learned through the moving process, though, we generally saved either the wrong stuff or, mostly, too much stuff.

Having moved into our home some 34 years ago, raising two kids wonderful children, starting and pioneering a video production company in Eastern North Carolina, returning to college for nursing, teaching for 17 years, collecting partial household goods from both sides of our family, and retiring from video and teaching, we have gathered a lot of stuff.

Stuff can eat you alive. It creeps in around you, slowly but surely getting a choke hold around your neck.

Bags of white sugar are displayed in a supermarket in JakartaEating too much of highly processed foods, oils, and truck loads of sugar can be like accidentally gathering too much stuff, too. You just know you don’t feel as light and free as you used to. You are literally weighed down by what feels like sludge.

While I exercised a throw-out mentality at least twice a year with Clutter_KeyArtthe closet change of seasons, clearly I was not doing enough. Similarly, we all may be seen making brief spurts in “eating better,” only to return to gathering sludge.

As the participants in my Designed for Health class are learning, making small, sustainable changes in their eating and life styles is becoming a daily habit. Change is no good if done in a quick flourish with over-charged engines. Gradual and consistent. A couple glasses of water first thing in the morning. The “ah-ha” moment of enjoying a Keystone breakfast’s lasting energy until past lunch time– which begs to easily be repeated.

These are sustainablclean-eating-not-diete. And liberating. Lightening. Empowering.
Right now, I am in the throes of moving most of my “stuff” from one level of the house to another in preparation for installing new flooring throughout the main living level. Closets, too! With an installation date finally on the calendar, I have to take a back step on meaningful food blogs.

However, as I am seeing ways to sell and give away as much as nothingtowearpossible—believe me, if I am not going to realistically be using or wearing something, it will not be returning to its original location in our living space—I can see a distinct parallel to eating pure, whole food that is easily digestible. Like the excess stuff, body sludge will be gone with better, cleaner food choices!

You may find a little closet and drawer cleaning to be liberating, too! I have vowed to my children not to leave them with our house stuffed to the rafters with “stuff”. Really, there will be no museum in my name to document every breath and possession. I have done that kind of post-mortem “museum” clean outs twice, now, and I wouldn’t wish that task on anyone.

pureBalance-Wellness-Centre-Cold-Flu-Man-300x180Similarly, in taking better care of our bodies, we are lightening the load for our families as we maintain our health to enjoy their company, not to rob them of their energies taking care of the avoidable diseases we are headed for with unwise eating patterns.

So, whether you are just starting out, wishing you could afford good “stuff”, or you are just plum proud of the good “stuff” surrounding you, or you are over-loaded with “stuff” and wondering what to do with it all, I challenge you to understand what life is all about. At the end of our life, will we be wishing for more “stuff”? No. We will want more time with our loved ones.House-Cleaning-Tips

It’s a matter of choice. Everything is. And it’s a responsibility. Choose to lighten your load. Your physical load and your material load. It just feels so darn good to be free of physical sludge and environmental clutter. Freedom!

Deidre


Freedom Fighters

Have you considered that you are a Freedom Fighter? When talkinggrocery-store-tour-pic about improving health through better, informed, and mindful food choices, one’s mind could assume a negative approach is needed. Somewhere in the process of saying no sugar, no grains, no dairy, no processed foods, we are appearing to be some kind of a “no-no-Nannette”……Wonder why?

First of all, we have to re-frame our approach. Most of any effort is 90% mental, so let’s rid ourselves of all that negative baggage once and for all. It’s not about what we can’t have. It’s all about what we are freeing ourselves from. (Grammarians read: It is all about that food-talk-r-u-carbs-freedom-fighterfrom which we are freeing ourselves). We are re-establishing a positive, trusting mental connection to our bodies through a more mindful approach to feeding and respecting them. Our mental approach is spiriting us to being more proactive for the daily outcomes of how we handle the relationship we have with our bodies. Choosing gluten-free, grain-free, dairy-free, and preservative-free is like casting a vote for yourself!

Being freed from the tentacles of sugar means we are no longer no-sugar-wooden-brooch-2_originalslaves to that unquenchable desire for “more, more, more”. We are free from massive rises and falls of blood sugar. I am so happy to be freed from my emergency stash of nabs (that’s Southern for peanut butter crackers) in case I had yet another blood sugar crash— not knowing my rescue snack of carbs and low quality protein was ultimately feeding the problem.

man expressive portraitAnd who could complain about being freed from endless bloating and gas? Isn’t it fun to be able to predictably fit into our clothes— not having to try on several outfits in case it’s a “bad day”?

How about that happy belly? Would you exchange that for a plate of grain-based pasta and French bread? Really? And would you want to get back those achy body joints, too? Surely not! Or would you give up clear thinking in favor of whole grains and a return to foggy brain? See my post on this subject: Your Brain on Wheat.

Feeling better, enjoying stable blood sugars, getting that spring back in our steps should NEVER be regarded as restrictive.

We fight for freedoms, don’t we? We naturally want to free themall-walkers oppressed where ever we find them. Bad food choices, made through several decades of mis-information, are oppressing millions of people to a lesser quality of life and dooming them to crippling, life-robbing diseases.

Become a Freedom Fighter for yourself, first, and then for your family and friends. Spread the word; share contacts; refer others to this site; ask for better choices in grocery stores and restaurants; take a class and learn more.

Exercise your freedom with every bite!

It’s liberating!

Deidre

Get the Keystone Habit!

You know what a keystone is, right? It’s the V-shaped stone placed at the top of an arch. It holds the whole thing together. Remove the keystone and the arch, along with everything above it, it will collapse.  There are keystone habits we can do each day that will set us up for a great day of feeling balanced and ready to meet the tasks ahead of us and will keep our “engines” running for a smooth ride.

Keystone HabitIn our first session of a seven-week series of classes called “Designed for Health,” held at First Baptist Church in New Bern, North Carolina, we touched upon the mechanics of habits and how we might nudge those habits in a way that would still give us the desired reward (which is emotional), but would yield improved results in terms of body chemistry outcomes (as in increased nutritional value).

Dr. Tom O’Bryan states that there are three important things we must do for great, balanced health:

1) Drink 2 glasses of water each morning,

2) Eat an anti-inflammatory diet, and

3) Basically, don’t sweat the small stuff; enjoy the moment.

Understanding how habits work is critical to modifying them. First, there is a “trigger”: something that initiates the habit. A trigger could be a thought, emotion or circumstance, just about anything that leads us to the actual thing we do which is the “action.” With the action comes the “reward” for having done the action. Rewards are usually mental/emotional. We like the results. Understanding the results we want is key to modifying habits in order to maximize positive habit results for long-term health rather than a fleeting flash of a blood sugar high, which can have dire results metabolically.

NewHabitsCase in point: I have made swishing out my mouth first thing each morning to be a trigger to remind me to drink a glass of water. Drinking the water is the action. The reward is the knowledge that I am doing my body a favor, assisting it to function at an optimal level, and I have already done something positive for myself before my eyes have really opened. The second trigger is right before I leave the bathroom; I drink the second glass of water. Downing two glasses of water at once is too much for me, so I have found that drinking a glass of water at the beginning and end of my morning routine works best. There! I am on a roll now of doing positive things, so that leads me into the bedroom to take 30 seconds to make the bed! Wow! Two pluses and the day has hardly begun! Keystone Habits!

Once we enter the kitchen, there is another Keystone Habit that can pave the way for a day of even energy flow, maximum nutrition, and stable blood sugars. A great breakfast is the answer, but so many of us do not have the time to scramble a couple eggs in “happy butter” (from pastured and totally grass fed cows) served with a generous portion of veggies.

Some of us actually dash out the door, stop off at the nearest fast food chain for a highly-processed, gluten-filled, greasy biscuit filled with some kind of highly-processed, edible food-like substances, followed with a sugary drink or a sugar-laden latte to be eaten at in the car or first thing at work. Stomach in knots, blood sugar levels guaranteed to plummet later, and require to be “fixed” by a vending machine snack…. So goes the day. Sound familiar?

If you do not have the time to reheat last night’s protein and veggies, or to cook from scratch each morning, may I introduce you to a Smoothie? I’ve spoken of them before, but would like to share some different ideas today. Smoothies can actually be made the night before. It’s fun to concoct a blender-full with someone else. It could be a family affair; chances for family-wide buy-in to drinking a nutrient-dense smoothie skyrocket when everyone helps.

First of all, smoothies are not about being sweet. The goal is nutrient density. Fruit is just a part of it. If your goal is for the most stable blood sugar levels possible, fruit choices should remain in the berry category. Blueberries, blackberries, and raspberries should be at the top of the list because of their low glycemic load, followed by strawberries. In any case, fruit should be measured at about ½ cup per 8-ounce drink. The rest is a choice of seasonings (salt, vanilla extract and “sweet spices” as I call them), fluid (water, coconut milk, almond milk, coconut water, or strong green tea), a good fat (avocado, coconut oil, or flax oil), and a good protein (nuts or nut butters, whey protein, powdered egg whites, and various seeds that also provide a good fat profile: hemp, chia, and flax), and greens (baby spinach, kale, and chard). Believe me, those greens really do not change the flavor substantially, but they are vital to make this the Keystone/Powerhouse drink we want to hold us for hours and help our bodies function optimally.

Now here’s the thing. You put the fruit, seasonings, fluid, and fat in the blender and blitz it; then you add the protein and seeds; blitz some more. Pause. Enjoy the color! If blueberries were your choice, you’d have a great blue/purple color. Lovely! If red berries or cherries were your choice, wow! Gorgeous pinks and reds!

But, wait! There’s more! We haven’t added our nutrient-packed greens, yet! OK. You remember art class back in school? Red and Green makes……right………brown.

Now this is where my being the instructor of future medical students comes to play. I remember the speech now…. Class, what color is blood? Red. Very good. Now is blood in its natural form dry or wet? Wet. Excellent. So, from now on, when you see blood, it will be pointless to scream like someone who has never seen that red, wet fluid, won’t it? Get over it. Blood is red and wet. Done! No screaming!

Either you can handle the potentially gloomy transformation of your beautiful, colorful concoction into varying shades of brown or puce, or you can’t. If you can’t “man-up” about it, or if your car-pooling colleagues might grab for a barf bag, or if you just don’t want to start “that” conversation again at work, I have a solution!

Food-talk-4-u-Keystone-Habit-(1)R
Before

Let’s look at before and after pictures of today’s recipe of 2-3 Tbs. coconut cream, 1 cup coconut milk (unsweetened), enough water to make things a good consistency (about 1 cup or so), cinnamon, nutmeg, vanilla, salt, 2 coffee scoops each of hemp hearts, ground flax seeds, and chia seeds, ½ banana, and 1 cup of mixed berries and cherries. This recipe is for at least 4 servings.

Beautiful, isn’t it?

See that spinach on top; yet to be blended?

Food-talk-4-u-Keystone-Habit-(2)R
After

Just makes you want to drink it, right?

Yummmmm! Food-talk-4-u-Keystone-Habit-1 (3)-R

Well, I can handle it; maybe because I used to be a nurse, but many people can’t. So here is my answer to the problem! Behold, the Mason jar decorating trick!

This could be a great family project! I selected watermelon shades that would remind me of the previous look of my beverage, before the greens.

Food-talk-4-u-Keystone-Habit-1 (4)RFirst thing you do is clean the surfaces to be painted with alcohol Food-talk-4-u-Keystone-Habit-1 (5)R

Then you apply the first coat, making sure to keep any painted area well away from the drinking area- at least ¾ of an inch.

Food-talk-4-u-Keystone-Habit-1 (6)R
First coat applied

Wait one hour for the first coat to dry, then apply the second coat.

With second coat
With second coat

Wait another hour before painting in the watermelon seeds.

Food-talk-4-u-Keystone-Habit-1 (8)R
Finished!

Once your creation is totally dried, put the pieces in a cold oven. Shut the door. Turn oven to 350 degrees. When the oven has come up to temp, set the timer for 30 minutes. At the end of 30 minutes, turn the oven off and WAIT. Wait until the oven has thoroughly cooled down. I did this one evening and just waited until morning to take the jars and lids out. DO NOT open the oven to peek at any time because that could crack the finish. Once completed, the objects are dishwasher safe.

Food-talk-4-u-Keystone-Habit-1 (9)RSo, enjoy your smoothie! Whether it turns out to be a green monster (I like those, too!) or something that’s perfectly puce, you can have fun while enjoying your nutrient dense drink and get the reward of knowing you are doing something really good for your health and well-being that will set you up for smooth running all day long! Keystone Habit!

Hope arts and crafts time is fun for you and yours-

Deidre

Bok Choy – Changing Up the Veggies

Kale. Kale. Kale. Spinach. Spinach. Spinach. It’s too early in the season for collards. I tried the cabbage collards this summer, but they just didn’t grab me. Maybe my taste buds are seasonal and were looking for that fall collard taste; whatever it was, it was a no-go for me. What to cook?

Our daughter kept mentioning cooking with leeks in a stir fry, so when looking at the greens in the veggie department the other day, I decided to grab a leek and a bundle of three baby bok choy that would go along with some onion for a creative stir fry. The left-overs rewarded me for several days, too, still maintaining their freshness.

Behold—the Sesame, Leek, and Bok Choy Stir Fry

INGREDIENTS

1 Leek

¼ large onion

1 Bundle of Baby Bok Choy with three bunches

½ inch fresh ginger, peeled and minced

2 cloves garlic, minced

2 Tbs. Extra Virgin Olive Oil

2 Tbs. Sesame Oil or Toasted Sesame Oil

1-2 tsp. sesame seeds

METHOD

1. Prepare the leek by slicing in half lengthwise and holding each half under water, fanning the leaves to remove any grit. I sometimes remove the outer leaves to hand wash each one; it is not fun to suddenly find an unexpected crunch while chewing delicious leeks! Trust me; I know!

Bok Choy
Bok Choy

2. Then slice the leeks across the grain, resulting in little half rounds.

3. Slice the ¼ large onion to give a similar shape as the leek slices.

4. Carefully wash the Baby Bok Choy and slice across to give a similar shape to the other veggies

Bok Choy and onion
Bok Choy and onion

5. Put olive oil in the sauté pan and add onions and leeks and cook over medium heat.

6. While onions and leeks start cooking, mince the garlic and the ginger

Minced garlic and ginger

7. Continue stirring the cooking veggies occasionally until the onions start to become translucent

Cooking onions and leeks with chopsticks

Cooking onions and leeks with chopsticks

8. Add the drained bok choy and continue stirring occasionally. As the bok choy starts to wilt and become a brilliant dark green, add the Sesame Oil

Toasted Sesame Oil

Toasted Sesame Oil

9. Also add the minced garlic and ginger

10. When all ingredients have been combined and are fragrant, serve and garnish with Sesame Seeds.


Oil, garlic, ginger in veggies

Cashew Gravy

I feel as if I have sort of dropped the ball with the Detox, Plan, Moves, and Life Series. Starting a major project on the cusp of vacations may not have been the wisest approach. Hopefully, you have been able to garner enough “ammunition” to take strides into more healthful eating habits and patterns even while on vacation! I Food-Talk-4-U-Cashew-Gravy-6-R-vacationam trying to address at least two of these basic topics in each current post.

I am in the midst of planning out the scope-of-course and lesson plans for my Designed for Health Classes in New Bern, North Carolina. Classes will be held at the First Baptist Church from 6-7 pm on Wednesday evenings starting September 10th and will continue for 7 weeks. If you are interested in attending, please call the church office at 252-638-5691 to reserve both your slot and a copy of the book we will be using for the class. The class is open to anyone in the community who would like to attend. If you would like more information, please leave a comment here or email me at foodtalk4you@gmail.com

Food-Talk-4-U-Cashew-Gravy-6-R-brewing-coffeeWell, my coffee brewing time is really getting busy! While waiting for the java to brew, I am working on planks, squats, and arm circles! Remember when I mentioned how much easier it is to slip a new habit into sharing a time slot already committed to something else? Well, apparently there is a name for that! According to James Clear, it’s called “habit stacking.” Who knew? Makes sense to me.

We’ve all done this when parking farther out from the store so we can get a bit more walking in. Only takes a minute longer, but the leg stretch is easily acquired without special scheduling. Then when it’s time to walk out to the mail box, we jog instead…maybe we even jog around the house one time. Waiting for water to boil? Do some slow motion squats or some TTapp-inspired arm motions as described in previous posts. Stack a good habit on top of some period of time that is “already there” so-to-speak. Try it! Let me know what you do to “habit stack.”

There are two approaches to being gluten-free. You can replace starchy baked goods with gluten-free versions. That’s fine and good sometimes. There are days when a breakfast just needs some toast to sop up that yummy egg yolk! However, incorporating the idea of nutrient density into our meal plans usually eliminates the additional carbohydrates found in baked goods. Therefore, the second approach should include, perhaps, a vegetable or a good fat source such as some avocado. Again, I am not saying no gluten-free breads ever again, I am saying that for at least 80% of the time we should be aiming in favor of nutrient density.

Therefore, I would like to revisit Cashew Gravy; this time with pictures of my latest batch! I was grilling some burgers the other night and knew some gravy would really add some “Umami” to my meal. Umami is that extra “something” that makes this delicious, yummy, and delightful. So here’s the recipe:

Food-Talk-4-U-Cashew-Gravy-8-R
The ingredients you need

Food-Talk-4-U-Cashew-Gravy-1-R 
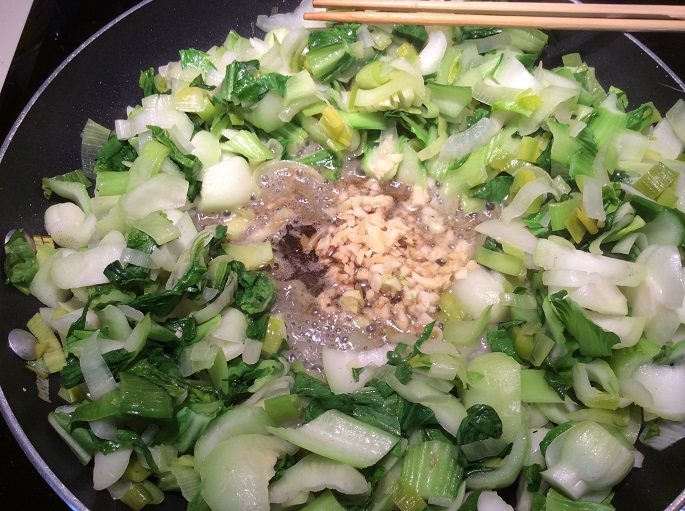
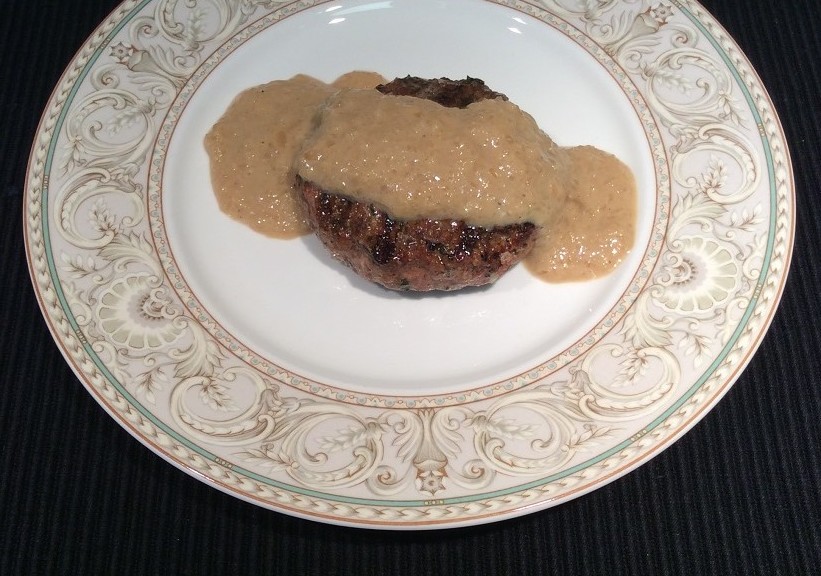
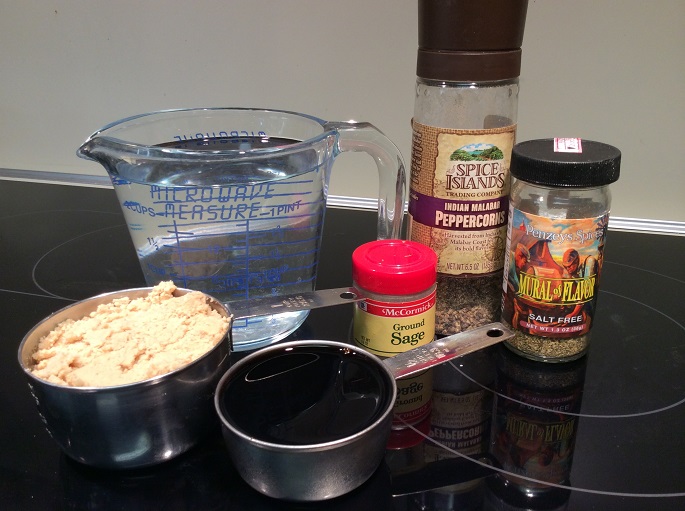
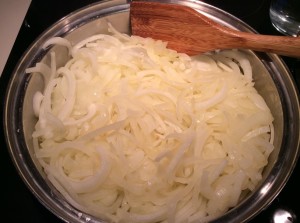
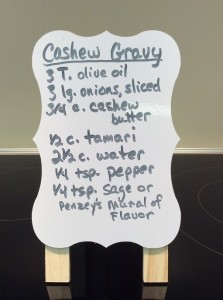
Slicing onions is no big deal, and a knife and cutting board are a snap to clean. Since I was going to use my food processor, which has four parts to clean for additional tasks, I chose to use it instead. After making the gravy, I sliced up more onion and then a bag of Brussels sprouts to prepare Sautéed Brussels Sprouts with Balsamic Vinegar to complete the meal.

So here are the onions after processing….

Food-Talk-4-U-Cashew-Gravy-3-R
Processed onions

You can purchase cashew butter already made, but I usually make my own by putting them into the food processor and processing them for a looooong time. Sure enough, a paste will form. If you are making your own, it will take a bit more than a cup of nuts to make a cup of nut butter. If there is extra, don’t worry. It will taste great on some gluten-free toast!

Food-Talk-4-U-Cashew-Gravy-4-R
Yummy cashews!

Then sauté the onions for a long time- probably 20 minutes- until they caramelize. Not much stirring is needed early on in the process, but as they become more cooked, more frequent attention is needed.

Food-Talk-4-U-Cashew-Gravy-5-R
Powdered cashews

Once the onions are starting to turn golden, add the water, cashew butter, tamari (wheat free), pepper, sage, or Mural of Flavor spice.

Food-Talk-4-U-Cashew-Gravy-6-R
Caramelizing the onions

After incorporating the ingredients and allowing them to cook a few minutes, process in about three batches in the food processor or blender, blitzing until smooth. Pour the now smooth gravy into a sauce pan to finish cooking a bit.

Enjoy on just about any kind of meat. It was great on my lamb burger; is awesome on beef, and can make poultry sing! This gravy also freezes very well!

Food-Talk-4-U-Cashew-Gravy-9.5-R
Creamy cashews!

Enjoy!
Deidre

Food-Talk-4-U-Cashew-Gravy-9-R
Mixing it altogether

Bring on the Fries!

Have you ever cooked a turnip? Not exactly your go-to tuber? Well, food-talk-4-u-turnipsme either! However, I have discovered a way to turn turnips and carrots into highly flavorful baked fries that are a real treat to eat! I don’t have many pictures to share with you on this, but pictures aren’t really necessary to master making these fun potato fry alternatives.

Parsnip Friesfood-talk-4-u-parsnips

Peel and cut about 4 parsnips into 3-4 inch long fry shapes and place in bowl

Melt 2 Tbs. of ghee and pour over fries

food-talk-4-u-parsnip-friesSprinkle ½ Tbs. of curry powder and salt and pepper to taste over the fries

Toss or mix the fries to coat evenly

Place coated fries in a single layer on a baking sheet lined with parchment paper

Bake in oven set at 350 degrees for about 15-17 minutes; stir fries around; continue baking for about 15 minutes more until golden and crispy.

Enjoy!

Spicy Carrot Friesfood-talk-4-u-carrots

Peel and cut about 5-6 carrots into 3-4 inch fries and place in a bowl
Drizzle enough olive oil over fries so that they are evenly coated after stirring them around

food-talk-4-u-spicy-carrot-friesSprinkle the following seasonings over the fries in amounts to taste:
Paprika, cayenne pepper, garlic powder, chili powder, salt and pepper

Stir seasoned fries to coat all sides of fries with seasonings

Place fries in a single layer on parchment lined baking sheet

Bake in oven set at 350 for about 15 minutes; stir fries around; continue baking for about 15 minutes more until crispy.

I usually do these at the same time and I still can’t decide which I prefer. It’s a fun addition to grilled meat. All you need is a salad to complete the meal and, voila, nutrient-dense, yummy, fun food!

Enjoy-

Deidre

The Bones Have It!

Talk about nutrient dense! What could be better than bone broth? food-talk-4-u-grandmother-cookingDo you know why? Yes, Mom gave us chicken broth when we were under the weather, but did you know that savory bone broth just might keep you out of “bad weather”?

Particularly in terms of osteoporosis? Being gluten and grain free enables our bodies to better absorb calcium and other minerals because there are no phytates blocking that process. (1) So, bring on rich bone broth as something just to drink everyday as many are doing, but also as a basis for some yummy soup.

chicken-shot-21Honestly, there are so many wonderful foods we can be eating every day, I have a hard time fitting them all in; but I do try to whip up a vat of sturdy bone broth at least once or twice a month. In the fall I use ox tails, but right now it’s chicken!

Right here, I have to make an addendum before going to the recipe below. Is it broth or is it stock? I have just finished ready several postings from about the web and rather than having things clarified, the issue is even murkier than before. So to avert a landslide of bad press, I am sharing a recipe that cooks meat-laden bones and flavor-enhancing vegetables for a while, removing the meat and returning bones for a lengthy simmer for the purpose of making a soup base. Call it what you will.

I have learned today of another way to do things by just using bones

Ox tail bones
Ox tail bones

for the sole purpose of making a perfectly clear ‘broth’ that may be even healthier. According to Summer Brock’s recent post, she parboils the bones-only broth for a few minutes and discards the water before the 24-48 hour boil and simmer in a new vat of water. This eliminates some of the foam junk that accumulates in the beginning that may be not that beneficial to consume. This method renders a very rich ‘broth’ that can be the base for some Pho or just used as a daily bone-boosting beverage.

Having said all that, I have adapted a recipe by Kelly Bejelly (in her blog A Girl Worth Saving) for Chicken and Dumplings by adding a couple ingredients, vastly extending the cooking time, and staging things differently because of the more beneficial cook time. When these bones are finished, the cartilage at the end of the bones has turned to jelly and the ends of the longer bones are practically falling off!

chicken-feet-1024x680Bones are the operand word here; bones, joints, necks, and –yes- chicken feet! OMG! You may say, but it’s true! I actually have run out of chicken feet for this batch, but they are easily found at a Piggly Wiggly grocery store. Buy a bag of chicken feet, use 3-4 and freeze the rest! This may be the part of the soup making process you need to hide from your family. We are not going to eat those poor feet, but they add so much gelatin and collagen which makes bone broth worth its weight in gold!

Chicken and Nut Dumpling Soup

To make the broth:

Chicken parts – This time, I used 4 leg/thigh quarters, 2 wings, back and rib bones (saved the breast meat for kabobs)

1 ½ – 2 tsp. of poultry seasoning

1 tsp. sea salt

1 tsp. freshly ground pepper

2 Tbs. gelatin dissolved and stirred into ½ cup water

2 carrots peeled and cut into large pieces

½ onion cut into large pieces

3 ribs of celery cut into large pieces

Your soup pot should look something like this:

Cover contents with water – it took 10 cups for me – and add about 2 Tbsp. of apple cider vinegar. The vinegar helps to break down the bones and to release their minerals.

food-talk-4-u-soup-simmeringBring to a gentle boil, reduce to a simmer, and forget about it for 3 hours. At this point, I use a slotted spoon to bring the meat/bones out into a bowl. Let the meat/bones cool, and remove most of the meat but return all bones and clumps of cartilage to the broth. Save the cooked chicken meat to finish the soup or to use for other purposes. The bones should continue to cook for a total of at least 12 hours. With my sensitive sense of smell, I am not a fan of over-night cooking, but if you are not bothered by cooking aromas in your sleep, go for it. I usually cook several hours one day, cool off the pot, and place it in the refrigerator until next days’ simmer.

Once the bones are falling apart, strain the broth using a colander or sieve and a large bowl or another soup pot. Discard the bones and the way-over-cooked veggies. You could stop here and just drink a cup – full of broth every day; many do. If you want to go on to soup, keep cooking!

To make the soup

Cut into your favorite soup-sized pieces:

2-3 carrots

½ onion

2-3 ribs of celery

Cut up and add as much of the cooked chicken meat as you like at this time, using the rest for other purposes such as chicken salad.
Add to pot of broth to simmer. Adjust seasonings to your taste.

While the veggies are cooking, prepare the Nut Dumplings as follows:

1/3 cup of broth, cooled

½ cup Tapioca flour

1 ½ cups of sliced or slivered almonds, preferably have been soaked and dehydrated to inactivate the phytates which will make the broth’s mineral richness more absorbable to the body.

½ tsp. sea salt

½ tsp. poultry seasoning

kneading_doughPlace the Tapioca flour, almonds, salt, and seasoning into a food processor or blender and process until the nuts are pretty much like flour. With the machine running, gradually add the cooled broth to the flour mixture until you have soft dough. Shape the dumplings to your preferred size by scooping out a spoonful of dough into your hands and gently rolling into balls. I like making really small ones, pinching off a bit of dough using an iced teaspoon, and dropping it into the pot.

Bring the soup to a low boil, and add shaped dumplings gradually. At this point, you could also add some quick-cooking vegetables as well: small broccoli florets, zucchini or summer squash. I also add a lot of fresh parsley leaves, chopped, at this time for added richness!

When veggies and dumplings are cooked, serve and garnish with added parsley if desired. Bon appetite!

Deidre

(1) The Paleo Solution, Robb Wolf, pg. 93

End of Detox But Not the End of Clean Eating

Let’s summarize what we are doing and where we are. We are creating and following The Plan of eating, learning how to do The Moves in exercise, and embracing The Life that will bring us renewed health with each meal and with each day’s activities. We are taking ownership of food-talk-4-u-child-cherries
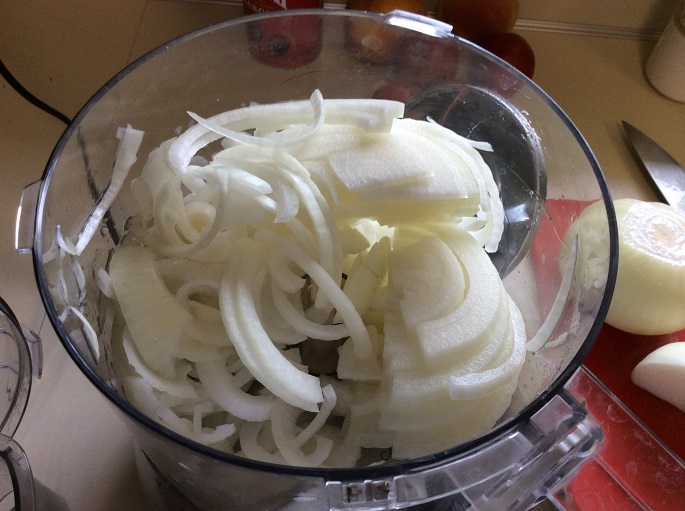
everything we put into our body, realizing that what we have been told in the past about nutrition (whole grain, low fat, high carb, count calories, eat less and exercise more) is probably where our troubles started in the first place.

For the first ten days of The Plan in the detox phase, we’ve ditched the sugar, dairy, gluten, grains, alcohol, and caffeine! Congrats if you were able to go all the way with this! I had a slip or two, but it’s okay; this is something I am doing for no one else but myself! I can live with it!

I truly hope you were able to decrease your dependence on sugar, and that living without constant bread and starches has opened up a whole new world of satisfyingfood-talk-4-u-brain-fog eating.

The point is how do you feel? How are your energy levels? Has the brain fog lifted? Has joint pain gone? Is your belly happy? Are you sleeping better? Have more bounce to your step? I hope so!

Now the detox has ended, clean eating has not! That should be part of your life plan anyway! What is needed now is perhaps a bit of liberality still within making nutrient dense food choices that will “do your body good.” We are always looking for ways to cram in as many nutrients (protein, good fats, and veggies) into all recipes.

Having wiped the slate clean and having gofood-talk-4-u-kerrygold-irish-butter
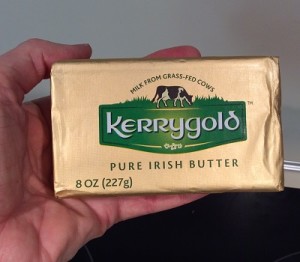
tten reacquainted with how your body functions without food pollution, you can try singular items every few days in order to assess how you react. Easy does it, one thing at a time. Make a small step towards dairy; see if you can tolerate ghee (clarified butter) without experiencing any gastric distress.

This ghee was given to me. I will probably have to order it online. Then use some pure, clean butter made solely from grass-fed cows. I use Kerrygold brand which is available from Harris Teeter. Nothing can add more lusciousnefood-talk-4-u-grass-fed-cows-Rss to lightly steamed broccoli than some real butter! Oh, my!

If you want to continue into the dairy world, a few days later, try some unsweetened low fat Greek yogurt. The low fat yogurt concept was explained to me this week; usually clean eating never shies away from good fats. Good fats include avocado, extra virgin olive oil, fat from grass-fed meat, dairy fats from grass-fed cows, nuts and seeds, and chocolate. Most low fat products just add sugar to keep that “bliss point” in thfood-talk-4-u-yogurte flavor palate. But non-fat plain Greek yogurt has way more protein in it than full fat yogurt so – Yay! Bring it on! I currently am using regularly available store-bought Greek yogurt; if I had access to yogurt from pasture-fed cows, I’d do it!

Here’s what I did with my yogurt yesterday. Is it a pudding? A cold cereal? Or, if slightly frozen, is it ice cream? I don’t know, but it is certainly helping me as a nighttime snack and could help others who do not feel like traditional breakfast food.

In Advance –

food-talk-4-u-chiaUsually I do this each night after cleaning up dinner’s dishes or right before bed – presoak the chia seeds and flax seeds in water. Presoaking these seeds at least a few hours allows them to swell up as they absorb the water. These seeds are a great source of fiber, but to benefit by them, you want the water absorption to happen before they get into you, lest the ‘helpers’ actually cause constipation by absorbing water in your intestines! These seeds also are wonderful sources of good omega-3 fatty acids and ramp up the protein count whenever you use them. I prepare chia and flax seeds daily not knowing exactly where they will end up- usually a smoothie, as a thickener to sauces, but sometimes like this in a Berry Blend!food-talk-4-u-berry-chia-2

Also a few minutes in advance while you are getting the ingredients together- gradually stir the gelatin into about a half cup of cold water for one minute. If you rush this, trust me, you will end up with weird shapes of hard ‘stuff’ in your final food product! Gross!

Creamy Berry and Seed Blend

Place the following ingredients in a food processor or blender:

2 – 5+ ounce containers of non-fat Greek yogurt

food-talk-4-u-strawberry1 cup fresh or frozen strawberries

1 cup fresh or frozen blueberries

Vanilla extract to taste

1 coffee scoop EACH of chia seeds and flax seeds, whole or ground, soaked in 1 cup water

2 Tablespoons of gelatin stirred into ½ cup water for one minute
Blend, blend, blend.

Transfer to a container and pop into the refrigerator for a few hours.

That’s it! Today’s breakfast consisted of some reheated leftover okra, a bit of leftover zoodles and shrimp cooked infood-talk-4-u-bbq-sauce pesto, and for dessert, a bowl of this Berry Blend. Yum!

Next post will be about other high-nutrition options along with a great barbeque sauce recipe that has no sugar in it and is bursting with flavor!

Please subscribe to this blog so you can join our growing community of people who are learning how to get better health one meal at a time. By subscribing, you will receive an email notice alerting you to each new post. Your address is never shared with others. Your comments and questions are always appreciated. For more lengthy or personal comments, you may reach me at foodtalk4you@gmail.com.

Deidre