Category Archives: Blogging for good health!

Peaches Gone Wild!!

Tired of swooning over the covers of Southern Living and other karen-tran-soolip-wedding-pink-crystal-brooch-centerpiecemagazines just wishing you could join the rest of the world in cool summertime deliciousness?  Except, you have wisely chosen to no longer eat gluten; and since giving up sugar, you really do not want to get that addiction started again.  So, you stand in the line at the checkout counter at the grocery store and you salivate at the magazine covers looking pitiful and deprived.  It could be embarrassing:

“Clean up at register 5; customer weeping buckets and drooling on the floor!”

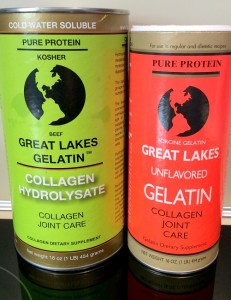
I regularly prepare what I like to call “Fruit with Benefits” which is a concoction of already healthful berries, sometimes an apple or a pear, and varying amounts of Great Lakes gelatin and ground flax seed.  This gives me all the goodies of the berries PLUS protein, PLUS more fiber, PLUS Omega-3 fatty acids!  A small scoop of this satisfying dessert and you are a happy camper.

Fruit-SaladSince developing my “Fruit with Benefits” skills, I am always looking for ways to squeeze in some more nutrition.  Therefore, when presented with this mouth-watering spread in the magazine about icebox pies, I began to wonder…and as the imaginative and creative juices flowed, an idea formed… Well, I think I’ve done it!

There is a bit of sugar, just over ½ cup total, for the entire pie but that’s compared to way over 1 cup of sugar in the original recipe that uses store bought peach preserves which have who knows how much sugar?!

The original recipe called for folding gobs of whipped cream in the filling, but I chose to not even convert that by using more whipped coconut cream.  Enough is enough.

I have tried lots of gluten free pie crust recipes, but this one is the best.  One of the things I especially liked were the occasional whole flax seeds that had escaped the food processor blade; it not only tasted great, but it looked great, too!

So, do not despair my lovelies, this will be a great treat, not sweet enough to initiate binge carb fests, but smooth and creamy and peachy enough to make you smile!

This recipe has plenty of bone and joint health benefits of gelatin and boosts in protein from not only the gelatin and eggs but from the flax seed that also gives omega-3 fatty acids! Win! Win! Win!

Prepare the crust first so it can completely cool before adding the contents.Pie-dough

Put the following ingredients into a food processor and pulse until well-combined:

1/2 cup whole flax seeds

1 cup almond flour

1/4 cup sugarpastured-cow

1 tsp. Kosher salt

6 Tbsp. butter from pastured cows, melted- (I use the Kerrygold brand)

Pat dough into a smooth ball and press into a 9-inch, lightly- greased pie plate. Evenly distribute the dough, pressing it up the sides.

Create an edge.  I just pressed a fork into mine.Food-Talk-4-u-finished-pie-crust

Bake 6-10 minutes at 325 degrees until golden. Remove from oven and cool.

Food-Talk-4-U-Jam-PrepPrepare fresh “jam” by putting the following ingredients into a sauté pan and cook on medium until it comes to a boil, check for sweetness, and take off heat:

1 Tbs. coconut oil

2 peeled and finely-diced peachesCooking-Jam

1 Tbs. lemon juice

1 Tbs. sugar

1 Tbs. gelatin that is wisked together with 1/4 cup boiling water: NO lumps!

Prepare the filling as follows:

Pie-filling-before-preservesFill a 3 1/2 quart sauce pan with water and bring to a boil over medium-high heat. Reduce heat to medium to keep at a simmer.

Using an electric mixer with the whisk attachment, whisk the following together in a 2 1/2 quart glass bowl:

3 large eggs

1/3 cup sugar

Place bowl over simmering water and cook while whisPie-filling-after-preservesking constantly five to six minutes or until mixture becomes slightly thick and sugar dissolves. Remove from heat and the simmering water.

Place 4 tsp. gelatin in a small bowl and pour 1/4 cup boiling water over it, whisking constantly until gelatin is completely dissolved.

Using the handheld electric mixer, whisk the egg mixture on high speed for 8-10 minutes until ribbons form on surface of mixture when beater is lifted.

Food-Talk-4-u-assembled-pieAdd gelatin mixture and continue whisking one more minute.

Fold in the peach “jam” and a pinch of kosher salt.

Spoon filling into cooled pie crust and arrange thin sliFood-Talk-4-u-Pie-bite-with-forkces of 2 medium peeled peaches over the filling. Cover with plastic wrap and freeze 2 hours.

Serve slices of pie with a dollop of whipped coconut cream sweetened with a pinch of sugar and a splash of vanilla!

Going, going, gone!

Just peachy!!

Deidre


Dairy-Free, Gluten-Free, Cheesy Kale Chips Demystified

Tired of being left out of the snack food world if you are eating clean? Surely there is more out there than carrot and celery sticks! Here are a couple of “secret ingredients” that can transform your snacking world AND give you a yummy, non-dairy, gluten-free, crunchy snack that’s actually good for you!

What is it about warm weather that makes us turn to “snack food” more? Somehow, finger food is just more attractive and fun – easy even – in the summer. Sliced meats, assorted cut up tropical fruits, veggies for dipping, and…chips…

Seems like this picture needs ‘tweaking’ to make things wholesome.

I mean, read the ingredient list on your favorite chips. Even if they were to limit things to organically raised potatoes and sea salt, they would be fried in some kind of “Franken-oil”… and who needs the starch, anyway?

How about kale chips? Very crunchy! A non-starchy vegetable, too! But they are fairly expensive to buy and they are usually squashed and pretty crumbled by the time I get them…

What if you could easily make them AND you can enjoy a real cheesy-ness with the addition of a couple of key, “secret” ingredients often used in making non-dairy options — all of which will address that deep longing for cheese that many of us have been unable to satisfy short of the real stuff.

Dairy never fails to literally ‘back fire’ on me—pun intended!
Enter freshly soaked cashews and nutritional yeast (not to be confused with yeast used in breads).

Follow the journey as I walk you through creating this satisfying, affordable, savory, and guilt-free snack!

Gluten-free, Dairy-free, Savory and Cheesy Kale Chips

Begin by soaking ¾ cup (preferably raw, unprocessed) cashews in water for at least one hour. That’s just enough time to do the dishes, clean the kitchen counters, and get the rest of the ingredients in order!

Food-Talk-4-You-14-R
Food-Talk-4-You-1-RAssemble the following ingredients and put into a food processor:

1 large clove of garlic, peeled and sliced

2 Tbs. coconut aminos (a gluten-free version of soy sauce or you can use wheat-free tamari)

2 Tbs. avocado oil or coconut oil

1/3 cup nutritional yeast

1 lemon, juiced

1/8 tsp. smoked paprika

1/8 tsp. salt

Prepare kale leaves as follows:Food-Talk-4-You-4-R

After carefully rinsing the leaves off under running water, strip the leaf portion off of the stem by holding the cut end of the stem in one hand and quickly pull leaf portion through clenched fingers of the other hand

Food-Talk-4-You-2-R


Lay out the leaf portion on a cutting board and zip out any of the remaining of the smaller stem veins that stand out. That’s not every small vein, just the ones that stand out. If you don’t, they will just dry out to be like little hard stems that are not very chewable.

Food-Talk-4-You-3-R
Stripped kale leaf

Your final product should look something like this:

Then, using my trusty blueberry and nut stained but just washed (!) old bath towel, I rolled the prepared greens up to make sure they were dry

Food-Talk-4-You-6-R
Dry kale in old bath towel

Line three baking sheets with parchment paper

Okay, we’re getting close now, so preheat oven to 180 degrees and make sure all 3 oven racks are spaced evenly

Drain the soaked cashews and add to the ingredients already in the food processor. Pulse the processor until a smooth paste is formed. Scrape the sides of the processor bowl to make sure all of the garlic and nuts get smoothed out.

Spread garlic mixture over kale

Select your favorite large “vat.”  Mine is the lid to my trusty cake carrier…best thing ever for things like this! Place enough kale leaves to cover the bottom of container, spoon the nut paste around over the leaves. Repeat layering until all leaves and batter have been placed in the container.

Now for the fun part! Using gloved hands (unless you just WANT to Food-Talk-4-You-8-Rsmell like smoked paprika!) gently massage the leaves along with the paste! That’s it! Massage away! This evenly distributes the flavoring and helps to break down the kale a bit. (A trick I learned from using raw kale in salads; really helps because kale is not tender like spinach)

Then evenly space leaves over the parchment-lined pans
Food-Talk-4-You-9-R
Put pans into the preheated 180 degree oven and set the timer for 1 hour. If you are not using a convection oven that evenly fans the heat throughout the oven box, then you will have to set the clock for 20 minute intervals so pans can be rotated from shelf to shelf over the course of the hour

Food-Talk-4-You-10-R
After 1 hour, pull pans out, turn leaves, and return to oven for up to 1 hour more (rotating again every 20 minutes if you do not have a convection oven)
You will know the kale chips are done when they are totally crisp when moved.Food-Talk-4-You-11-R

Now, you are ready to enjoy! These crunchy and savory darlings have saved me more than once from a slippery slope of unhealthy Food-Talk-4-You-12-Rsnacking. So much fun to eat AND a serving of greens!
Place cooled kale chips into an air tight container or zip bag. These are so good! They would be the hit to take to a party! And they are satisfying…in that you do not need to eat all of them in one sitting to feel satisfied!

Happy summer and be safe over the holidays as everyone seeks some kind of refreshing and regenerating retreat!

Deidre

Here’s a condensed recipe:

Gluten-free, Dairy-free, Savory and Cheesy Kale Chips

Soak ¾ cup (preferably raw, unprocessed) cashews in water for at least one hour.

Assemble the following ingredients and put into a food processor:

1 large clove of garlic, peeled and sliced

2 Tbs. coconut aminos (a gluten-free version of soy sauce or you can use wheat-free tamari)

2 Tbs. avocado oil or coconut oil

1/3 cup nutritional yeast

1 lemon, juiced

1/8 tsp. smoked paprika

1/8 tsp. salt

Process soaked, drained cashews and the ingredients listed in a food processor until a smooth paste is formed.

Evenly distribute paste over one bunch of cleaned and prepped kale leaves, and massage leaves with paste to work in the goodness and to break down the kale a bit.

Evenly space prepared chips onto parchment covered baking sheets and bake in 180 degree oven for 1 hour; turn leaves over; continue baking about 45-60 more minutes until all leaves are crispy. Store in a zip lock bag. Enjoy!

Just One (Good) Thing After Another!

My absolute favorite morning routine sets me up for greeting the food-talk-4-u-2new day with renewed and centered energies. Whenever possible, this is what sets me on a great path. I call this a “Series of Good Things.” We started talking about this in the fall series of Designed for Health classes, and with my deeper understanding of habits and habit formation, it is all coming together for me with positive results.
Let me share:

Rise and shine at the same time each day! In doing so, I am waking naturally a few minutes before my gentle phone alarm announces itself. With more consistent bedtimes, waking up is not so problematic. Sleeping in has robbed me of too many retirement mornings, and I regret it when I do. No. Getting up at a consistent time is my first good thing.

food-talk-4-u-3Drinking that first full cup of cold water right after swishing out the “cob webs” from my mouth is good thing number two. Start the day with the best “hydrater” of all: water.

If my husband is up, I will make the bed on my way to the closet to dress. Good thing number three. The bedroom is neat and I am already on a roll!

Moving into the kitchen, I pass the refrigerator first, so I grab my food-talk-4-u-4cold Bragg’s apple cider vinegar from the door, pour a tablespoon-full into a glass, add about 6 ounces of water, and chug. This is a personal experiment; many in my spring Designed for Health class are doing it for cholesterol benefits. My research has netted a zero on scientifically proven health benefits except for well-documented benefit of improved blood sugars. I am doing it to add acid to my stomach in hopes to improve some reflux issues. While we refer to acid reflux, often it can be a result of not enough acid in the stomach. We will see. No harm for sure, and – hey- that’s more water! Good thing number four.

Then, I have to start my day feeding my menagerie of birds and squirrels! Watching their antics off the back porch is our major amusement and delight. That’s number five.

food-talk-4-u-5Taking a few deep, mindful, meditative breaths while pausing to sit on the porch swing helps me calmly set myself up for a new day. “Thank you, God, for this new day; thank you, Lord, in every way for your blessings great and small; make me a blessing to others this day. Amen.” Six.

Then, while the coffee or tea is brewing, number seven is my favorite to check off because, not only do I enjoy doing this, but getting to it can be hard for me. Plank time! Starting with a child’s pose to stretch my lower back, I move forward to do my two minutes of planks: full body plank followed by a “restful” half-plank from the knees.

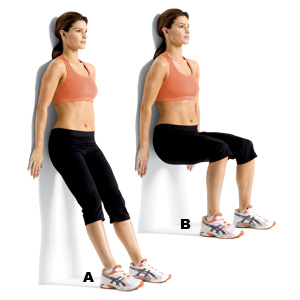
The rest of coffee brewing time is dedicated to slow motion squats, Plank_modified_opkitchen-counter slow motion push-ups, palms up arm circles, ballet-bar style toe points to the front, side, and back: very good for balance. That is number eight!

Bing, bing, bing! Coffee’s ready! That’s number nine!

So – exercise minimums are met, bed is made, water is drunk, nature is fed; well… it’s a series of good things!

food-talk-4-u-sugar-8To keep that good vibe, I make sure half of my breakfast plate is veggies! Leftovers work great as a side to my two eggs or they can be scrambled together as a frittata. If all else fails, after frying the bacon and before cooking the eggs, I will grab a giant handful of greens to sauté with a bit of good oil (coconut, avocado, or olive). That’s number ten!

I hope that you, too, have a “series of good things” you are doing for yourself each day. Please share them with me!

To summarize some good things we have covered here and in class about improving our over-all wellness:

1. Mindful breathingBeautiful girl breathing and smiling on the beach with the sea and blue sky in the background

2. Gratitude each day

3. Drink some extra water

4. Taper-off and eliminate added sugars

5. Eat real food. Eat food without labels!

6. Half of your plate each meal should be (mostly green) veggies

7. Use good fats- butter and ghee from pastured cows, coconut oil, olive oil, avocado oil

8. Supplements should include Vitamin-D, omega-3 fatty acids, probiotics, and magnesium with your calcium

9. Toss the grains- they cause inflammation seen and unseen, and work against vitamin and mineral absorption

10. You may also want to toss the legumes: dried beans and peanuts- because they can have an adverse effect on digestion, can block absorption of vitamins and minerals, and can be inflammatory

11. Keep a regular bedtime and get enough sleep

12. Move and stretch your body every day. I have just started weekly Yin Yoga classes and am just loving it! More restful sleep; greater inner awareness and calm; and a more balanced feeling.

13. Set tiny, repeatable “tweaks” to move yourself toward better wellness.

14. Simplify, simplify, simplify!

15. Rather than getting more “stuff,” gather experiences in your life!

16. Smile!food-talk-4-u-7

As I concentrate on finalizing my book, preparing single day seminars, and simplifying my own possessions by cleaning and tossing out, I will be taking a bit of a blogging sabbatical. There may be the occasional summer recipe or thought, but I am going to practice what I preach by simplifying and daily application of things that make our ultimate goals come true!

Have a great summer!

In health and wellness-

Deidre
Note to Self – Just Don’t…

Congratulations, self! You decided to break away from sugar as the food-talk-4-u-sugar-1one good thing you were going to do. A little tough at first, perhaps. No Pop Tart for breakfast. No mid-afternoon cookie break. Cake for dessert? Nope. No added sugar this week!

And you did it! Funny how, after the first three days, the yearning for sweet stopped! It felt so good, too! Those knee joints didn’t hurt so much. There was enough energy all day long! That mandatory afternoon nap wasn’t even needed or missed! I could just sit down and relax while reading a book and not fall asleep mid-sentence.

Why, then, oh why, did I thifood-talk-4-u-sugar-7nk I could reward myself with a sweet dessert? Why? Why would I want to break the “spell” of being FREE from sugar? And not just as a habit! Why, oh why, did I think that one dessert would not have an effect on me?

Immediately, I felt physically weighted down.

The sofa beckoned me for a nap… food-talk-4-u-sugar-3

Where did my pep go?

Why was I hungry later on?

This is how it was for one of our Designed for Health class participants last week. Great progress in sugar habit modification, and an even greater personal example to her about the power of sugar.

Not only does sugar contribute to blood sugar and hormone imbalances, but it is addicting to the extreme, contributes to body-wide inflammation, disrupts thyroid balances, provides fuel for cancer tumors, and generally mucks things up.

Note to self…once off sugar, stay off!

Another case, this time with yours truly—who should know better – I know, I know… We obese-factor-75were eating lunch at our favorite destination, Carolina Bagel. Passing on the bagels is not even hard; I just do not do gluten, but I am not Celiac. I forgot to ask to have the croutons left off the salad. I had no trouble removing them from my plate, but…oh, there were a couple left and they are seasoned so well…
What’s a few measly (delicious) croutons? Was I going to be above any reaction at all? No.

Just 30 minutes later there was a knot in my gut for a while; and why did that nameless malaise suddenly appear?food-talk-4-u-sugar-4

Note to self…listen to your body and do not eat the gluten. Ever!
Those were the things I noticed right off; but what was happening on levels I could not immediately appreciate?

We all may think we can be above it all, be the exception, but “no.”
Don’t beat yourself up for temporarily not thinking…although, not thinking is a choice, too…. But okay, you may goof. Just pick yourself up, dust off, appreciate that your body ALWAYS tells you the truth, and recommit to listening better and thinking smart.

food-talk-4-u-sugar-5May is National Celiac Month. I will be sharing some new information about gluten, grains, and intestinal permeability a.k.a. “leaky gut” on this blog and in my Designed for Health classes at First Baptist Church.

If you are in the New Bern, NC area, please join us next Wednesday at 6 pm in Building A. We will be sharing information about healing our guts through supplementation and food choices.
Stay tuned-
Deidre

Have We Got News For You!

Designed for Health classes have re-commenced at First Baptist Church, New Bern, food-talk-4-u-announcement-2NC, and it is not too late to start joining us for an hour of wellness techniques! With so many folks enjoying Easter Break out of town last week, I want to make sure to remind everyone that we are starting a new series!

Come join us each Wednesday evening from 6-7 pm for the next five weeks. Class is held in the main sanctuary building, just off of the breezeway entrance. There are plenty of signs and people to guide you!

This week’s main topics are about sugar, sugar substitutes, and starchy vs. non-starchy vegetables. We will also re-visit last week’s topics of how to establish new habits.

The class is free to all who attend, and we always have a great time!

Hope to see you Wednesday!

Deidre
A New Trend In Exercise – The Plank

A svelte model, I am not. model

One to turn heads in spandex, no.

Worth a second look fully clothed….maybe.

I just know that I want tighter abs and stronger back muscles. My poor chiropractor has to re-assemble my lower back every month, and it never seems far away from “going out.” Then, there is the flat tummy thing. After two babies, each weighing over 9 pounds, those lower regions have been stretched to kingdom come! Even returning to my pre-pregnancy weight back then never gave me “abs of steel”!

Coupling these two needs with my application of recent advanced studies in habits, I have made fantastic progress!

A little history, first. The whole idea of doing planks was brand new to me. I thought we just walked on planks of wood…it’s called flooring; but, my fifth period junior boys were showing off to each other their prowess at doing planks. Students taught me things all the time; this was cool! I was eager to learn!

How-to-do-a-plankIt seemed simple enough: get down on the floor, face down, with body touching floor only at the elbows and forearms and toes, and stay there a minute. The two boys who were having a plank-off seemed to be having a tough time after about 30 seconds. Their whole bodies seemed to tremble at the 45 second mark. They were wiped out after a minute.

One boy hung back, not wanting to participate. Seems he boasted he badform-plcould do it, but just not in front of everybody. Wise chap.

Needless to say, Mrs. Edwards went home to try it out for herself…in private…away from photo sharing students who would have lit up Facebook with embarrassing pics of their teacher. That was over three years ago.

Sure enough, seemed like I had found yet another exercise I couldn’t do! I played around with it every now and then, making it easier by bending my knees and cutting the work load in half. Still…I naturally did not master it because I did not consistently do it. And…it was a little boring!

But there was somePlank_modified_opthing intriguing about this exercise. I kept reading about it and watching it on videos. “Great exercise for core strength!” “Perfect for those efficient 10 minute workouts!”
Ten minute workout? That’s me!

So, ok. A little here….a little there…once a week….twice a week…every few days…. Is it any surprise things were still no good? I decided that, sure as I want to become a better writer, so I needed to write every day; I needed to do this (and other exercise) every day as well, if I wanted to see progress.

If all I could do was a half-plank for 15 seconds, then fine! Who does not have 15 seconds? So I did 15-second, half-planks every day. Period. No skipping. Naturally, as I got stronger, it was easy to extend my time to 30 seconds. Every day. Then 45 seconds; then a full minute!

But that was a half-plank, so I moved on to a full body plank: only elbows/lower arms and toes on the floor. I followed up full-minute half-planks with a 15-second full plank.

You can imagine how this is going to play out. From 15 seconds to 20…to 30…to 40…45…50…a full minute! Wow! What elation! What happiness! I did it!

Then I learned about straight-arm, full-body planks! You got it! Right now, I do:

Muscles toned by planking!

A full-body elbow-toe plank for a minute

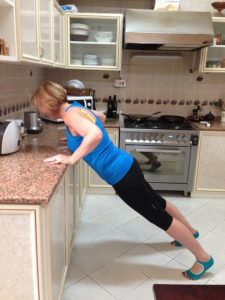
A half-plank for a minute as a rest, then do a straight-arm plank for a minute!Three minutes of plank-ness! ME! Non-exercise-y me!
And you know what? That straight arm plank so looks like the starting position for a push up…..!

Always wanted to do push-ups……

Maybe I’ll start on my knees with those….

Whatever you are trying to accomplish remember to:

1) break it down to a manageable, easily repeatable task that takes just a little time, knowing that what you are doing is right, and will pay off in time, and

2) show up every day to do it!

When doing a teensy good thing, it is easy to do!

But it is also easy NOT to do, as well… happy-fitness-class

If you miss doing your 15-second plank today…no harm? People who succeed would tell you that, yes, there’s harm in not doing it. The world is full of people who do not succeed. Their teensy little things just do not get done. It’s easy to do and equally easy not to do! As a result, they reflect that daily choice just the same way those who do that teensy little thing also reflect the result of their daily choices.

I chose to do a plank. What do you want to choose?

Deidre Edwards, “Planker” Extraordinaire!

Good Morning, Glory, Power Muffins!

March on Morning Glory Power Muffins
Food-Talk-4-U-Morning-Glory-7-R
Sometimes you just really want a muffin! I know that often, muffins are just glorified little cakes full of unnecessary carbohydrates. Popping on the label saying they are gluten-free is NOT necessarily a pathway to improved health. There is so much around these days with the label “gluten-free,” and once again, the advertisers are wooing us with products still replete with chemicals, highly refined oils, starch, and sugar!

So, I was determined to make a nutritionally dense muffin that would satisfy and be truly delicious.

I did it!

These Morning Glory Power Muffins have received rave reviews, and it is my pleasure to share this recipe with you today!

Morning Glory Power Muffins

Yield- 20 muffins

Preheat oven to 350

Food-Talk-4-U-Morning-Glory-3-RIngredients:

½ cup golden raisins

4 Tbs. hemp seed hearts

3 Tbs. ground golden flax seed meal

¾ cup unsweetened coconut flakes

1 cup grated carrots

1 cup crushed pineapple no sugar added

1 cup chopped walnuts*

Food-Talk-4-U-Morning-Glory-1-R

2 medium-sized ripe bananas, mashed

1/3 cup brown sugar

1 ½ tsp. vanilla

3 eggs

1 tsp. cinnamon

¼ tsp. ground ginger

¼ tsp. kosher salt

1 ½ tsp. baking soda

1 cup gluten-free flour

½ tsp. xanthan gum

¼ cup coconut flour

1/3 cup coconut oil, melted

Method:

In a large mixing bowl and using an electric mixer, beat the eggs until creamy yellow; add the banana, vanilla, brown sugar,Food-Talk-4-U-Morning-Glory-2-R cinnamon, ginger, salt, and baking soda, beating until well-combined. Add the melted coconut oil and mix well. Add the flours and the xanthan gum, beating to combine.

Then, using a wooden spoon or spatula, stir in the raisins, hemp and flax seed, coconut, carrot, pineapple, and wFood-Talk-4-U-Morning-Glory-4-Ralnuts. Make sure to mix all ingredients well.

Fill muffin tin lined with baking cups about 3/4 full.

Bake in pre-heated 350 degree oven for 28 minutes or until a toothpick comes out clean after being inserted.

 *Prior to using, soak walnuts at least 4-6 hours in enough water to cover and 1 tsp. sea salt. Rinse soaked nuts very well, blot dry on a towel, and dehydrate in oven or dehydrator. This process activates the nuts, makes them more Nuts-drying-in-ovendigestible, and increases their crisp tastiness. While I do own a dehydrator, this was the first time I used my oven for nut dehydration, and I was totally satisfied with the results. After using the oven for another purpose, I spread these walnuts out on a large rimmed metal pan and put them in the pre-warmed oven (350) which I then turned off. After a few hours, I stirred the nuts around, closed the door and warmed the oven up to about 200 degrees; theFood-Talk-4-U-Morning-Glory-5-Rn I turned it off, and let them dehydrate some more. This was done before going to bed. By morning, they were crisp. Once you have tasted activated nuts, you will never want to eat plain raw ones again!

I hope you agree that these are the “Best Ever Morning Glories”! Their power comes from the hemp, flax, and walnuts which give great forms of “good fat” as in Omega 3 fatty acids, and in protein! Certainly, the otherFood-Talk-4-U-Morning-Glory-8-R ingredients aren’t too shabby, either!

News Flash!

Deidre has been a little absent from this blog because there is so much good stuff going on!
Sorry for my absence here, but I have been preparing for the next cycle of the Designed for Health Classes, AND I have been working on my book in which I am putting all of this wellness thinking into one work! Plus, I have been doing so much research into habits are born, and how to develop our daily energies into something more powerful than we could ever imagine!

Designed for Health, Series 2 classes will be held at First Baptist Church, New Bern, North Carolina. They will be held in Building A for six weeks on Wednesday nights from 6-7 pm. If you are not a member of First Baptist Church, that’s fine, just email me at foodtalk4you@gmail.com to let me know you want to attend. I want to make sure we have a room big enough for everyone, so a head count is always good to have in advance. This series is free to all.
If you are interested in a class closer to where you live, or your organization would like me to speak with them, please contact me at the same email address to schedule a class or single presentation.

Fruit – With Benefits

What do I mean? Isn’t fruit full of goodness all by itself? You bet! I am not even going to try to enumerate all of the nutrient rich benefits there are in different berries, apples, and such, lest I leave something out!

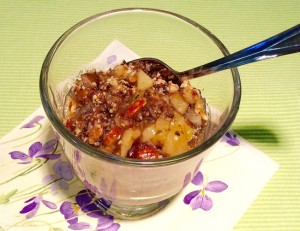
Fruit 1But what if we could stir something up that expanded on the nutrient-richness of fruit? How about a truckload of omega 3 fatty acids? How about some collagen joint care? How about protein? Well, I’ve done it! All without added sugar of any kind if you don’t want; and if you do, a small dab of honey.

This warm fruit compote will delight your senses, build strong bones, provide satisfying protein, and increase your omega 3 fatty acid intake. Wow! Let’s get to it!

Warm Fruit Compote

Ingredients:

1-3 Tbs. coconut oil depending upon amount of fruit. I used 3 Tbs

Fruit sprinkled with cinnamon

. for this quantity pictured

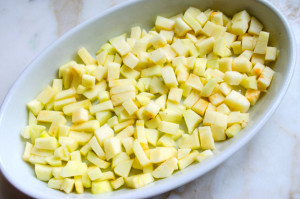
1 gala apple, peeled, cored, and chopped into fairly small pieces

1 Bartlett pear, peeled, cored, and chopped into fairly small pieces

Assortment of frozen berries- today I used probably over 2 cups plus

a few slices of frozen peach

Pinch of salt

Cinnamon to taste- a “sweet spice” that can enhance fruit without the need for sugar. Cinnamon also helps control blood sugar levels

Powdered grass-fed gelatin

Ground flax seed

Optional- only if your fruit is sour- a spoonful of honey stirred in at the end

Simmering fruit mixture

Method:

Melt the coconut oil in an enamel non-stick sauté pan and add all of the prepared fruit over medium heat. Generously sprinkle the cinnamon, gelatin, and ground flax seed over the top of the fruit. Add a pinch of salt.

As the mixture warms and begins to get juicy, gently stir.

Both the gelatin and the flax will thicken this mixture as the fruit releases its bounteous moisture. If your fruit compote is too runny, just sprinkle on more gelatin and/or more flax. Lower heat a bit to continue cooking without bubbling.

This refrigerates well and can be eaten warm, cold, or at room temperature. This is my go-to evening snack. So satisfying, Fruit 5filling, good for you and not sugary!

Hope you enjoy this fruit…with benefits!

Deidre
The Best Ever Salmon Patty Recipe!

Hungry as a bear for salmon?  Try this terrific recipe from Deidre's recipe book!
Hungry as a bear for salmon? Try this terrific recipe from Deidre’s recipe book!

There are just some things we always need to keep around and canned salmon is very high on my list! Ever had one of those days when you just wanted to pull something together really quick with little fuss?

Well, this could be the answer for you!

But what to call them? Maybe they are just humble patties. You know, like a hamburger patty; plop them on a grill or throw them into a pan….few minutes on each side…dinner is served. Last year, I may have briefly described my creation without benefit of a recipe as a “fritter.” Sounded more colorful; a little regional, perhaps. Countrified. Then, this month’s Southern Living magazine had a recipe for “Salmon Croquettes” which really looked like MY patties… or…fritters!

A Salmon fish!
A fishy Salmon!

Goggling the moniker dilemma just sort of muddied things up. Both croquettes and fritters, apparently, are deep fried. Nay! Nay! Even Southern Living did not deep fry its croquettes! They are both also dipped in egg and breaded before frying.

Please, so much messy work!

So, I am left with my humble patties. “Croquettes” just sounds like a restaurant raising their price on patties by calling them something elite. “Fritters” just sounds….I don’t know, maybe deep fried in a converted gas station come greasy spoon restaurant.

2 to 4 beaten eggs
2 to 4 beaten eggs

I did not have the Greek yogurt Southern Living mentioned to fix up as a dipping sauce which I have done in the past; fortunately, these patties remained quite moist and did not demand a sauce. I will give you some ideas for the sauce, though. Cool thing is, this recipe can be adapted to a variety of ingredients at hand and measuring is not a must at all.

Southern Living’s recipe called for 2 – 14.75 oz. cans of salmon; I used just one. They called for 4 eggs which I actually used between 2 to 4, but I compensated by adding ¼ cup of coconut flour!
Celery
Celery

Unfortunately, I did not take pictures of this actual process and all the evidence is eaten, but I did have a couple file photos of a similar recipe to share. So here it goes from my memory for the Best Ever Salmon Patties!

Best Ever Salmon Patties

Ingredients:

  • 1 (14.75 oz.) can salmon, drained
  • 1 large celery stalk, finely chopped
  •  3-4 green onions, chopped with green stalks
  •  3 mini multi-colored bell peppers, finely chopped
  •  ½ small can water chestnuts, finely chopped
  •  2 – 4 eggs, beaten
  •  1 tsp. kosher salt
  •  1 tsp. freshly ground black pepper
  •  1 tsp. dill weed
  •  Approx. ¼ cup coconut flour, as needed. to make the patties “stick” together

Method

Coconut flour
Coconut flour

Beat eggs in a large bowl.

Add the remaining ingredients, except the coconut flour, and mix well to combine. I do this with my hands while wearing latex free gloves.

Add the coconut flour if the mixture is too moist and needs some ‘glue’ to stick together.

Using your gloved hands, form mixture into approximately 1/2 cup patties, pressing firmly to mold.

Pan fry the patties on medium heat using about 2 Tbs. good oil of choice: olive oil, avocado oil, or coconut oil. When the edges start looking a little crispy, flip patties over. Cooking time should be 2-3 minutes on each side.

Ingredient ideas for dipping sauces:

Mix Greek yogurt, lemon, Dijon mustard

Using a base of plain Greek yogurt add:

  • Dijon mustard, dill weed, lemon zest, lemon juice, pinch of ground red pepper

Or in a blender or food processor combine the following with the yogurt:

  • English cucumber, dill, salt, pepper for a Greek flair
The delicious end product - Best Ever Salmon Patties!
The delicious end product – Best Ever Salmon Patties!

Ingredients are easily substituted and swiped out. When there is fresh parsley around, I always add it for added spunk and flakes of greenness. No water chestnuts? Leave them out! I just happened to have a few green onions that needed to be used up; any kind of onion could be used.

Just keep a few cans of salmon around to “save the day.”

Enjoy-

Deidre

Remember to subscribe to this blog so you can be alerted via email when a new post is up. Just give us your email address!

Just A Little Something From Me to You!

 With a lot of help from Sheree Alderman and Michael McClendon, beets-2we are finally able to present to our readers our first e-booklet covering the recipes posted last year in a usable PDF format! Yay!

Magic Mousse, Broth, Dumplings, Smoothies, Gravy… it’s all there! To get your copy, all you have to do is: Click on the link FoodTalk4U 2014 Recipes and wella!! Just follow the prompts on top of the screen on the right hand side to download it!

I am followFood-talk-4-u-Keystone-Habit-(1)Ring ‘my bliss’ (see recent blog by same name) by delving into writing my first book! It is designed to go along with the ‘Designed for Health’ series that I teach here in New Bern, North Carolina, a couple times a year but will certainly be a helpful guide for any reader! It’s still unfolding before my eyes, and I look forward to seeing it in my hands… and YOUR hands!

Book writing and self-publishing sad-writerrepresents such an exciting learning curve! I am reading more than ever, above and beyond the daily food and wellness research; and then, of course, there’s the writing. Writing, writing, writing. I am trying to garner more resources for you and put together tools for you that will guarantee your personal success at a higher, more complete level of wellness than you ever imagined!

In the meantime, how does your plate look?

Here are two representations that summarize what I have been talking about:

1) The goal

FullSizeRender(1)


2) How breakfast might be composed.

FullSizeRender


What’s the ‘green stuff’ in breakfast? Well, usually, I will grab 2 or 3 handfuls of baby spinach or a baby spinach/baby kale combination and throw them into my enamel non-stick pan with ‘happy butter’ from grass fed cows, similarly sourced Ghee, coconut oil or olive oil, and wilt the leaves. It’s a cinch! Stir those babies around a minute and they’re done! Add some pink Himalayan salt or lemon pepper, and you’re all set!

Food-Talk-4-U-Eggs-2Or…you can reheat last night’s leftover greens. Really, once you start doing this, breakfast will look funny without some healthy greens. Asparagus? Go for it! Sprouts? Green beans? Do it!

I always try to keep some mushrooms around. If they are not leftover, start them first in the pan and when they are finishing browning on the second side, scoot the mushrooms to one side of the pan and cook the spinach. After plating the veggies, you are ready to cook your eggs. Or….you can whip up the eggs, start cooking them, then add the veggies for an easy omelet!

See, you do not have to be a Master Chef to take control of your Female chef in restaurant kitchennutritional destiny!

It is so easy!

Enjoy the FoodTalk4U 2014 Recipes

Deidre