Category Archives: Recipes

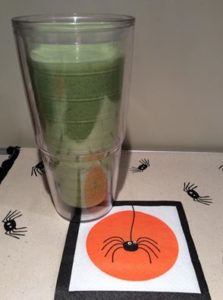
Nothing Spooky With This Smoothie!

woman-scaredOne of my Designed for Health students, Steve Lambert, still jokes me about my heavy duty green smoothies that were – in retrospect- admittedly a challenge to drink. Apologies to all!

It is not necessary to add EVERY great and healthful ingredient to one single smoothie. Our daughter, Serena Ann, inspired me to create something healthy AND tasty!

With the basis of frozen fruit, yogurt, protein, and a handful of greens, I am committed to having an ENJOYABLE SMOOTHIE every morning this week!

Today’s concoction included:

  • A generous handful of frozen cantaloupe
  • A modest handful of baby kale
  • A half cup of coconut milk
  • A tablespoon of chia seeds
  • At least a half cup of vanilla yogurt
  • A scoop of protein powder
  • A half cup of water

Tomorrow I may change out the protein for a handful of almonds. This is very drinkable and I am being rewarded with good fats, fiber, probiotics, and a serving of powerfully beneficial greens!

Happy Halloween! May there be NO spooks in your smoothie!

witch-pumpkins


Deidre


Classical Gas Blues

Has gastric reflux set up house in you? This goes beyond the 7-Tips-to-Reduce-Belching-or-Burpingoccasional heartburn. This kind of reflux can help you identify the location of your esophagus…when you’d just as soon not know. Then there’s the stealth version, too. No uncomfortable sensations in the gullet, but unexplained hoarseness or inability to sing as smoothly as you usually do.

gastroesophageal_refluxThere are other symptoms as well, including: regurgitation of a bitter tasting and burning fluid into the throat, burping, and recurring hiccups, just to name a few. Reflux or GERD (gastro-esophageal reflux disease), as it is known, can tear up a perfectly good esophagus and ruin singing careers. There is also increased risk for esophageal cancer if left untreated over time.

While the reflux was just a nuisance thing when I bent over, (which is Learn-to-Sing-Nowa lot as a caregiver), then I started having trouble singing…Well, that was too much!

There is definitely a stress factor, as well. Truly, I can have just one negative thought and bring on the reflux. Who says the mind isn’t powerful?

So, one prong of my anti-reflux campaign is stress management. Affirmations. Check. Coloring. Check. More sunshine. Check – when the sun shines. More walking. Check. Talking with friends. Check. But, I was still clinging to what also needed to be addressed.

There, again, our health is our choice.

The turning point forhow-proton-pump-inhibitors-work me came with viewing NBC Nightly News the other night, as they featured a story about the bad side effects of many common drugs given to combat reflux. In addition to the already known side effects of proton pump inhibitors being increased risk of fractures and infection (due to the drug blocking mineral absorption), the folks at Johns Hopkins discovered there is also an increased risk for kidney disease.

A 20-50% increase risk for kidney disease, in fact!

One female patient was profiled having normal kidney function in March but only 30% function by August, while taking a proton pump inhibitor. She was instructed to stop taking the over the counter medication and her kidney function increased.

Yet, drug manufacturers claim that following the recommended dosage on the label is safe. Today we’re hearing that the top medications for treating heartburn/reflux also cdoctor-bannerauses dementia!

The story concluded with a doctor from Johns Hopkins saying reflux can totally be addressed by food. He said eliminating berries, chocolate, caffeine, and alcohol for 28 days will help heal the body. That was it. He was speaking to me. There was my choice for the second prong of my defense attack.

Was I going to choose health? Health without drugs?

Yes.

Caffeine consumption is going down – gradually – a cold turkey approach is not kind to the head. No more chocolate…Hey, Valentine’s Day is over! A choice is a choice. So long berries…See the recipe that follows using baked apples. No more alcohol…well, that SP_WINEisn’t hard, but my half glass of wine will just have to wait another day.

It’s day five as I write this and guess what? No reflux. Even with just half-caffeine coffee! Twenty-eight days total for healing.

Twenty-three more to go! When I get there, moderation will be my middle name.

So, with no more chocolate, what kind of treat can I devise? I return to an updated version of my Baked Fruit with Benefits. This may be the best baked apples I have ever created, and they are chock full of extra goodness (that’s the benefits part).

As a lead-up to the recipe, however, let me summarize a recent post on MarksDailyApple.com that reminded me of somcollagenething I needed to be doing: adding collagen to my diet where ever possible.

Here’s why. The amino acid glycine is the main amino acid in collagen. We make about 3 grams of this a day ourselves (so it’s considered non-essential) BUT we need a minimum of 10 grams a day – more if we are healing from injury or recovering from intense exercise. Thus, it could be categorized as a conditionally essential amino acid– meaning we need to supplement it in our diets.

pastured-cowThe big flap about not eating so much meat, apparently, can be erased by ramping up our intake of collagen – if the animal studies translate to human results. Meat-eating animals’ longevity was increased with the addition of glycine/collagen to their diets. He cited another study in which low levels of glycine predicted diabetes risk.

Glycine/collagen will also: improve quality of sleep, reduce the amount of muscle meat needed to be eaten to maintaisleepn muscle mass, is great for healthy joints, improve appearance and elasticity of skin , assist in healing of wounds, and is a key ingredient in cooking rich sauces.

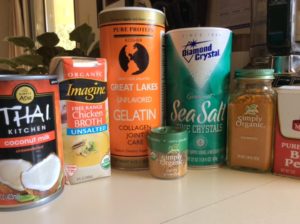
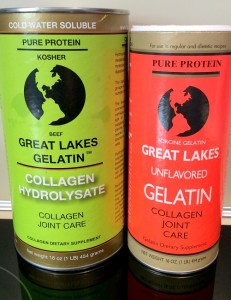
Aside from eating bony cuts of meat: ribs, oxtails, necks, and the like, which all take extra time to slow cook, and from drinking collagen-rich bone broth, I add bone and body building collagen with the products pictured here.

IMG_1871The collagen hydrolysate on the left is not a thickener, and it can be stirred into liquids of any temperature. That’s the kind I used in the recipe below by mixing this collagen powder into the arrowroot/brown sugar mixture used to dust the apple bits before baking.

The powered gelatin on the right can be added to any hot liquid as a thickener. My no-bake Fruit with Benefits recipe in Toolkit for Wellness uses this to thicken the fruit juices as they cook in the pan. I add this to my home-cooked bone broths, as well. With this, you could make your own jello or fruit rolls ups!

Now to the recipe. You will notice that I crammed in every good thing I could find for this baked apple dish. Fresh fruit, gelatin, minimal sugar, and cinnamon topped with activated nuts, hemp, ground flax seed, minimal sugar, cinnamon, and coconut oil.

Baked Apples/Pears with Benefits

Preheat oven to 350 degrees; grease 8 x 8 inch glass dish with coconut oil

Prepare mixture used to “dust” the cut fruit. Any extra may be stored in air-tight container for next time. Quantities may vary as you may even need to mix up just a bit more if you run out.

Stir together:

¼ cup brown sugar

½ cup arrowroot

¼ cup collagen hydrolysateFullSizeRender(1)

1 tsp. cinnamon/apple pie spice, or to taste

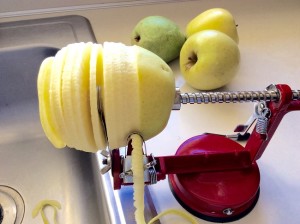
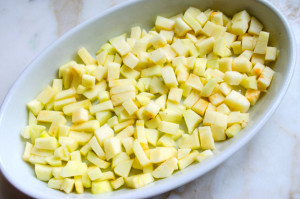
Prepare fruit by peeling, coring, slicing apples and possibly pears.

Today I used:

3 Golden Delicious apples and
1 Anjou pear

Gradually add sliced fruit to bowl and sprinkle with dusting mixture, stirring to coat after each addition.

When all fruit is prepared, transfer into prepared glass dish.apples-in-dish

Topping:
Into large fry pan on medium heat put:

2 Tbs. coconut oil

1 cup chopped activated nuts (I used the last of my walnuts, some pecans, and almonds)

¼ cup brown sugar

1/3 cup ground flax seedsFullSizeRender(2)

1/3 cup hemp seeds

2-3 tsp. cinnamon/apple pie spice

Pinch of salt, if desired

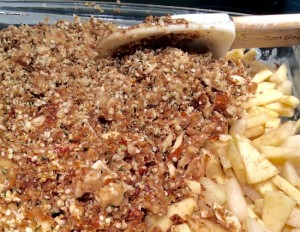
Stir to combine, and continue to stir occasionally as the topping heats and browns – about five minutes. Do not let this burn. When browned and warm, spread on top of apple mixture.

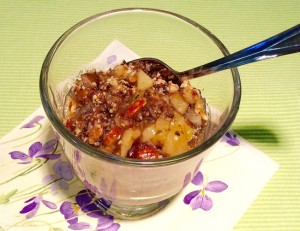
Cover dish with foil and bake foFullSizeRender(4)r 40-45 minutes until bubbly. Serve warm or at room temperature.

This is delish! You can easily change-up the fruits; a handful of blueberries is awesome. A scoop of this is a great way to flavor my nightly chia seeds stirred into hot water, too! Keeps the insides humming!

Here’s to no more reflux and happy faces enjoying a healthy dessert!

Deidre

Food That Says, “I Love You”

Times have changed in some respects; and in others, not at all. I IMG_1791remember reading aloud the Laura Ingalls Wilder series of Little House on the Prairie to our children every night as we all learned of Laura and Almanzo’s adventures. Today, our grandchildren listen to The Adventures of Harry Potter. I don’t know what the children eat at the Hogwarts School, but Almanzo’s favorite repast had to include fried apples ‘n’ onions.

Being more of a city girl transplanted to small town North Carolina, this notion of apples ‘n’ onions did not beckon to my palate or culinary desires. Too bad.

First of all, they aren’t fried- as in deep fried. I don’t deep fry anything. In country jarIMG_1790gon, frying apples implies sauteing and browning until tender and even possibly cooked down to a mush.

But apples ‘n’ onions? Really?

Well, this is the month of love. If you fix apples ‘n’ onions you will LOVE the flavor of this impossibly delicious side dish that happily occupies its spot in the perfect plate fruit/fat component and part of the veggie area. Pair this side with any kind of dark-green lea fy veggie, along with lean chicken or pork protein, and you will have a meal that says, “I love you”!

With just three ingredients, this is a cinch to do, and quantities vary according to what’s on hand.

Apples ‘n’ Onions Recipe

Apples – 3-4 apples

Onion (I used a Vidalia onion) – one medium-sized onion

Coconut oil- 1-2 Tbs. of coconut oil to coat the pan wellIMG_1779

Method:

In order to activate the beneficial anti-inflammatory enzyme, allicin, slice up the onion first so it has 10 minutes to rest before heating.
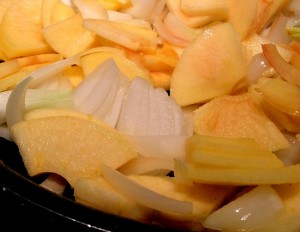
Peel, slice, and core the apples into desired shape. I use an old-fashioned hand crank apple peeler/slicer/corer and just cut the slices into sI love foodmaller pieces.

Melt 1-2 Tbs. coconut oil into large sauté pan on medium heat and add prepared apple and onion slices. You may want to add a pinch of salt.

Stir occasionally and gently cook until browned and tender. Serve warm.

Recipe number two involves an oft’ forgotten little green nugget that used to be buried under an avalanche of melted Velveeta. Boy, once you stop eating “food-like substances,” as found in dairy “products” such as Velveeta, the very thought of returning to them sends chills down the spine. Ick!

IMG_1853-1
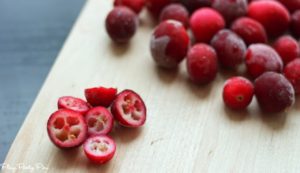
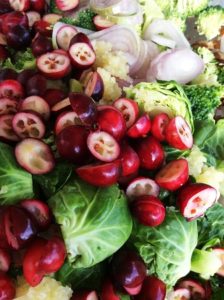
Raw Brussels sprouts and cranberries

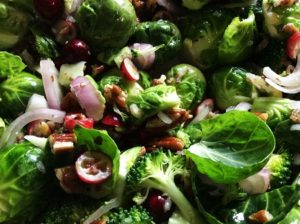
So, what to do with that bag of Brussels sprouts? This latest recipe supersedes any I have tried thus far! My book contains a great pan-cooked version of Brussels sprouts that’s really fine and has similar ingredients, but these roasted sprouts are the BEST!

Roasted Brussels Sprouts with Fresh Cranberries and Pecans

1 pound fresh Brussels sprouts, trimmed and cut in half8

1 cup activated pecans*, coarsely chopped

½ cup fresh or frozen cranberries, (not dried and sweetened), coarsely chopped

1 Tbs. olive oil

1 Tbs. finely chopped shallots

3 garlic cloves, finely chopped

IMG_1862-1
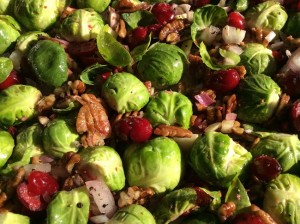
Roasting!

1 tsp. Kosher or sea salt

½ tsp. ground pepper

Optional: 2 Tbs. balsamic vinegar to toss in after roasting

Method:

Heat oven to 400 degrees. Using a large baking pan, toss all ingredients together except balsamic vinegar. When all ingredients are mixed and coated with oil, arrange Brussels sprouts so the cut side faces down in baking dish. Roast for 25 minutes or untiToolkitforWellnessBolder(1)l golden brown on the edges.

Optional: Toss with balsamic vinegar when roasting is complete. These smelled so good and tasted so good right out of the oven; I forgot the vinegar and never missed it.

*Activated Pecans: Soak raw pecans in salted water 24 hours; drain; dehydrate 105 degrees in dehydrator 14 hours or bake at lowest oven temperature until crispy. This process is explained in my book, Toolkit for Wellness, and makes the nuts way more digestible and yummy.

So, there youKeep-Calm-Valentines have it! Healthy anti-inflammatory eating at its very best. Some old-school goodness from the past and some modern farm-to-table style of today!

Say, “I love you” with some good eatin’!

Happy Valentine’s Day!

-Deidre


Ginger Tea – Oh So Goodness!

I used to call it the “creeping crud.” You know, the variants as sinusitis, person-with-coldbronchitis, laryngitis, coughing, sore throat and the like? Those of us who sing, teach, coach, or otherwise strain our vocal cords on a regular basis, need some relief and prevention.

Enter – Ginger tea!

A fellow singer keyed me into this years ago as a preventative, as well as a therapy. I’d see her going from one rehearsal to another, always clutching her ginger tea. After picking up her habit, I can vouch for the effectiveness of ginger tea; both, as a preventer of illness, and as an aide to healing when the “creeping crud” arrives despite every effort.

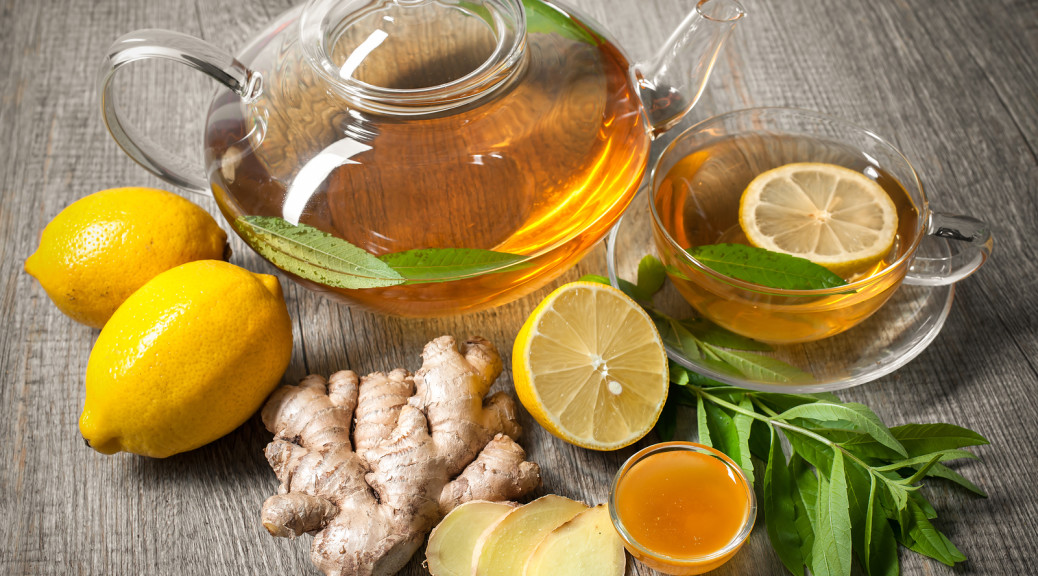
FullSizeRender(1)The recipe is simple enough:

Green tea

Fresh ginger

Fresh lemon juice

Honey

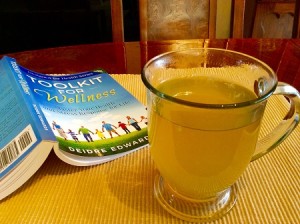
For two cups of tea, I boiled water, added about an inch of fresh ginger peeled and sliced, juice from ½ lemon, a teaspoon of local honey, and three green tea bags.

Let’s take a look at the healing and health-promoting properties of each ingredient:

Green tea: loaded with antioxidants with many medicinal properties, benefits-of-ginger-tea-for-good-healthhas properties that improve brain function, increases metabolism and increases fat burning, properties in tea called catechins, can positively impact oral hygiene and reduce infection risks, may help the body process blood sugar, has been shown to be heart healthy, and can decrease the risk of cancer.

Ginger: ancient Chinese source for digestive issues such as nausea, loss of appetite, motion sickness, morning sickness, and cold-bugchemotherapy-induced nausea. Its pain-reducing capabilities can help with pain and inflammation seen with arthritis, headaches, and menstrual cramps. It has been shown to inhibit the virus that causes colds.

Lemon: antiseptic properties, vitamin C, calcium, potassium, and pectin fiber. Functions as an anti-inflammatory. The list goes on.
Honey: anti-bacterial and anti-inflammatory properties among others.

Now you can see why drinking this is like putting the power of Superman into a cup. Antioxidants, anti-inflammatory agents, and antiseptic properties in every sip!

Wow!

Daily green teas:

Some people brew a super-strong cup of tea using 8 bags of Bigelow Green Tea. It’s their morning “shot” of goodness. I have found Bigelow brand to be the most authentic tasting tea in tea bags.

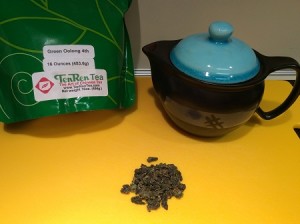
IMG_1849I have also discovered the joys of loose leaf green tea available on-line from Ten Ren Tea. The Oolong variety has a wonderful aroma and taste. A bag of loose leaf Oolong is expensive, but it lasts a long time. A little bit less than 1 tablespoon of tea leaves yields two of these small pots full of fragrant green tea which will fill my mug twice. Just enough to start the day off right, and my beverage of choice on Sunday morning before singing in choir or before going to special morning choir practices.

A couple cups of Ginger TeFullSizeRender(2)a or regular green tea will soothe the mind, tummy, and go a long way to boosting our wellness!

Enjoy a cup while you go through your Affirmations!

In health-

Deidre


Top Google Searches for 2016!

Heard on the news recently about the top 3 Google searches for 2016, where everyone’s focus seems to be on improved health? Can you guess? Here they are:

  1.  How to get rid of stress
  2.  How to make kale chips
  3.  How much water do you need to drink to lose weight

Let’s help ourselves and the world by addressing those hot-topic issues.

How to get rid of stress?strss

A stress-free life will never be experienced this side of heaven. We are, however, so much more in control of our response to stress. Sometimes we can control how much stress is on our plate – sometimes not.

Mindset is the key!

Have you ever allowed a ‘grumbly’ mood take over? From then on, every little thing that does not suit you gets amplified? Things snowball to the negative? On the flip side, have you ever been so happy and positive that nothing could turn you away from your happy frame of mind?

I noticed this past December that, no matter where I went, there was a holiday song in my heart, if not my ear, and I was extra courteous to all drivers and pedestrians. I was excited, happy, and wanted to embrace the world. Instead of grumbling at slow lines in the market, I said a prayer for the harried cashier, and counted my blessings to be in the midst of such abundance…and I looked for ways to share mine.

When the storms do blow, and the waters rise in spite of our best efforts, well, that’s stress! The ‘fight or flight’ hormones flood our beings. We are challenged to first regroup ourselves before flying off the handle with our response.

How do you start the calming regrouping process? I have even said “STOP!” out loud to myself, something short of a Jimmy Cagney slap on the face, to wake myself up. This is a reminder that spiraling out of control is a choice; and I do not want to do that. Definitely a time for cleansing breaths followed by a few affirmations. If possible, stepping back and away from Happy1the “stresser” is helpful. Asking for help, or sharing your burden with another, can be key in getting a handle on things and gaining perspective.

As far as how much stress is on our plates, we all should pause and take into account:

  • How much of that stress is self-created?
  • Can we eliminate any of the stress by paring down on the number of obligations we put ourselves under?
  • Have we asked for help?

How to make kale chips!

A reprise on a favorite recipe already shared:

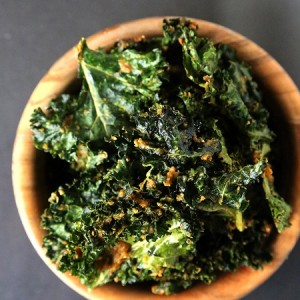
Gluten-Free, Dairy-Free, Savory and Cheesy Kale Chips

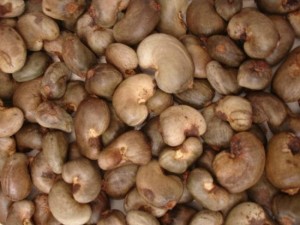
Soak ¾ cup (preferably raw, unprocessed) cashews in water for at cashew nutsleast one hour.

Assemble the following ingredients and put into a food processor:

1 large clove of garlic, peeled, and sliced

2 Tbs. coconut aminos (a gluten-free version of soy sauce or you can use wheat-free tamari)

2 Tbs. avocado oil or coconut oil

1/3 cup nutritional yeast

1 lemon, juiced

1/8 tsp. smoked paprika

1/8 tsp. salt

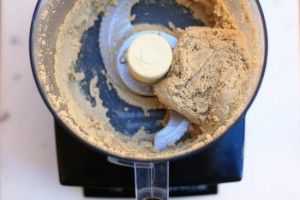
cashew processorProcess soaked, drained cashews and the ingredients listed in a food processor until a smooth paste is formed.

Evenly distribute paste over one bunch of cleaned and prepped kale leaves, and massage leaves with paste to work in the goodness and to break down the kale a bit.

cheesy-kale-chipsEvenly space prepared-chips onto parchment-covered baking sheets and bake in 180 degree oven for 1 hour; turn leaves over; continue baking about 45-60 more minutes, until all leaves are crispy. Store in a zip lock bag. Enjoy!

How much water do you need to drink to lose weight?

The very question concerns me. There is no formula for “water in…fat out.”

The bigger over-riding question is how much water do we need to drink to be healthy? …to have a properly running digestive system? ….to avoid headaches?

Granted, drinking a glassful of water 30 minutes before each meal has been shown to “fill” a person up enough to actually cause eating less during the mealdrinking-water. Whether to base a ‘weight loss diet’ around that is questionable, if the quality of the food is not considered. My book, Toolkit for Wellness, and these posts are all aimed at food choices that do not cause inflammation and create a healthy balance of non-starchy vegetables, lean protein, and healthy fats.

Proper hydration is obtained when the urine is a pale yellow/amber. You will notice that first thing in the morning, your urine is a darker yellow because you were not drinking any fluids during the night. As you begin to hydrate yourself, your urine’s color lightens up. If your urine starts looking as clear as water, you may be a bit too hydrated. It is possible to drink too much waterwater which causes loss of valuable electrolytes/minerals. Consistent over-hydration could land you in the hospital!

So there you have it: stress, kale chips, and water.

Done. Done. And done!

FYI: When you throw your back out on New Year’s Eve like I did, twisting as you get out of your easy chair, the absolute BEST therapy is walking! Just keep doing it. So much for my accelerated exercise routine for January 1st! But, hey, I can walk and do kitchen counter push-ups!

Now, if I could just sit in a chair comfortably again… off to the chiropractor!

Happy New Year!

Deidre



Santa’s Got a Brand New Bag! (Oh yeah…)

Poor Santa! So much sugar! But the poor fellow LOVES cookies! Is there an answer? Yes! santa 2No need for the Old Elf to be totally deprived of his seasonal favorites! Step into my Christmas kitchen for a quick recipe share of two satisfying confections that do not deliver a huge sugar/carb hit. These macaroon and oatmeal recipes will more than fill the bill for treats that do not overdo things and Food-Talk-4-You-12will keep you in balance.

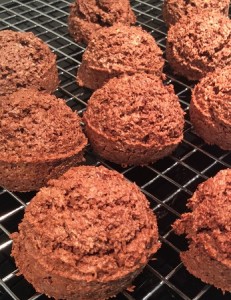
Midnight Macaroons were developed to be part of a regular care package sent to our daughter for a moment of hugs-across-the-miles during her grueling night shifts as a Resident Physician. She shared them with her fellow residents during their – rare – breaks.

Midnight Macaroons

Preheat oven to 350 degrees or convection oven to 325 deFood-Talk-4-You-3grees

Cover baking sheet with parchment paper

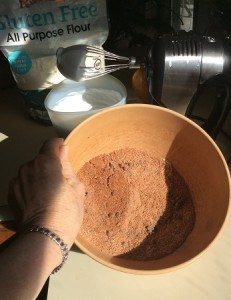
Combine dry ingredients in a large bowl:

• 1 1/3 cup unsweetened, finely shredded coconut
• 3 tablespoons gluten-free flour (I used Krusteaz Brand)
• 1/8 teaspoon sea salt
• ¼ cup cocoa
• 2 tablespoons mini dark chocolate chips (I used Ghirardelli Brand)

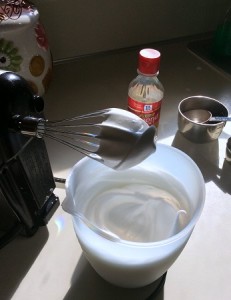
Food-Talk-4-You-2Beat/whip 3 large room temperature egg whites until they become fluffy.

Then gradually add 1/3 cup white sugar while beating.

Add ¼ teaspoon almond extract and continue beating until stiff peaks form.

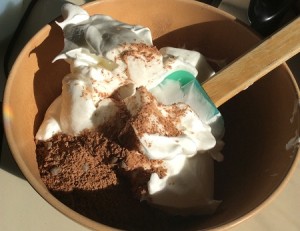
Spoon whipped egg white mixture into the dry ingredient bowl and gently fold Food-Talk-4-You-5ingredients until combined.

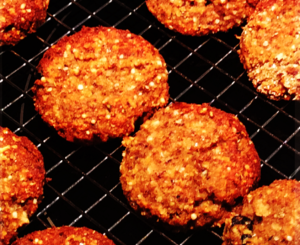
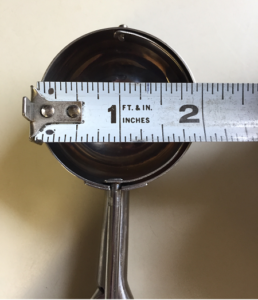
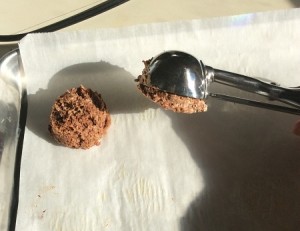
Using a cookie scoop – I used a 2 inch scoop – place dough onto prepared baking sheet. These will not spread out.

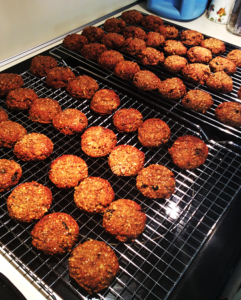
Bake 25 minutes and cool on a rack. Smaller cookies will need less time to bake.

For an optional added chocolate “hit” you can easily dip the tops of these into melted dark chocolate.

These are not especially sweet (YAY!) and are totally satisfying and provide LOTS of nutritional goodness through the egg whites, coconut flakes, and dark chFood-Talk-4-You-6ocolate.

I stress in Toolkit for Wellness – barring severe allergic reactions – an 80/20 approach to anti-inflammatory eating should meet our needs to be mindful of how we ‘fuel’ our bodies without making Food-Talk-4-You-8us obsessive. I choose to stray from the path of “no grains” once in a while as a serving of white rice is savored or a gluten-free corn chip is enjoyed at a party. But, oatmeal labeled “gluten-free” has been calling me like sirens from the deep.

I bought a bag of Bob’s Red Mill Brand Gluten-Free Rolled Oatmeal last year and ended up just giving it away to a friend. I didn’t trust myself to not go down a very slippery slope into regular bowlfuls of carbohydrates in the morning. Well, I took the plunge this year and used some of that oatmeal to create a fabulous treat. So far, so good. One cookie every other day or so! Who is in control at all times? Me! I can do this!

Traditional oatmeal cookies call for a total of 1 cup sugar (brown and white), but I eliminated one third cup of that and did not lose a bit of flavor or fun. I think this could even be made with less sugar than that and be just fine.

Low Sugar, Gluten-Free Oatmeal, Raisin, Walnut Cookies

Food-Talk-4-You-1Preheat oven to 350; or 325 degrees for a convection oven. Cover baking sheet with parchment paper.

Combine in a medium-sized bowl:

• ½ teaspoon gluten-free baking soda
• ½ teaspoon gluten-free baking powder
• ½ teaspoon sea salt
• 1 teaspoon xanthan gum
• 1 cup gluten-free flour

Cream in a large bowl:

• ½ cup grass-fed butter
• 1/3 cup brown sugar
• 1/3 cup white sugar

Mix into the butter mixture:

• 1 egg
• 1 teaspoon vanilla
• 2 teaspoons water

Add dry ingredients to the wet and mix until combined.

Stir in:

• 1 ½ cups gluten-free rolled oats
• ¾ cup activated nuts, chopped (See Recipe chapter in Toolkit for Wellness)
• ½ cup golden raisins

Using a cookie scoop, put scoops of dough onto prepare baking sheet.
Bake 10-12 minutes for 2” cookie scoops. Smaller scoops will require less time.

cookies in freezzer
Cookies in freezer

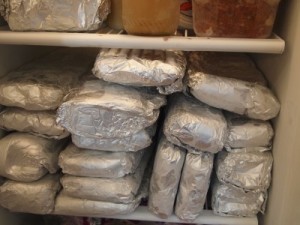
My only improvement on these delicious recipes is that I will use a smaller scoop next time so I can have more cookies and smaller servings.  A move to smaller treats will keep these cookies closer to the 80 side of the equation! These both freeze well, by the way; so the treat can last longer if you are not sharing them.

icaughtsantacom-2-90_grid_6So, now we see Santa settling by the hearth with his NEW, favorite book to learn of other amazing ‘tweaks’ he can make in his daily life that will revolutionize his health and peace of mind!

Merry Christmas and Happy New Year to one and all!

Deidre

PS- Thank you for making Toolkit for Wellness a Best Seller in ALL of its categories at one time or another!

Remember! The eBook is still at $0.99 until Christmas when the price goes up. If you prefer reading on a devise, that’s a great bargain for yourself or someone you care about.

But wait, there’s more! The paperback version is ready and also available through Amazon! Click HERE to get yours today!


The Time for Thanks Has Come

AutumnleavesSTAs the temperatures start falling, along with the glorious and colorful leaves, our attentions turn inward and homeward to Thanksgiving! Whether you celebrate once, or several times with different groups of family and friends, this is a time of reflection and gratitude. I learned a new twist on my usual turkey and stuffing prep, and wanted to pass this along to you. See, we had our family Thanksgiving early in November this year, so this approach is fresh from the kitchen and just in time for the actual holiday!

With two grandchildren on cranberry cleaning and culling duty, and cleaning-cranberriesthree adults to tackle everything else, this Thanksgiving was a delightful process, running like a well-oil machine, intermingled with uproarious laughter and memory making for the ages. Even after final cleanup, there was still enough energy for more laughter and stories.

Raw-Turkey-2

Our daughter created a turkey rub mixture that took a garden-variety-store-label-turkey into the moistest and most flavor-infused turkey I have ever eaten!

Moistness had usually been a hit-or-miss thing for me; but this rub will take chance and good luck out of the recipe, and should guarantee great results every time.

Into our small food processor, Serena put the following ingredients:

Turkey rub:

Rosemary-food-talk-4-you
Sprig of Rosemary

1 cup sauteed onions and red bell pepper

5 – 6 cloves of raw garlic

1/2 stick of butter

Large sprig of rosemary

Handful of parsley

Several sprigs of thyme

Dash of cuminHappy-Thanksgiving-2

Salt

Pepper

Blend all ingredients together in a food processor and rub underneath the skin on the breast of the turkey, inside the cavity, and all over the top.

Measurements are Happy-Thanksgiving-3approximate. 🙂

The turkey was baked covered with foil until about the last 30-45 minutes until the pop-up timer came up.

Even our cornbread stuffing/dressing seemed extra special this year. The non-dressing lovers among us couldn’t get enough! Here’s what we did:

Stuffing:

gluten-free-cornbreadGluten-free corn bread made with applesauce***

3-4 slices of gluten-free bread (we used Glutino Brand, seeded bread)

One onion

3-4 cloves garlic

Poultry spice mix

Salt

Pepper

Cut the breads into cubes and toast. Sauté onion and garlic in butter. onionSeason with poultry spices, salt, pepper. Mix into toasted bread cubes. Moisten with turkey broth taken from the simmering pot of giblets destined to become gravy. When the turkey comes out, add turkey juices from the roasting pan to the stuffing.

Bake at 350 for 30 min, covered in foil.

Enjoy. 🙂

TURKEY RUB AND STUFFING RECIPE

***We had made a square pan full of cornbread using about a half-bag of Bob’s Gluten-free Corn Bread mix. After six of us all had a piece, we used the rest for the dressing. The mix seemed a little dry because it was probably more than half a bag, so we added 4 oz. of unsweetened Thanksgiving-Table-Decor-Martha-Stewart-07applesauce. The texture was less crumbly.

So, may you savor the moments with family and friends along with some savory turkey and dressing! You will find, using Serena’s method, the meat throughout the turkey will be moist and kissed with the flavors of the rub. No more dry white meat!ToolkitforWellnessBolder(1)

I hope to be publishing Toolkit for Wellness very soon! An announcement will be forth-coming!

Happy Thanksgiving!

Deidre

The Pumpkin Patch is Open!

Do you do a happy dance when all things pumpkin-flavored reappear PumpkinSpiceLattein the fall? It’s a short season, so I look for every way imaginable to ramp up pumpkin goodness. I have two pumpkin delights to share with you today. First, a pumpkin version of Bulletproof Coffee, and a pumpkin spice version of my Breakfast Cookie recipe.

My early morning solo-brew is either loose leaf green tea or Bulletproof Coffee. It’s a part of my Series of Good Things that starts most days:

Large glass of water after swishing out the cobwebs first thing each morning.

Water on face to open eyes – a real must to enjoy what follows.

Open all the curtains.

Plank_modified_opHead for my mat in the guest room to do full and half planks, full and half push-ups, and a slant. (All exercises are explained in my Toolkit for Wellness which is finished, but still needs formatting, subtitle, and a NEW book cover- more on that in a bit).

Make my way into the kitchen to preheat tea pot/French press pot and start heating water.

Do my step-to-jog-to-run-in-place exercise while the water is heating.

Brew either the coffee or the tea for 5 minutes.

Do squats and lifts with a kettle bell or arm exercises during brew time.

Pour and enjoy.

Bulletproof Coffee is special coffee made from mold-free coffee Pumpkin-3-Rbeans. I learned from Dave Asprey, who writes the Paleohacks newsletter and sell it, that most all coffees are polluted with mycotoxins that can adversely affect people. Think sinus congestion, headaches, and other ailments. Enter mold-free Bulletproof Coffee.

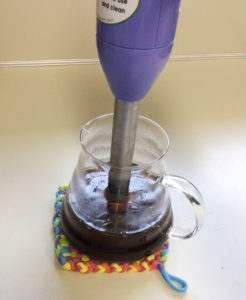
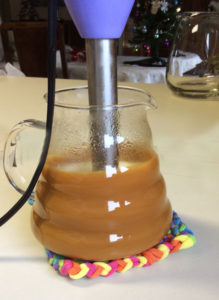
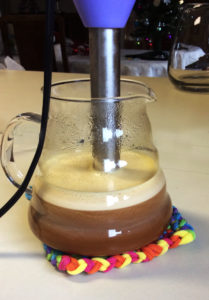
After the coffee is brewed, I add the healthy fat of 1-2 teaspoons of organic ghee and blitz it in my Vitamix. Ah-mazing!

Being it is pumpkin season, I have been adding a couple tablespoons of pumpkin puree, pumpkin pie spice, and -yes- a half teaspoon of sugar! This is truly a sensory delight! My own pumpkin spice latte right at home! Even GOOD for me!

What would go great with a Pumkin-spicepumpkin latte, but Pumpkin Breakfast Cookies? Below is the annotated recipe I have published before on this blog and am putting into my new book, Toolkit for Wellness. We are not interspersing pictures this time so you can see it all together.
Breakfast Cookies freeze well and are a staple to have around for a light meal (2 cookies) or a light snack (1 cookie).

This is like a sneak preview of what is in the recipe chapter of the book!

Breakfast Cookies

Adapted from a recipe by Danielle Walker

This is a large recipe that makes about 27 cookies using two large parchment covered cookie sheets. I use an 11-cup food processor to mix most of this, followed by a final stirring using a large bowl to incorporate the two batches of ingredients.

In a food processor, place the following ingredients and pulse 2-3 times for 15 seconds each. Pulse until dates are in very small pieces and bananas are smooth:

1 Tbsp. lemon juice

3 large, ripe bananas broken into chunksplenty-of-pumpkin`

7 medium-sized dates /or/ 5 large Medjool dates, soaked in warm water for 15 minutes and drained

2 Tbsp. ghee /or/ palm shortening

1 cup unsweetened applesauce /OR/ replace with pumpkin puree

Pour the majority of this mixture into a large bowl. Scraping is not needed. Then place the following ingredients into the processor bowl and pulse for 5-6 bursts until incorporated:

1 cup of hazelnut /or/ almond flour* – This time, I used 2/3 cup almond and 1/3 cup coconut flour

1/4 cup ground flax seed

1/4 cup hemp seed hearts

1/4 cup Great Pumpkin-Patties-RLakes gelatin

3 tsp. cinnamon /OR/ replace with pumpkin pie spice

2 tsp. vanilla extract

2 tsp. baking soda

Add the following to the nut flour mixture and pulse 3-4 bursts until incorporated:

1 cup unsweetened coconut flakes

1/2 cup dried fruit of choice usually a berry /OR/ golden raisins

Add contents of food processor to those in the large bowl and hand mix using a large wooden spoon or spatula until well-combined. The batter is a bit wet, but should hold its shape well. If it seems too wet, add some more nut flour.

Using a golf ball-sized cookie scoop, form dough and place onto parchment paper-covered cookie sheets.

Using damp fingers, gently press each on down a bit.

Bake at 350 degrees for 20-25 minutes. I used a convection oven, which automatically lowers the temp to 325 degrees. A regular oven may take a little less time at the higher setting. Cookies will still be a little bit soft but not mushy when done. Place cookies on a cooling rack where they will firm up.

A couple of these make an awesome breakfast, especially when Pumpkin-2-Rspread with almond butter alone or almond butter mixed with a tad of Justin’s Chocolate Hazelnut Butter. Justin’s version of Nutella has organic cane sugar as the third ingredient after hazelnuts and almonds and contains only 8 grams of sugar compared to the others 21 grams of sugar as the first ingredient!

* I have used various combinations of flours depending upon what I had in stock. Coconut flour will dry dough, so the amount of moistness will change depending on how much coconut flour you use.

Click this link for a printable recipe of FoodTalk4U-Breakfast Cookies

NEWS from Toolkit for Wellness!

5181280_origThe book cover currently posted on our Facebook site is NOT the one I’ll be going with! I know everyone just loved the “blue cover” but deep down inside, I just knew it was not representing the larger message. A member of a Facebook Community I am in, not only gave me some pointers as an author, but also shared with me a concept cover based on what he had gotten from my book. Well, folks, he was spot on! So, off to a graphic artist I went and I am waiting to see how this turns out!

A new cover means a delay, but if something is worth doing, it’s worth doing right! I look forward to sharing the new look with you as soon as possible.Pumpkin-patch-find

Like us on Facebook!

Here’s to pumpkin!

Deidre
Peaches Gone Wild!!

Tired of swooning over the covers of Southern Living and other karen-tran-soolip-wedding-pink-crystal-brooch-centerpiecemagazines just wishing you could join the rest of the world in cool summertime deliciousness?  Except, you have wisely chosen to no longer eat gluten; and since giving up sugar, you really do not want to get that addiction started again.  So, you stand in the line at the checkout counter at the grocery store and you salivate at the magazine covers looking pitiful and deprived.  It could be embarrassing:

“Clean up at register 5; customer weeping buckets and drooling on the floor!”

I regularly prepare what I like to call “Fruit with Benefits” which is a concoction of already healthful berries, sometimes an apple or a pear, and varying amounts of Great Lakes gelatin and ground flax seed.  This gives me all the goodies of the berries PLUS protein, PLUS more fiber, PLUS Omega-3 fatty acids!  A small scoop of this satisfying dessert and you are a happy camper.

Fruit-SaladSince developing my “Fruit with Benefits” skills, I am always looking for ways to squeeze in some more nutrition.  Therefore, when presented with this mouth-watering spread in the magazine about icebox pies, I began to wonder…and as the imaginative and creative juices flowed, an idea formed… Well, I think I’ve done it!

There is a bit of sugar, just over ½ cup total, for the entire pie but that’s compared to way over 1 cup of sugar in the original recipe that uses store bought peach preserves which have who knows how much sugar?!

The original recipe called for folding gobs of whipped cream in the filling, but I chose to not even convert that by using more whipped coconut cream.  Enough is enough.

I have tried lots of gluten free pie crust recipes, but this one is the best.  One of the things I especially liked were the occasional whole flax seeds that had escaped the food processor blade; it not only tasted great, but it looked great, too!

So, do not despair my lovelies, this will be a great treat, not sweet enough to initiate binge carb fests, but smooth and creamy and peachy enough to make you smile!

This recipe has plenty of bone and joint health benefits of gelatin and boosts in protein from not only the gelatin and eggs but from the flax seed that also gives omega-3 fatty acids! Win! Win! Win!

Prepare the crust first so it can completely cool before adding the contents.Pie-dough

Put the following ingredients into a food processor and pulse until well-combined:

1/2 cup whole flax seeds

1 cup almond flour

1/4 cup sugarpastured-cow

1 tsp. Kosher salt

6 Tbsp. butter from pastured cows, melted- (I use the Kerrygold brand)

Pat dough into a smooth ball and press into a 9-inch, lightly- greased pie plate. Evenly distribute the dough, pressing it up the sides.

Create an edge.  I just pressed a fork into mine.Food-Talk-4-u-finished-pie-crust

Bake 6-10 minutes at 325 degrees until golden. Remove from oven and cool.

Food-Talk-4-U-Jam-PrepPrepare fresh “jam” by putting the following ingredients into a sauté pan and cook on medium until it comes to a boil, check for sweetness, and take off heat:

1 Tbs. coconut oil

2 peeled and finely-diced peachesCooking-Jam

1 Tbs. lemon juice

1 Tbs. sugar

1 Tbs. gelatin that is wisked together with 1/4 cup boiling water: NO lumps!

Prepare the filling as follows:

Pie-filling-before-preservesFill a 3 1/2 quart sauce pan with water and bring to a boil over medium-high heat. Reduce heat to medium to keep at a simmer.

Using an electric mixer with the whisk attachment, whisk the following together in a 2 1/2 quart glass bowl:

3 large eggs

1/3 cup sugar

Place bowl over simmering water and cook while whisPie-filling-after-preservesking constantly five to six minutes or until mixture becomes slightly thick and sugar dissolves. Remove from heat and the simmering water.

Place 4 tsp. gelatin in a small bowl and pour 1/4 cup boiling water over it, whisking constantly until gelatin is completely dissolved.

Using the handheld electric mixer, whisk the egg mixture on high speed for 8-10 minutes until ribbons form on surface of mixture when beater is lifted.

Food-Talk-4-u-assembled-pieAdd gelatin mixture and continue whisking one more minute.

Fold in the peach “jam” and a pinch of kosher salt.

Spoon filling into cooled pie crust and arrange thin sliFood-Talk-4-u-Pie-bite-with-forkces of 2 medium peeled peaches over the filling. Cover with plastic wrap and freeze 2 hours.

Serve slices of pie with a dollop of whipped coconut cream sweetened with a pinch of sugar and a splash of vanilla!

Going, going, gone!

Just peachy!!

Deidre


Dairy-Free, Gluten-Free, Cheesy Kale Chips Demystified

Tired of being left out of the snack food world if you are eating clean? Surely there is more out there than carrot and celery sticks! Here are a couple of “secret ingredients” that can transform your snacking world AND give you a yummy, non-dairy, gluten-free, crunchy snack that’s actually good for you!
What is it about warm weather that makes us turn to “snack food” more? Somehow, finger food is just more attractive and fun – easy even – in the summer. Sliced meats, assorted cut up tropical fruits, veggies for dipping, and…chips…

Seems like this picture needs ‘tweaking’ to make things wholesome.

I mean, read the ingredient list on your favorite chips. Even if they were to limit things to organically raised potatoes and sea salt, they would be fried in some kind of “Franken-oil”… and who needs the starch, anyway?

How about kale chips? Very crunchy! A non-starchy vegetable, too! But they are fairly expensive to buy and they are usually squashed and pretty crumbled by the time I get them…

What if you could easily make them AND you can enjoy a real cheesy-ness with the addition of a couple of key, “secret” ingredients often used in making non-dairy options — all of which will address that deep longing for cheese that many of us have been unable to satisfy short of the real stuff.

Dairy never fails to literally ‘back fire’ on me—pun intended!
Enter freshly soaked cashews and nutritional yeast (not to be confused with yeast used in breads).

Follow the journey as I walk you through creating this satisfying, affordable, savory, and guilt-free snack!

Gluten-free, Dairy-free, Savory and Cheesy Kale Chips

Begin by soaking ¾ cup (preferably raw, unprocessed) cashews in water for at least one hour. That’s just enough time to do the dishes, clean the kitchen counters, and get the rest of the ingredients in order!

Food-Talk-4-You-14-R
Food-Talk-4-You-1-RAssemble the following ingredients and put into a food processor:

1 large clove of garlic, peeled and sliced

2 Tbs. coconut aminos (a gluten-free version of soy sauce or you can use wheat-free tamari)

2 Tbs. avocado oil or coconut oil

1/3 cup nutritional yeast

1 lemon, juiced

1/8 tsp. smoked paprika

1/8 tsp. salt

Prepare kale leaves as follows:Food-Talk-4-You-4-R

After carefully rinsing the leaves off under running water, strip the leaf portion off of the stem by holding the cut end of the stem in one hand and quickly pull leaf portion through clenched fingers of the other hand

Food-Talk-4-You-2-R


Lay out the leaf portion on a cutting board and zip out any of the remaining of the smaller stem veins that stand out. That’s not every small vein, just the ones that stand out. If you don’t, they will just dry out to be like little hard stems that are not very chewable.

Food-Talk-4-You-3-R
Stripped kale leaf

Your final product should look something like this:

Then, using my trusty blueberry and nut stained but just washed (!) old bath towel, I rolled the prepared greens up to make sure they were dry

Food-Talk-4-You-6-R
Dry kale in old bath towel

Line three baking sheets with parchment paper

Okay, we’re getting close now, so preheat oven to 180 degrees and make sure all 3 oven racks are spaced evenly

Drain the soaked cashews and add to the ingredients already in the food processor. Pulse the processor until a smooth paste is formed. Scrape the sides of the processor bowl to make sure all of the garlic and nuts get smoothed out.

Spread garlic mixture over kale

Select your favorite large “vat.”  Mine is the lid to my trusty cake carrier…best thing ever for things like this! Place enough kale leaves to cover the bottom of container, spoon the nut paste around over the leaves. Repeat layering until all leaves and batter have been placed in the container.

Now for the fun part! Using gloved hands (unless you just WANT to Food-Talk-4-You-8-Rsmell like smoked paprika!) gently massage the leaves along with the paste! That’s it! Massage away! This evenly distributes the flavoring and helps to break down the kale a bit. (A trick I learned from using raw kale in salads; really helps because kale is not tender like spinach)

Then evenly space leaves over the parchment-lined pans
Food-Talk-4-You-9-R
Put pans into the preheated 180 degree oven and set the timer for 1 hour. If you are not using a convection oven that evenly fans the heat throughout the oven box, then you will have to set the clock for 20 minute intervals so pans can be rotated from shelf to shelf over the course of the hour

Food-Talk-4-You-10-R
After 1 hour, pull pans out, turn leaves, and return to oven for up to 1 hour more (rotating again every 20 minutes if you do not have a convection oven)
You will know the kale chips are done when they are totally crisp when moved.Food-Talk-4-You-11-R

Now, you are ready to enjoy! These crunchy and savory darlings have saved me more than once from a slippery slope of unhealthy Food-Talk-4-You-12-Rsnacking. So much fun to eat AND a serving of greens!
Place cooled kale chips into an air tight container or zip bag. These are so good! They would be the hit to take to a party! And they are satisfying…in that you do not need to eat all of them in one sitting to feel satisfied!

Happy summer and be safe over the holidays as everyone seeks some kind of refreshing and regenerating retreat!

Deidre

Here’s a condensed recipe:

Gluten-free, Dairy-free, Savory and Cheesy Kale Chips

Soak ¾ cup (preferably raw, unprocessed) cashews in water for at least one hour.

Assemble the following ingredients and put into a food processor:

1 large clove of garlic, peeled and sliced

2 Tbs. coconut aminos (a gluten-free version of soy sauce or you can use wheat-free tamari)

2 Tbs. avocado oil or coconut oil

1/3 cup nutritional yeast

1 lemon, juiced

1/8 tsp. smoked paprika

1/8 tsp. salt

Process soaked, drained cashews and the ingredients listed in a food processor until a smooth paste is formed.

Evenly distribute paste over one bunch of cleaned and prepped kale leaves, and massage leaves with paste to work in the goodness and to break down the kale a bit.

Evenly space prepared chips onto parchment covered baking sheets and bake in 180 degree oven for 1 hour; turn leaves over; continue baking about 45-60 more minutes until all leaves are crispy. Store in a zip lock bag. Enjoy!